CPRplus User Manual
목차
1. Introduction and Installation
1.1. CPR plus App
What is CPR plus?

CPR plus is a training app for learners and instructors of CPR (Cardiopulmonary Resuscitation). It provides effective learning through Scenario and Feedback modes.
Individual Learners
Learn CPR sequences in Scenario Mode, and gain a proper understanding of accurate CPR through Feedback Mode.
Instructors Share screen and sound for group scenario practice, and conduct precise evaluations with Feedback Mode. Connect up to 6 manikins or cprCUBEs simultaneously for real-time feedback.
Supported Devices and Versions


1.2. Installation Method
Appstore links
https://apps.apple.com/app/id6480102785
https://play.google.com/store/apps/details?id=com.imlabworld.cpr_plus
Searching for CPRplus on Appstores
① Access the App Store (iOS) or Google Play (Android).

② Search for CPR plus.

③ Download the application.
2. Preparation for Use
2.1. Checking Power

cprCUBE PRO
- Press the power button located at the top (Gen3) or bottom (2nd gen.)
Add-on Kit Manikin
- Insert batteries and confirm a buzzer sound. This indicates power is on.
- After 10 minutes of inactivity, the manikin enters standby mode.
- Press and hold the manikin for 2-3 seconds to reactivate it.
2.2. Initial Connection
Connecting to Manikins
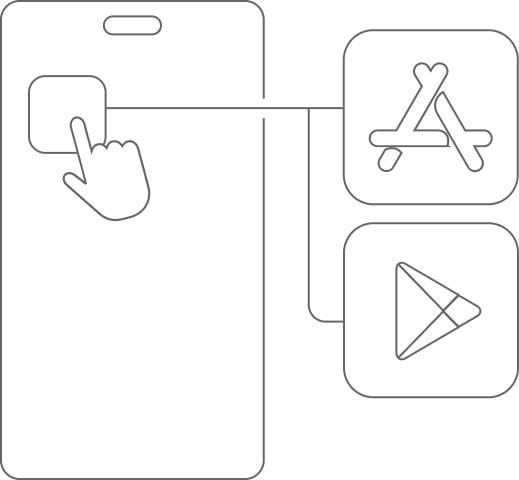
Tap the kit connection icon at the top-right corner of the application to connect to a manikin equipped with the CPR Add-on Kit or a cprCUBE Pro device.
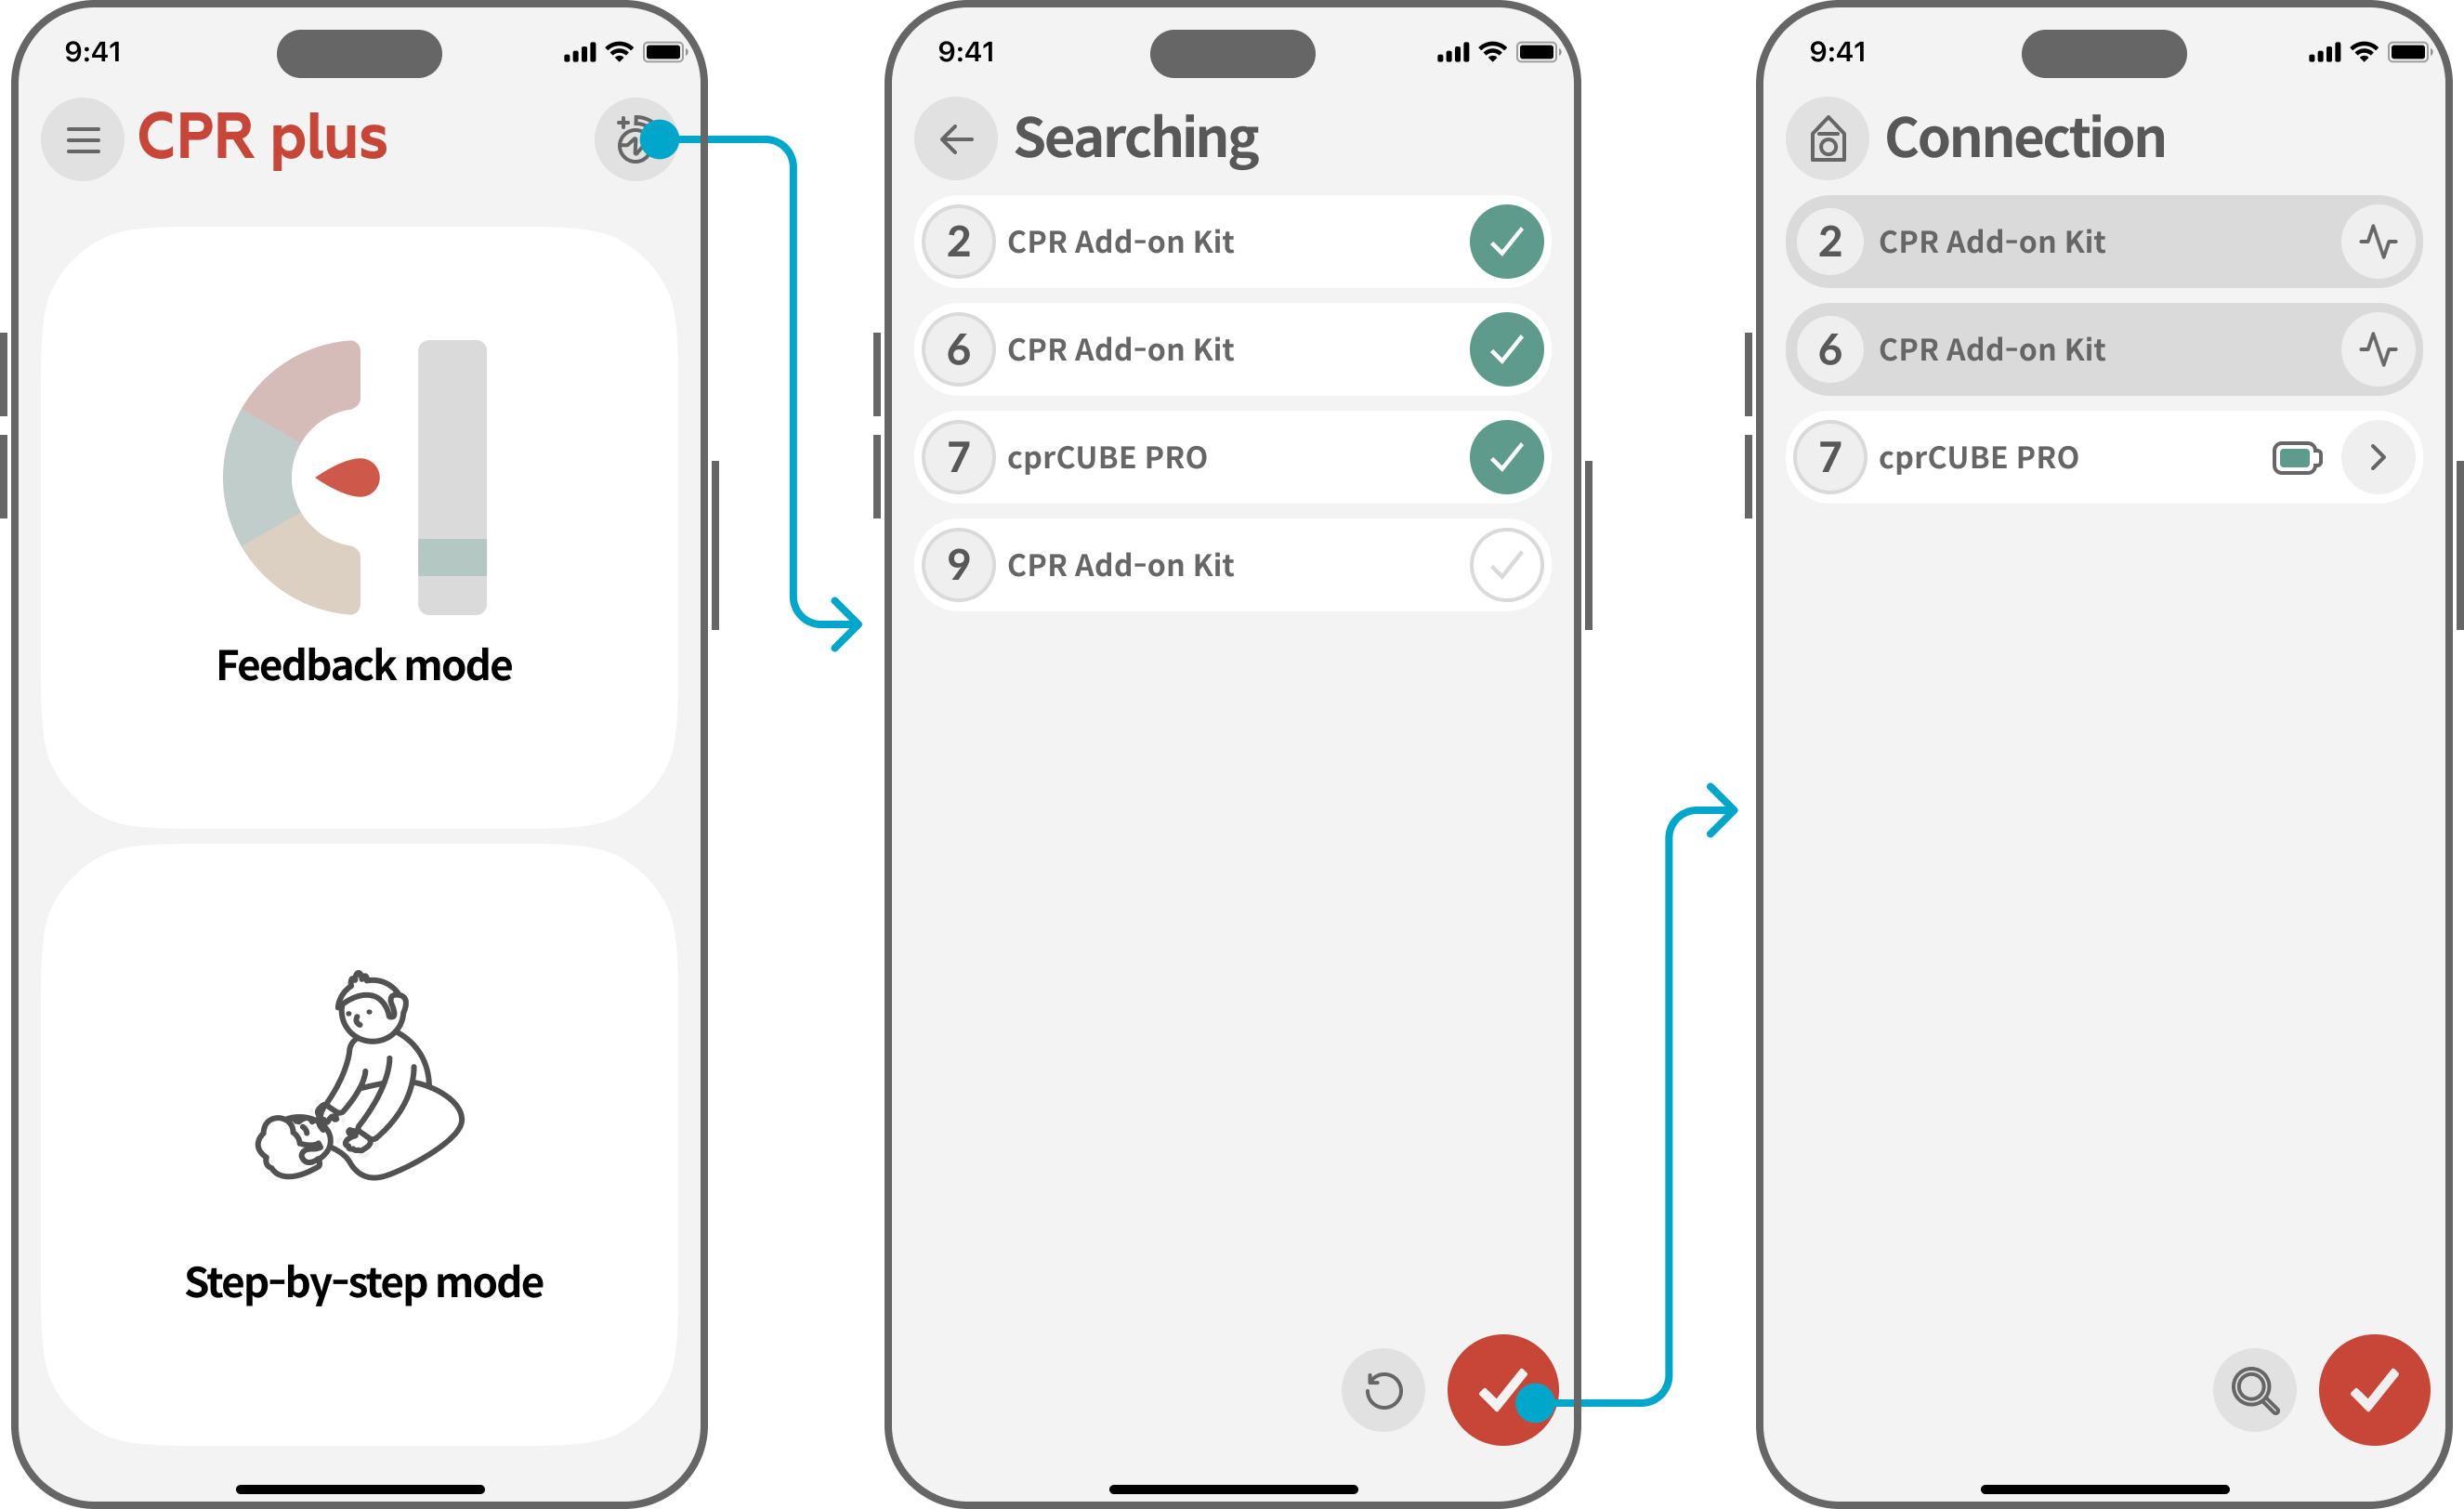
① Tap the kit connection icon on the top-right of the main screen.
② Select your manikin or cprCUBE Pro. If your device isn't visible, tap the refresh icon.
③ Complete connection and view battery status.
Manikin ID Setup and Change
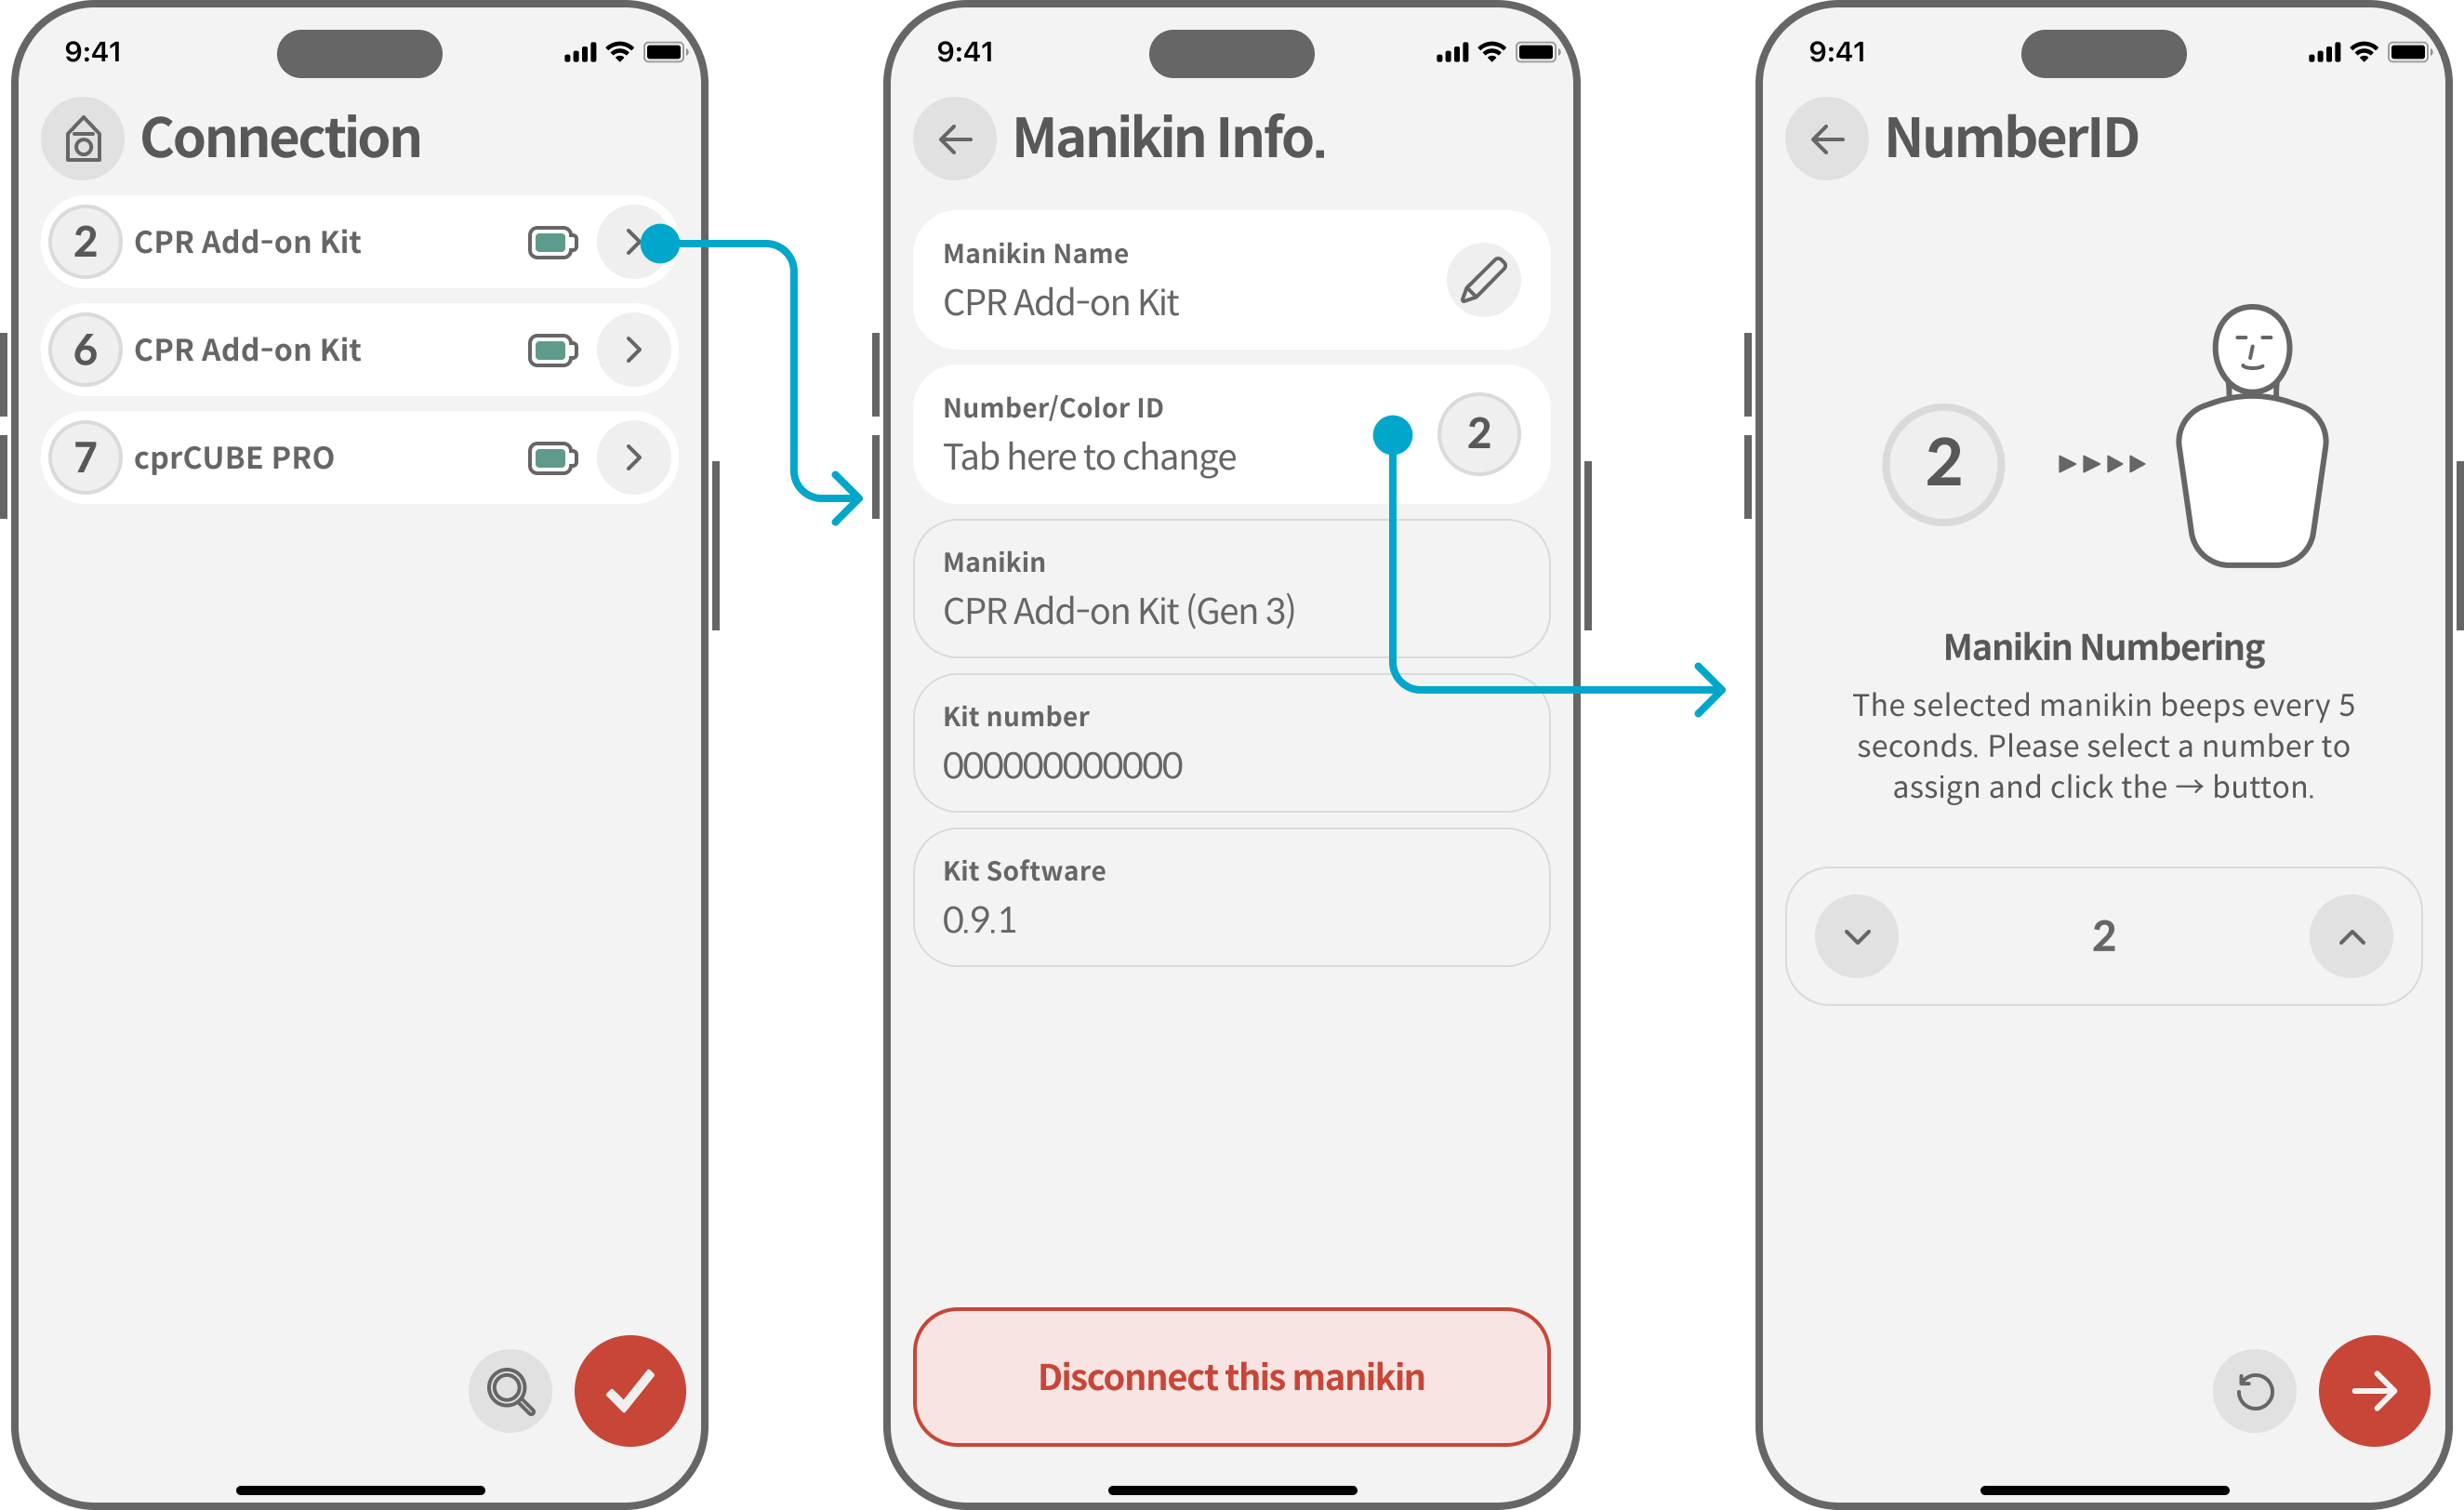
The Manikin ID is an identifier displayed during the search, composed of colors or numbers.
① Enter the connection screen, select the details icon (>) next to the desired manikin.
② Select "ID" and reset it to your preferred number

Mark this number using the provided name tag.
3. Main Features
3.1. CPR Measurement and Real-time Feedback
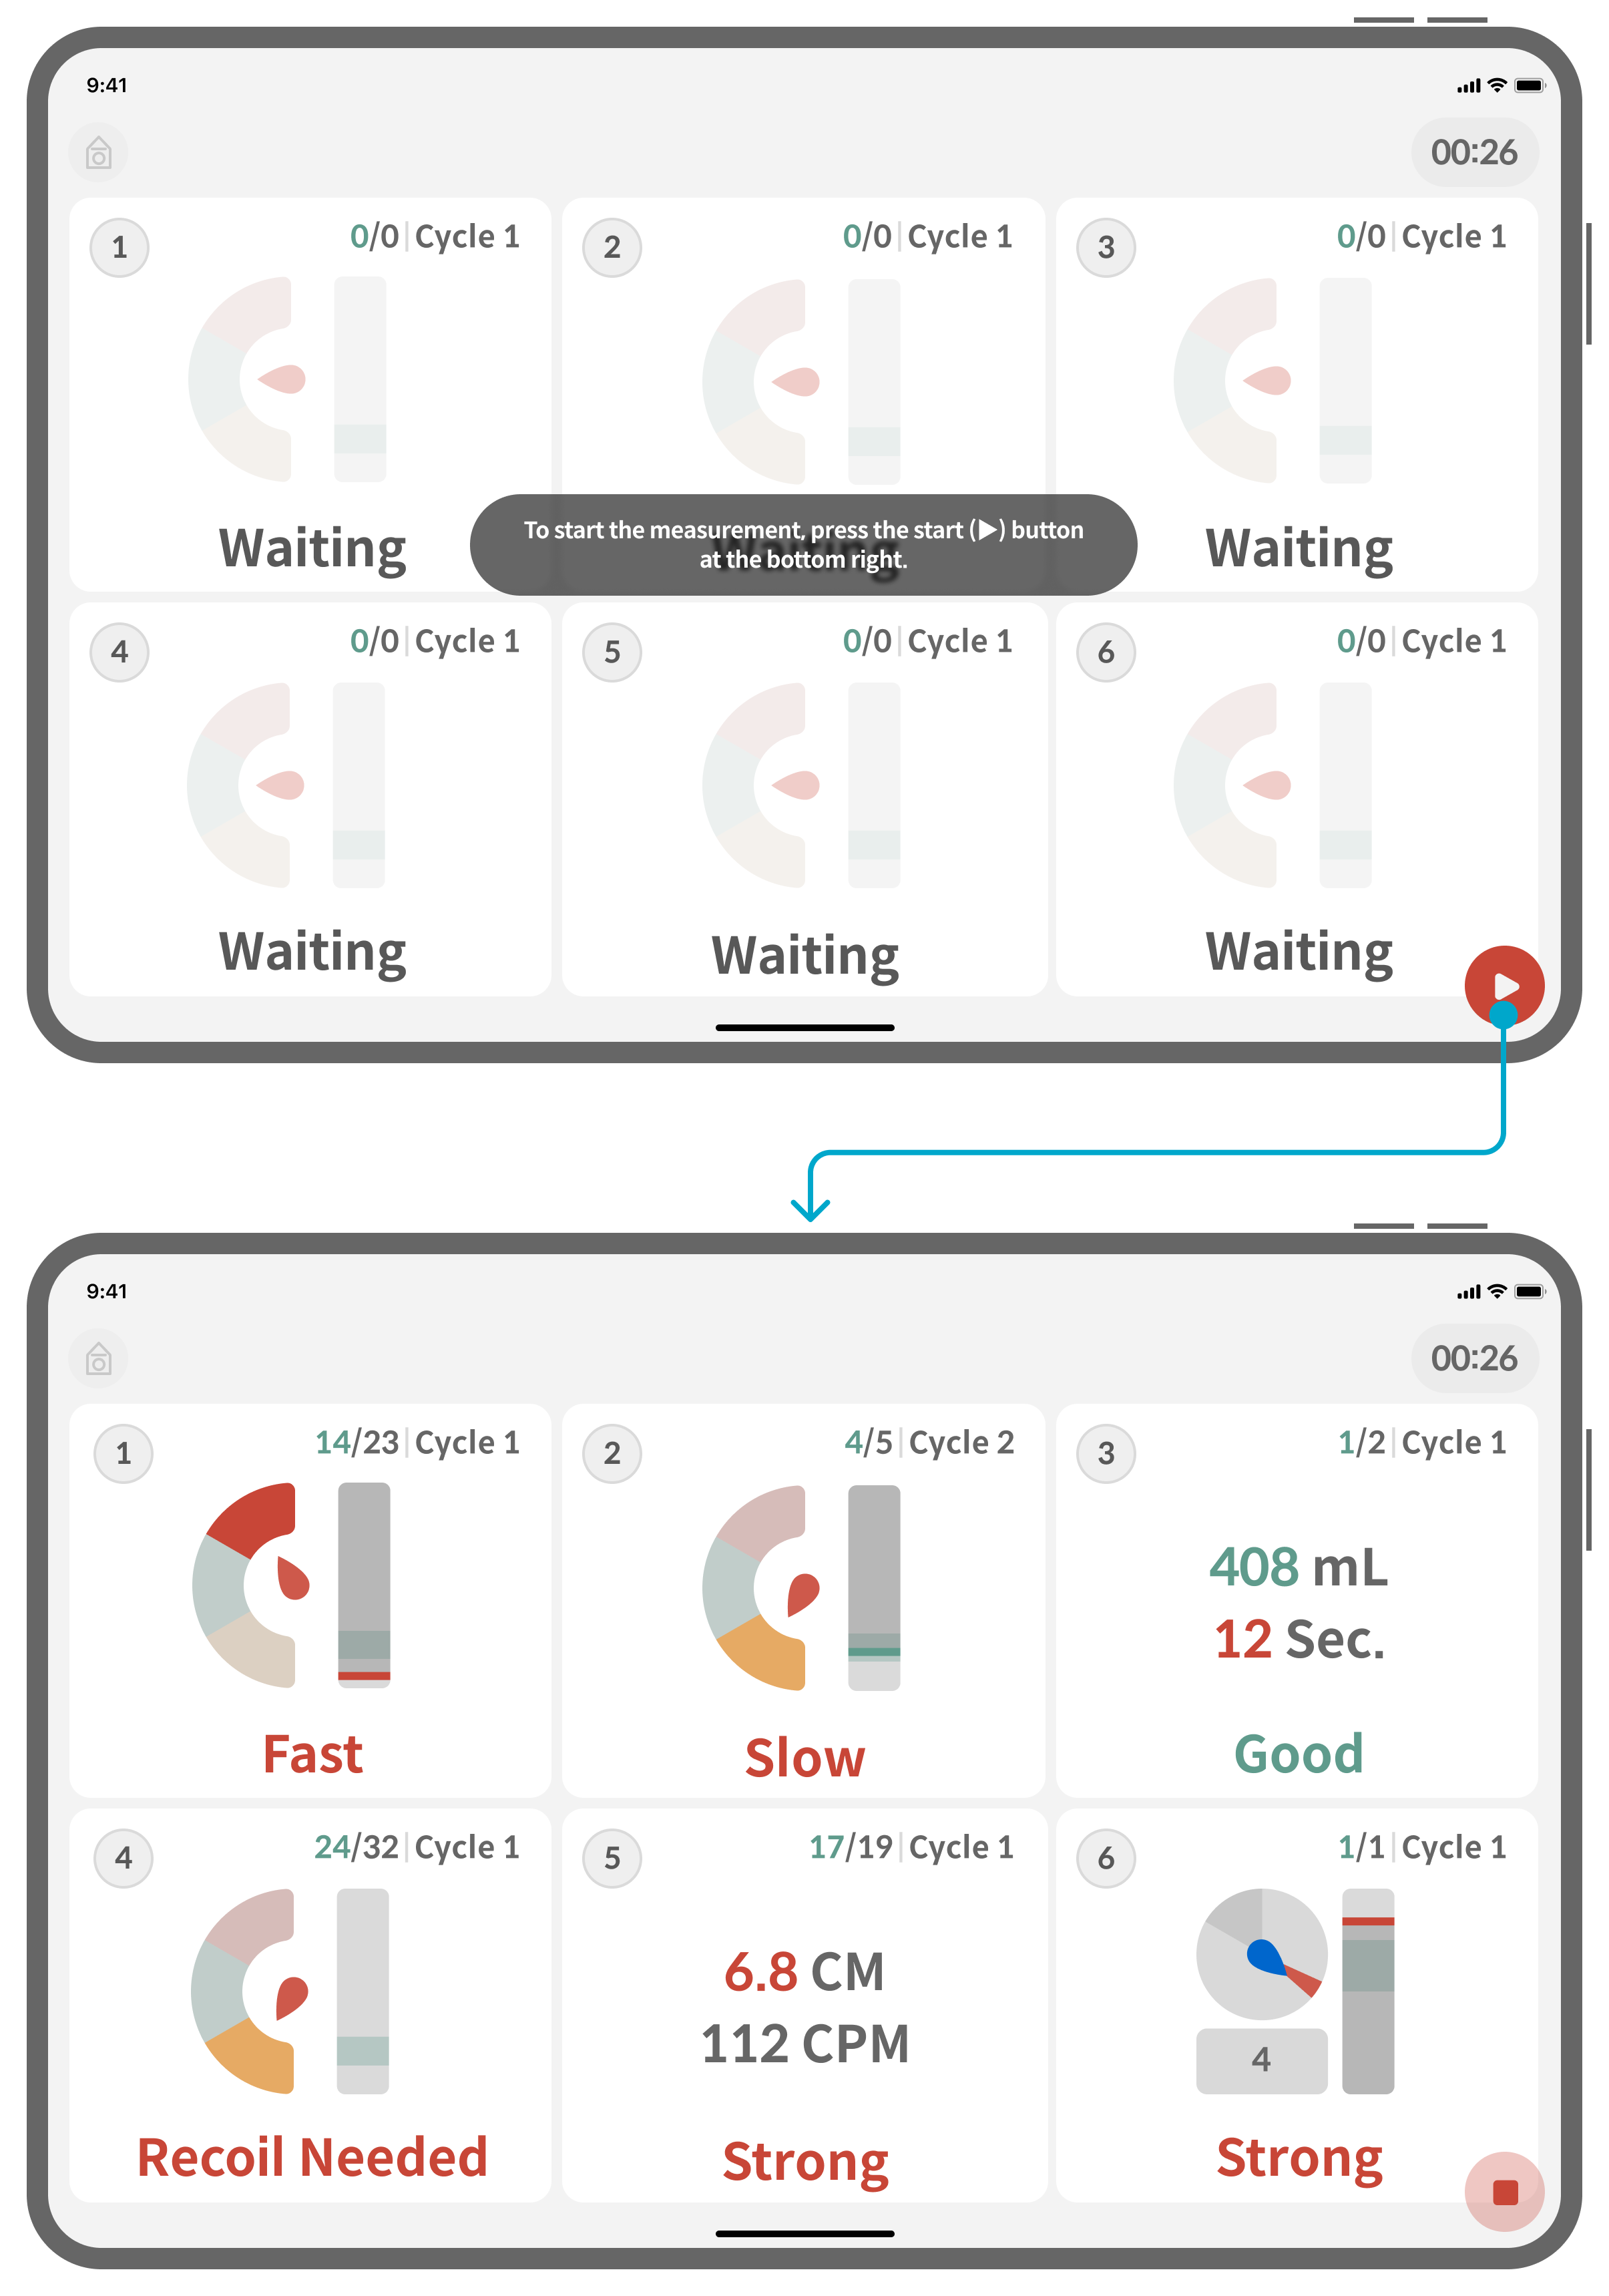
From the main screen, select "Feedback Mode" to connect up to 6 manikins or cubes simultaneously for real-time compression and breathing feedback.
Running Feedback Mode:
① Connect the equipment, then press the start (▷) button at the bottom right.
② Perform CPR.
③ Press the stop (◼) button after completion.
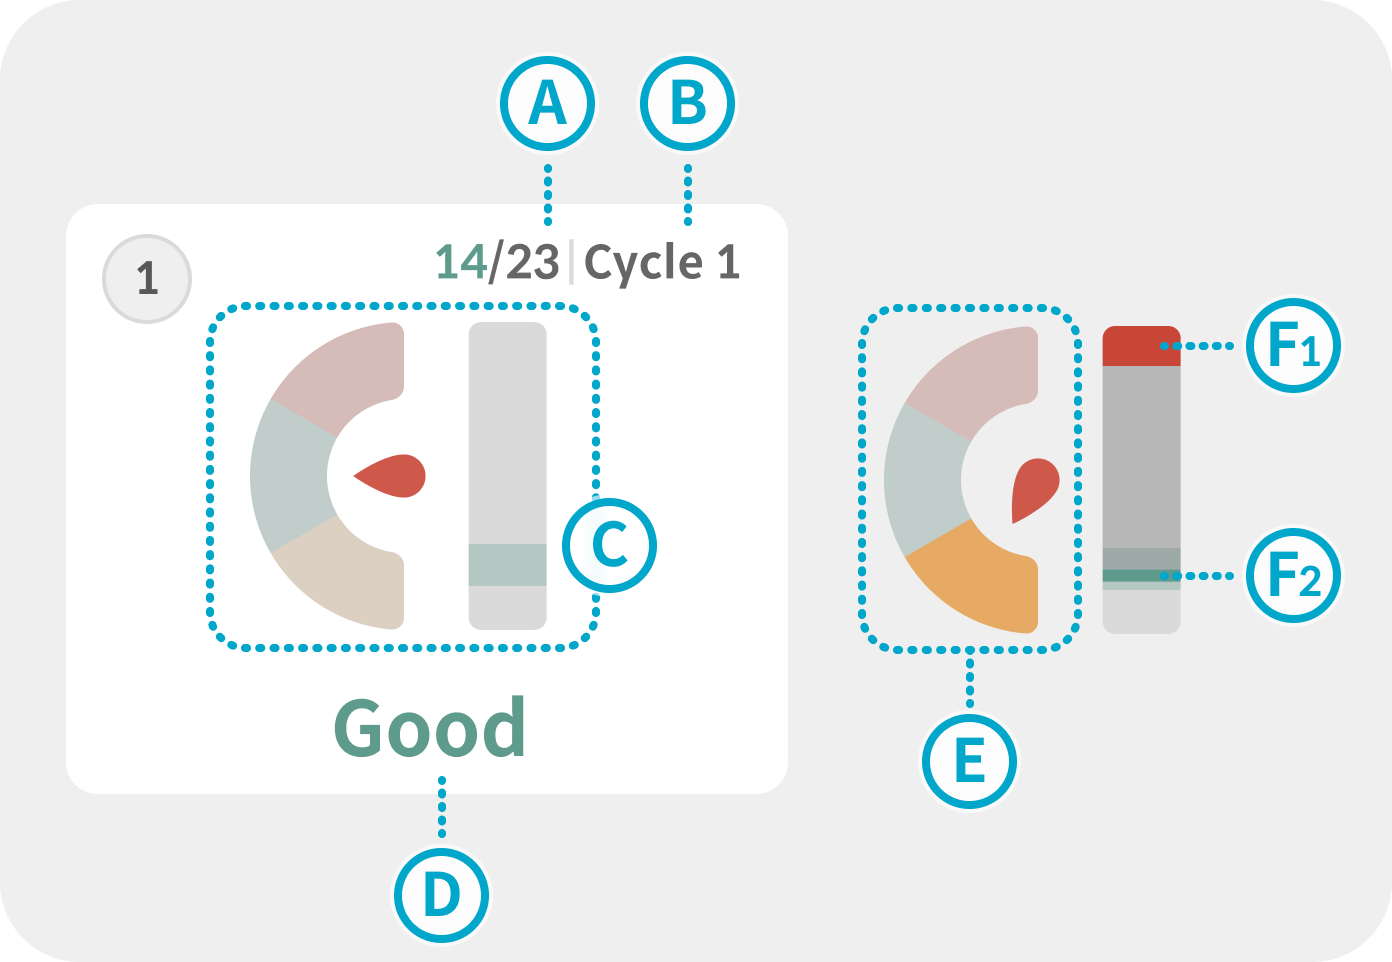
Compression Feedback
Successful Compressions****/
Total Compressions
Cycle
Displays the current cycle. Moves to the next cycle if interruption occurs.
Speedometer and Depth Bar
Real-time speed and depth indicators.
Text Feedback
Priority feedback for overall status or areas needing improvement.
Rate Feedback
Displays compression rate as slow/good/fast.
Recoil Feedback
Indicates insufficient recoil by marking the top of the depth bar in red.
Final Depth Feedback
Shows the final depth of each compression.
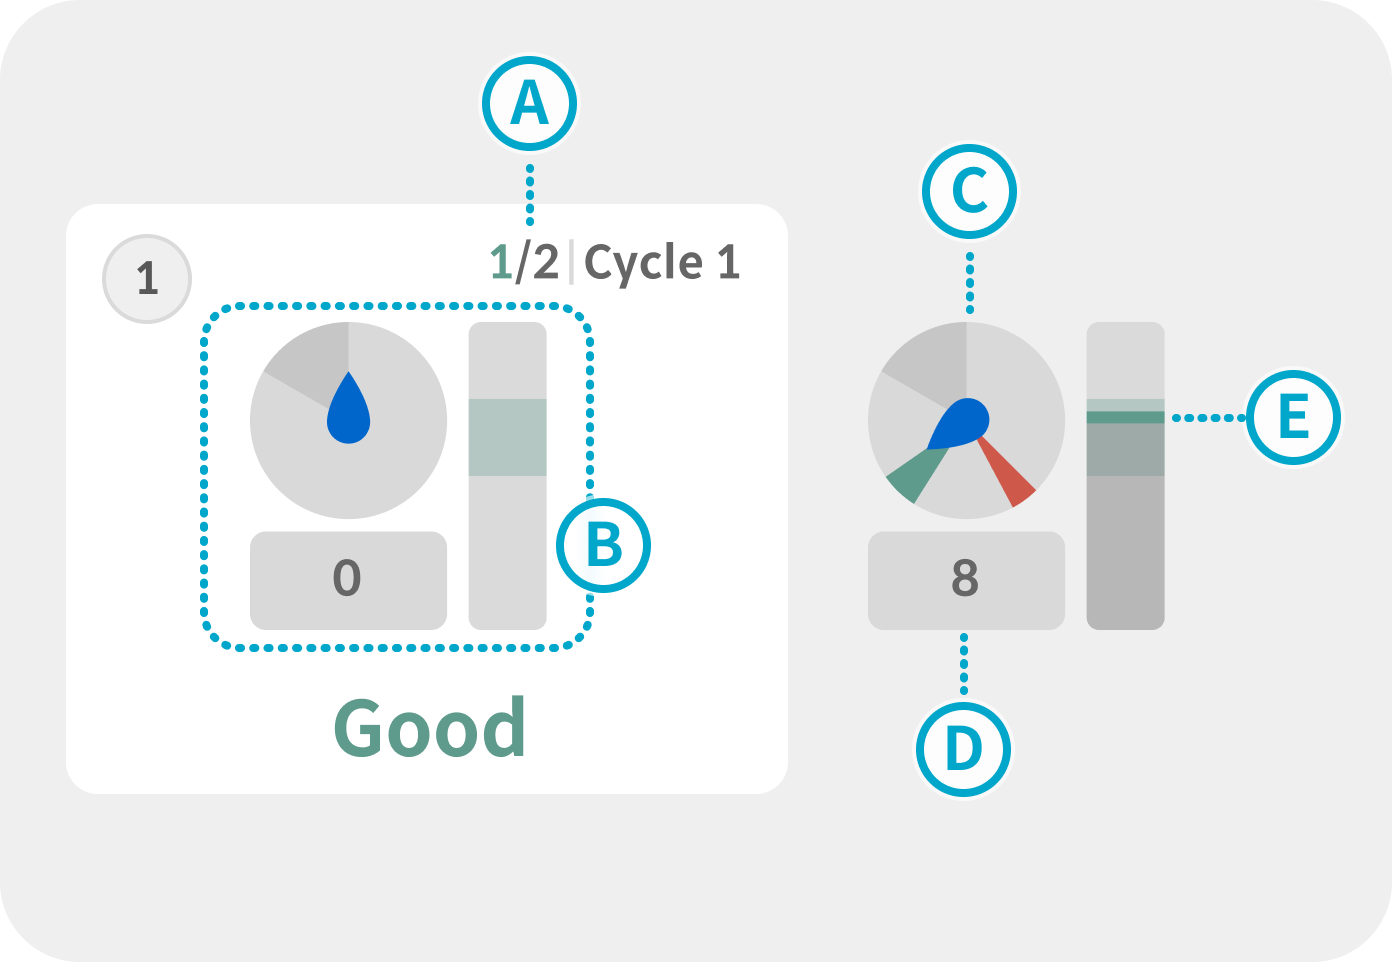
Breath Feedback
Successful Breaths****/
Total Breaths
Timer and Breath Volume Bar
Real-time breathing status indicator.
Timer
Displays rotation from 0-12 seconds, coloring upon breath input. Green indicates correct breathing; red indicates too strong or weak.
Compression Pause Time
Shows the interruption duration.
Breath Volume Bar
Indicates the final volume of each breath.
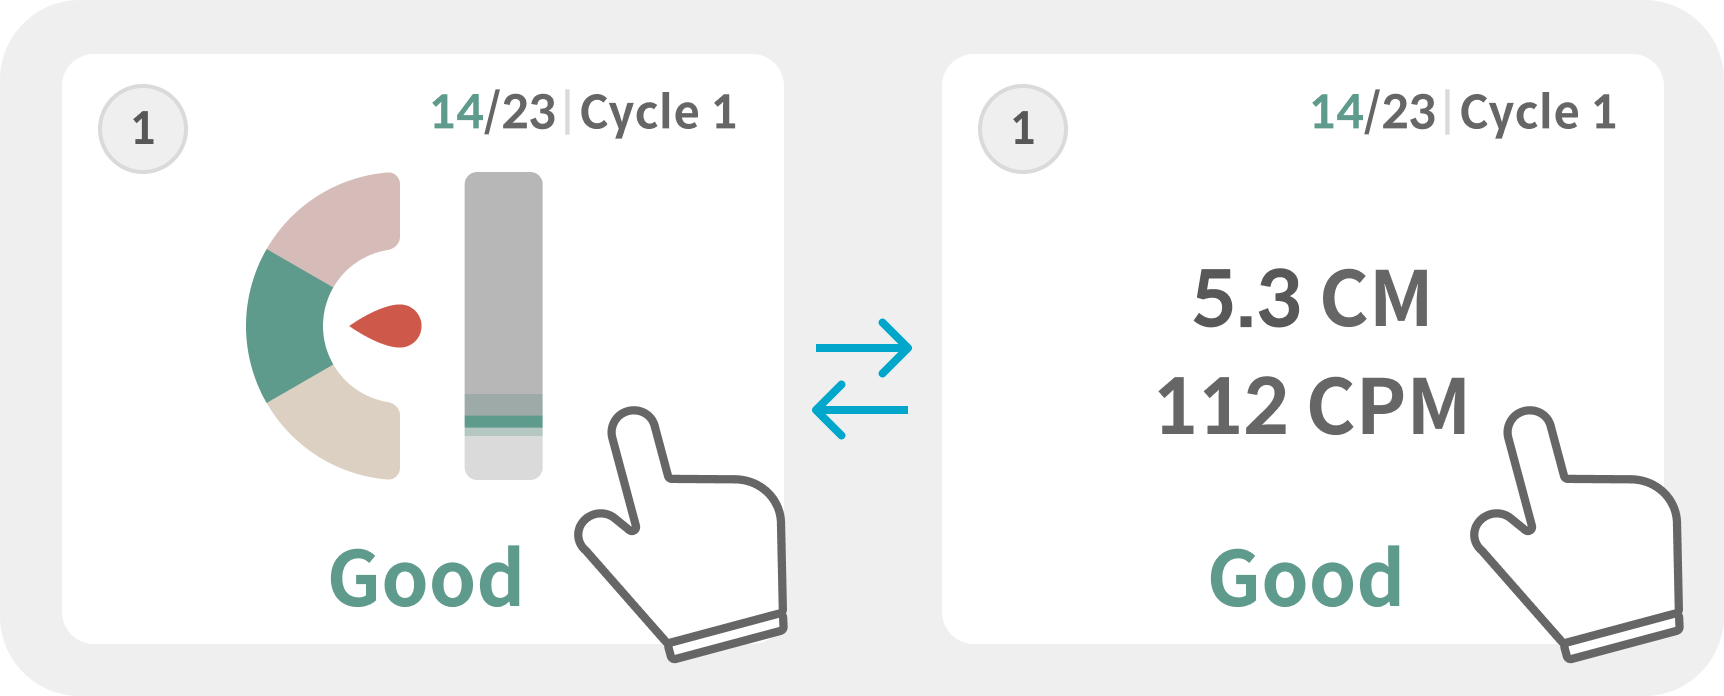
Switching Feedback Types
Touch the cell during feedback to switch types to text. Tap again to revert.
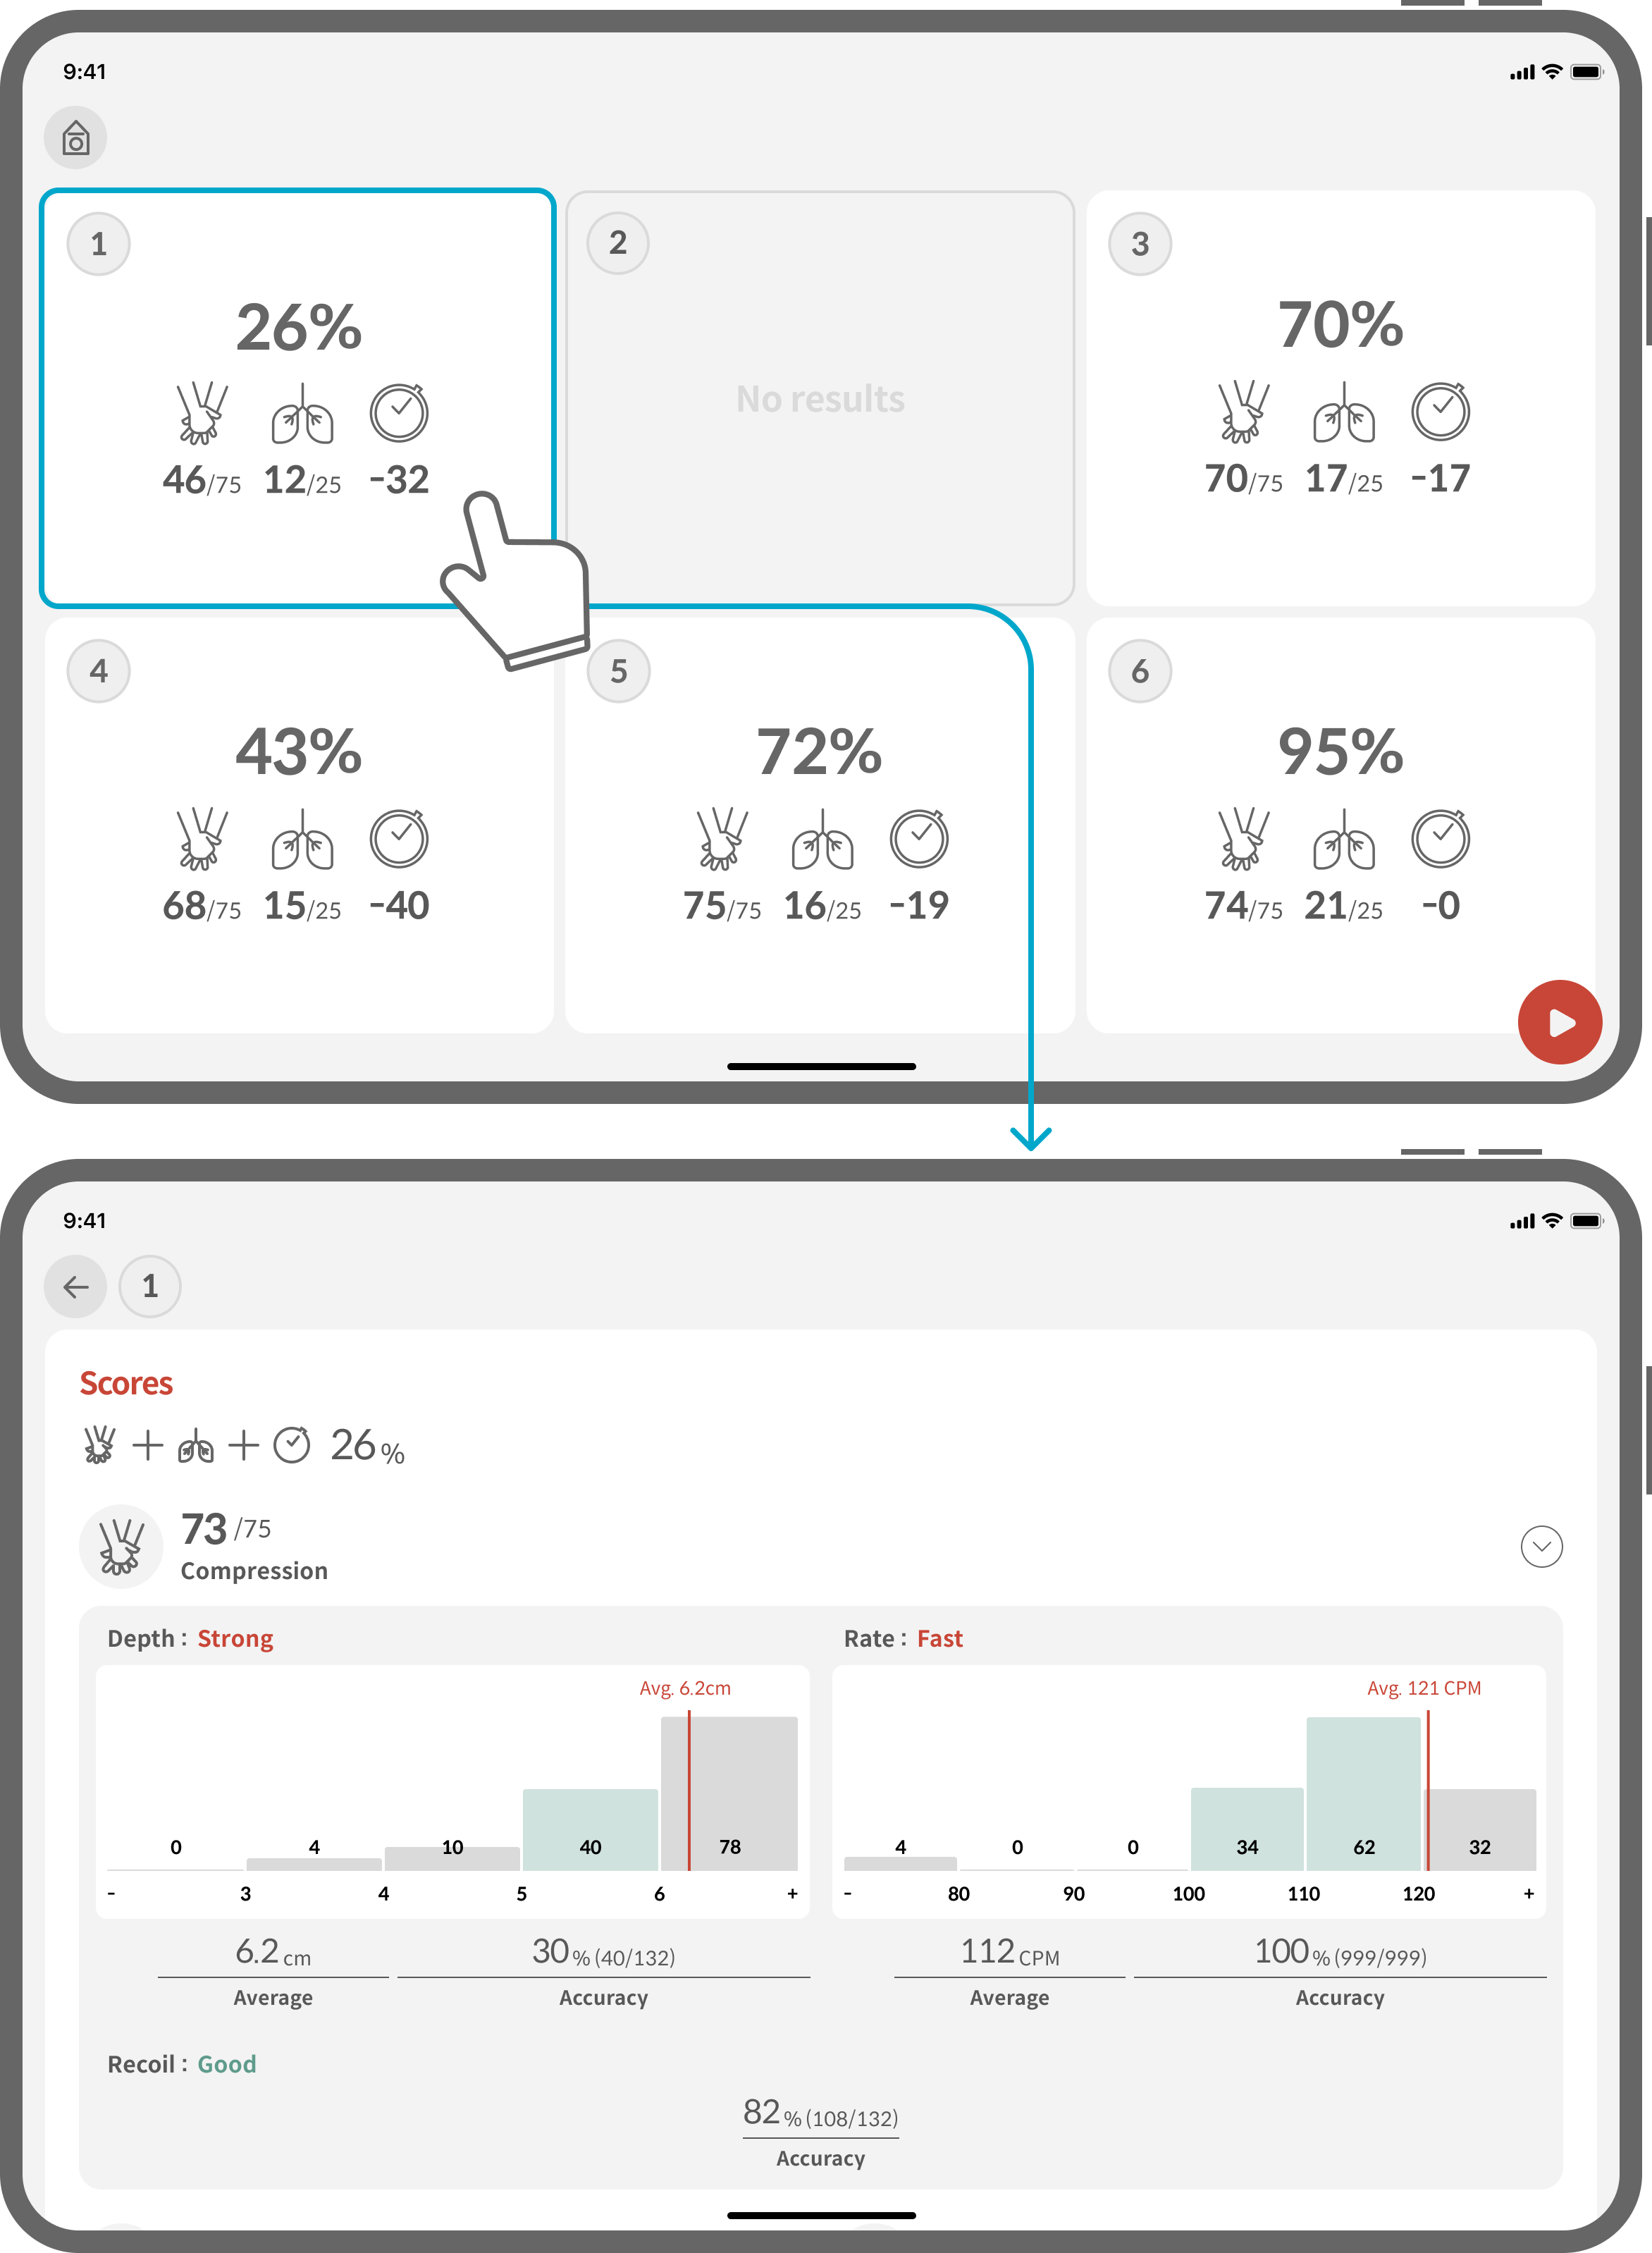
Session Debrief
Instant summary displayed after sessions.
Individual Detailed Results
View detailed results by selecting the cell, with graphs and data provided.
- Compression: Detailed data on depth, speed, recoil, and correction feedback.
- Breathing: Distribution and correction feedback on breath volume.
- Hands-off Time: Chest Compression Fraction (CCF), interruption time, and correction feedback.
3.2. Scenario Mode

Scenario Mode Configuration
Steps include Consciousness Check → Call for Help → CPR → AED (Automated External Defibrillator).
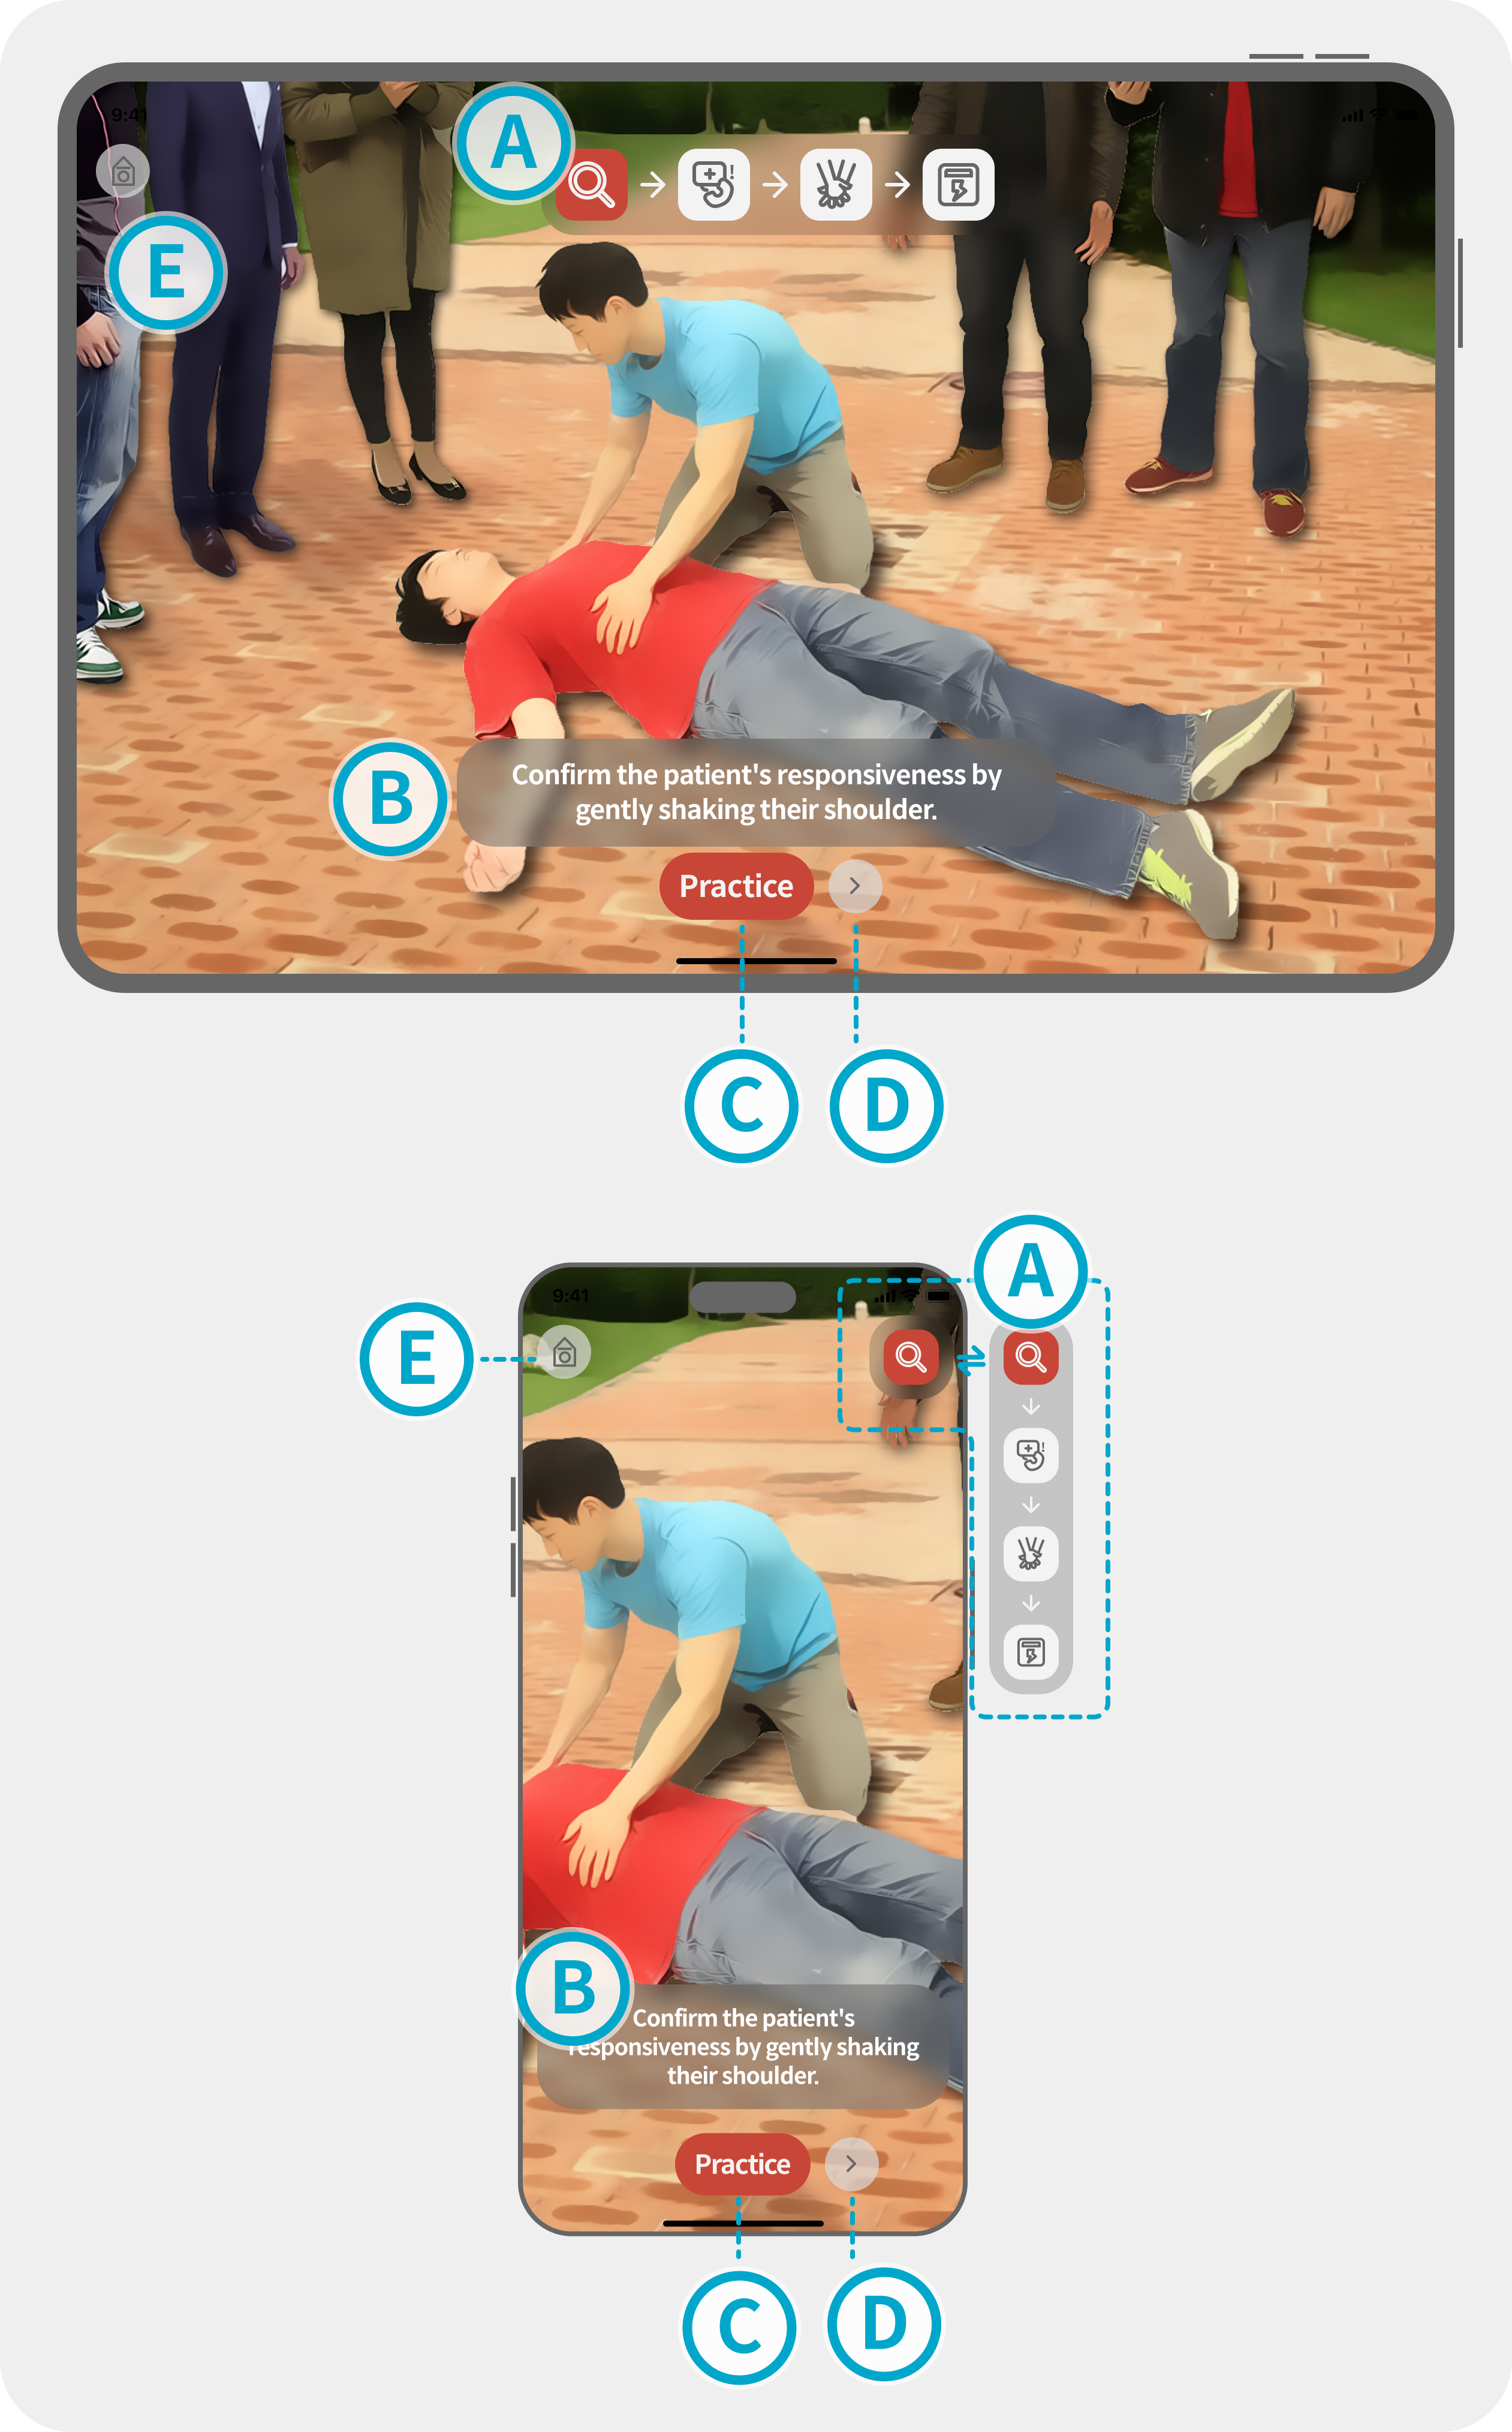
Screen Operation Method
Progress Bar
Displays current steps; tap icons for quick navigation. Expandable on mobile.
Voice Subtitles
Displays ongoing narration; tap subtitle button to proceed.
Practice Button
Practice scenario procedures.
Navigation
Move forward or backward within the scenario.
Home Button
Exit scenario and return to home.
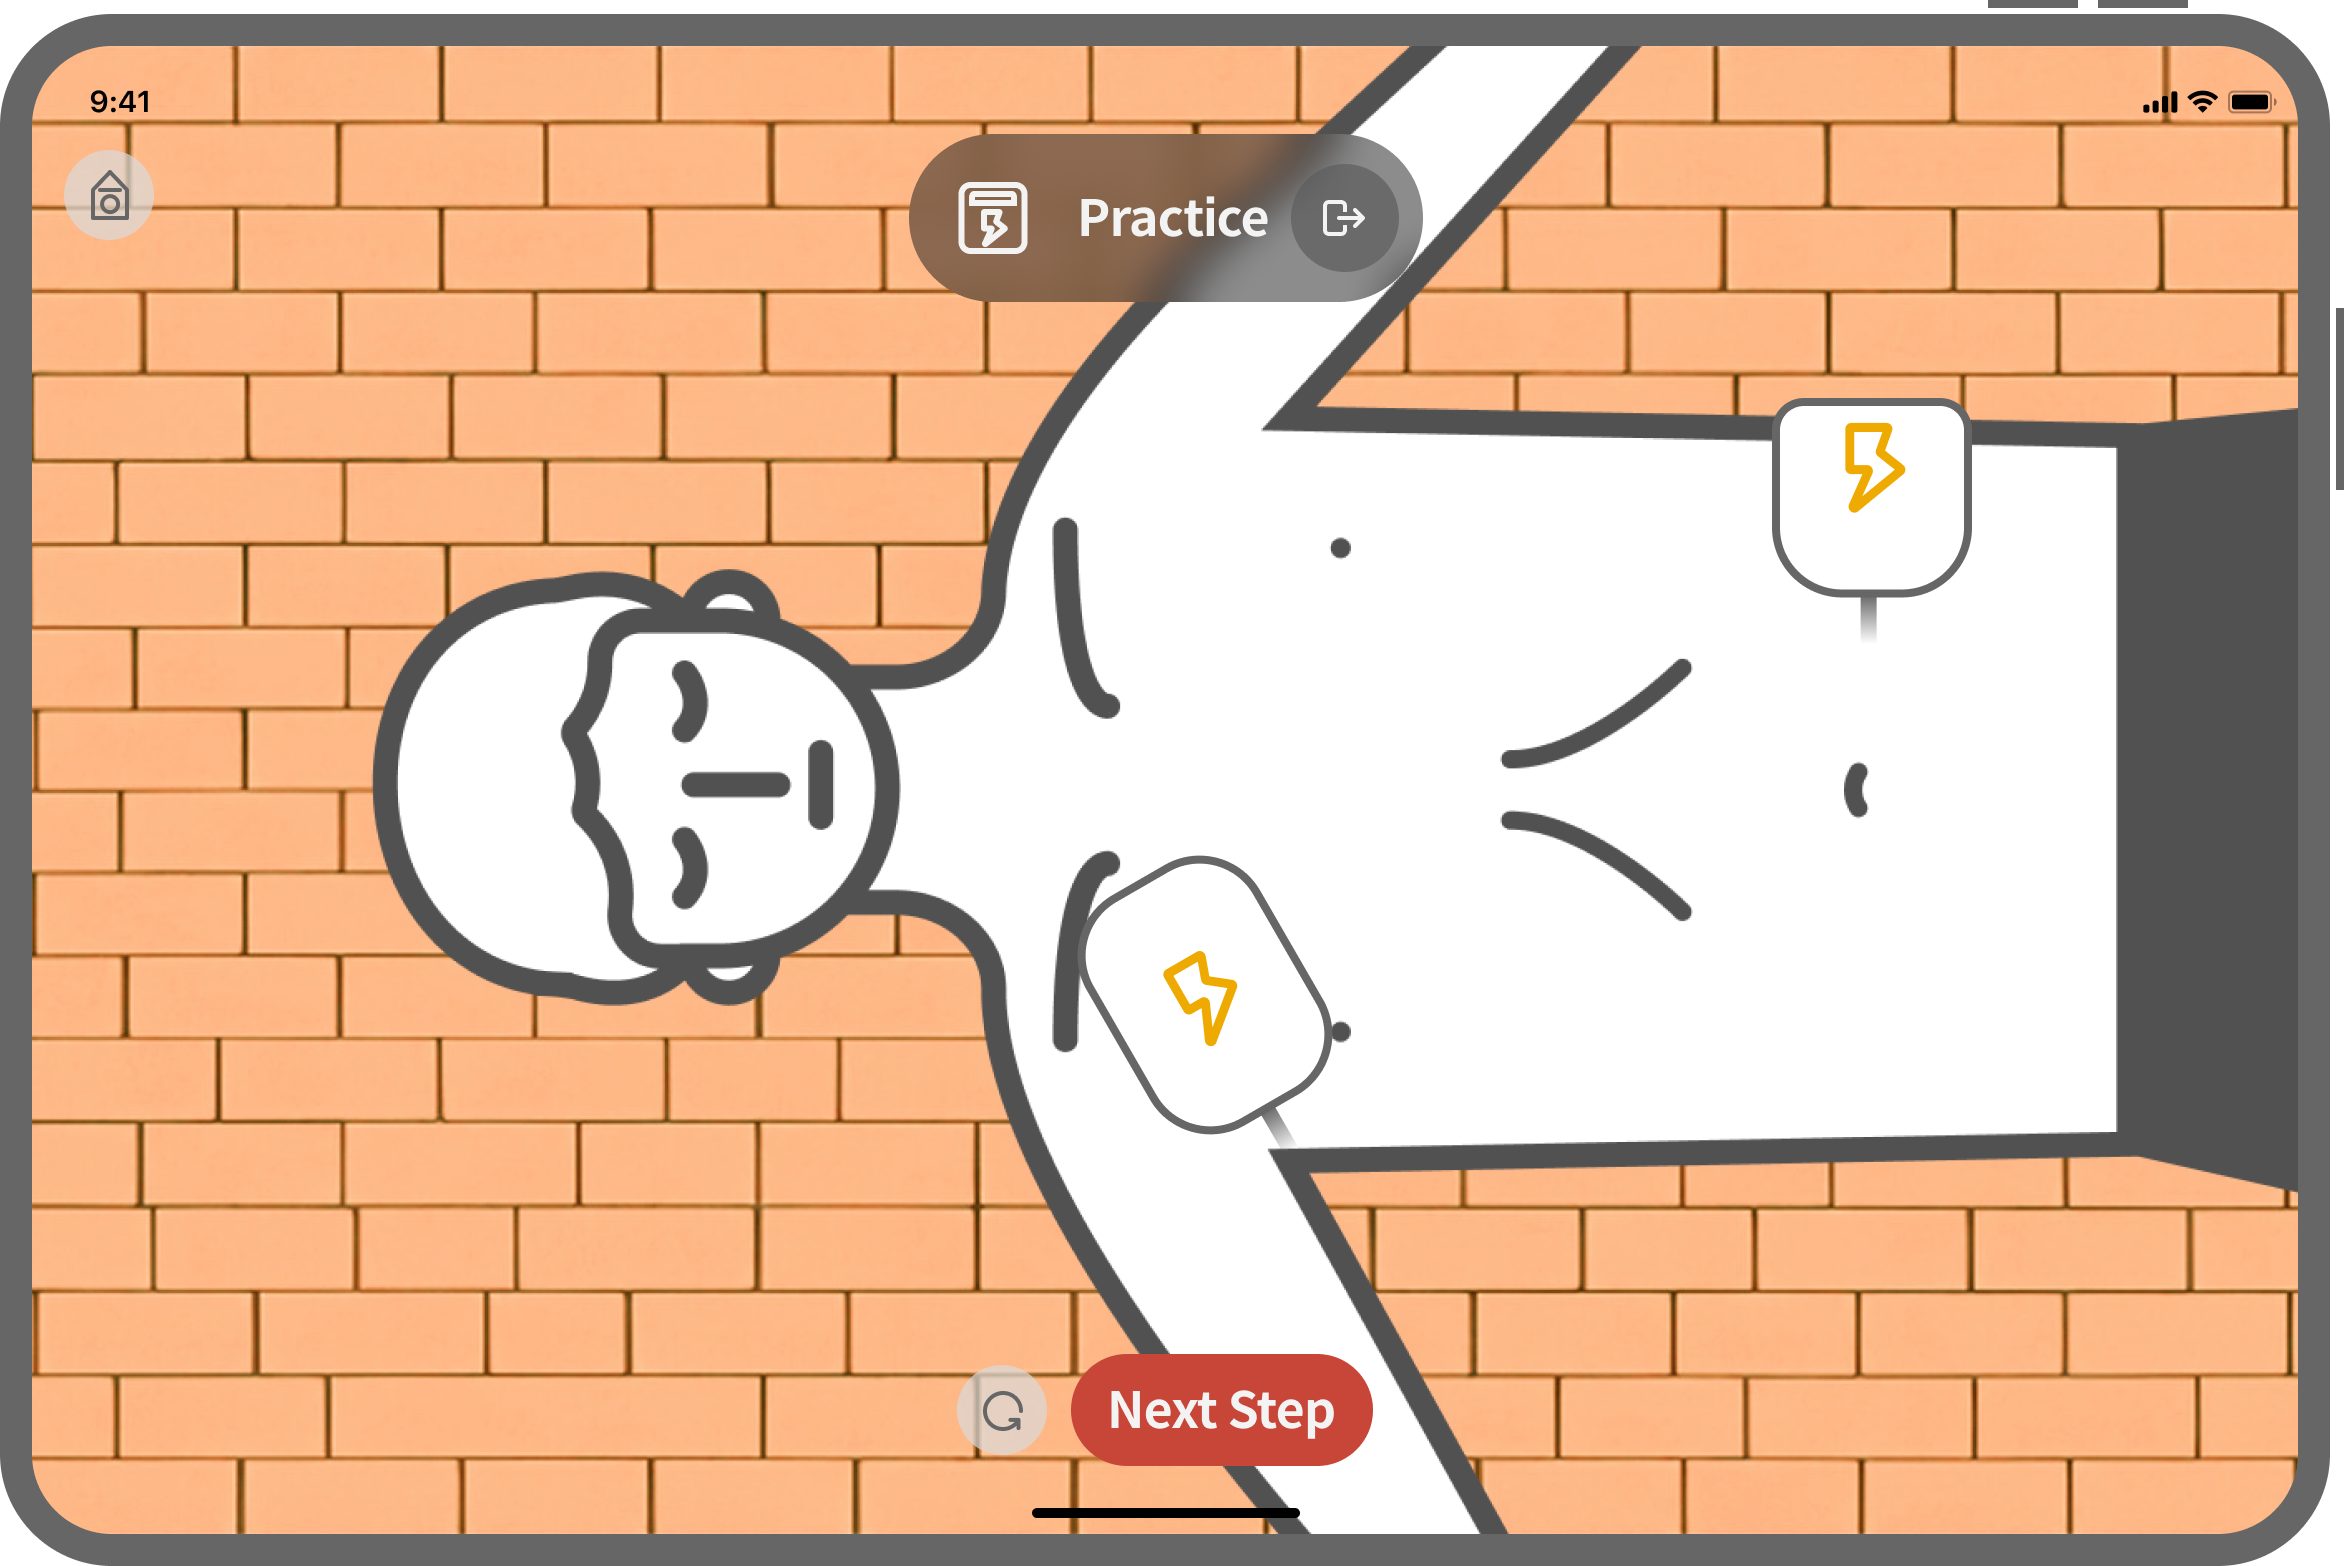
Practice Content
Interactive content for each step for hands-on learning.
3.3. Reviewing Saved Data
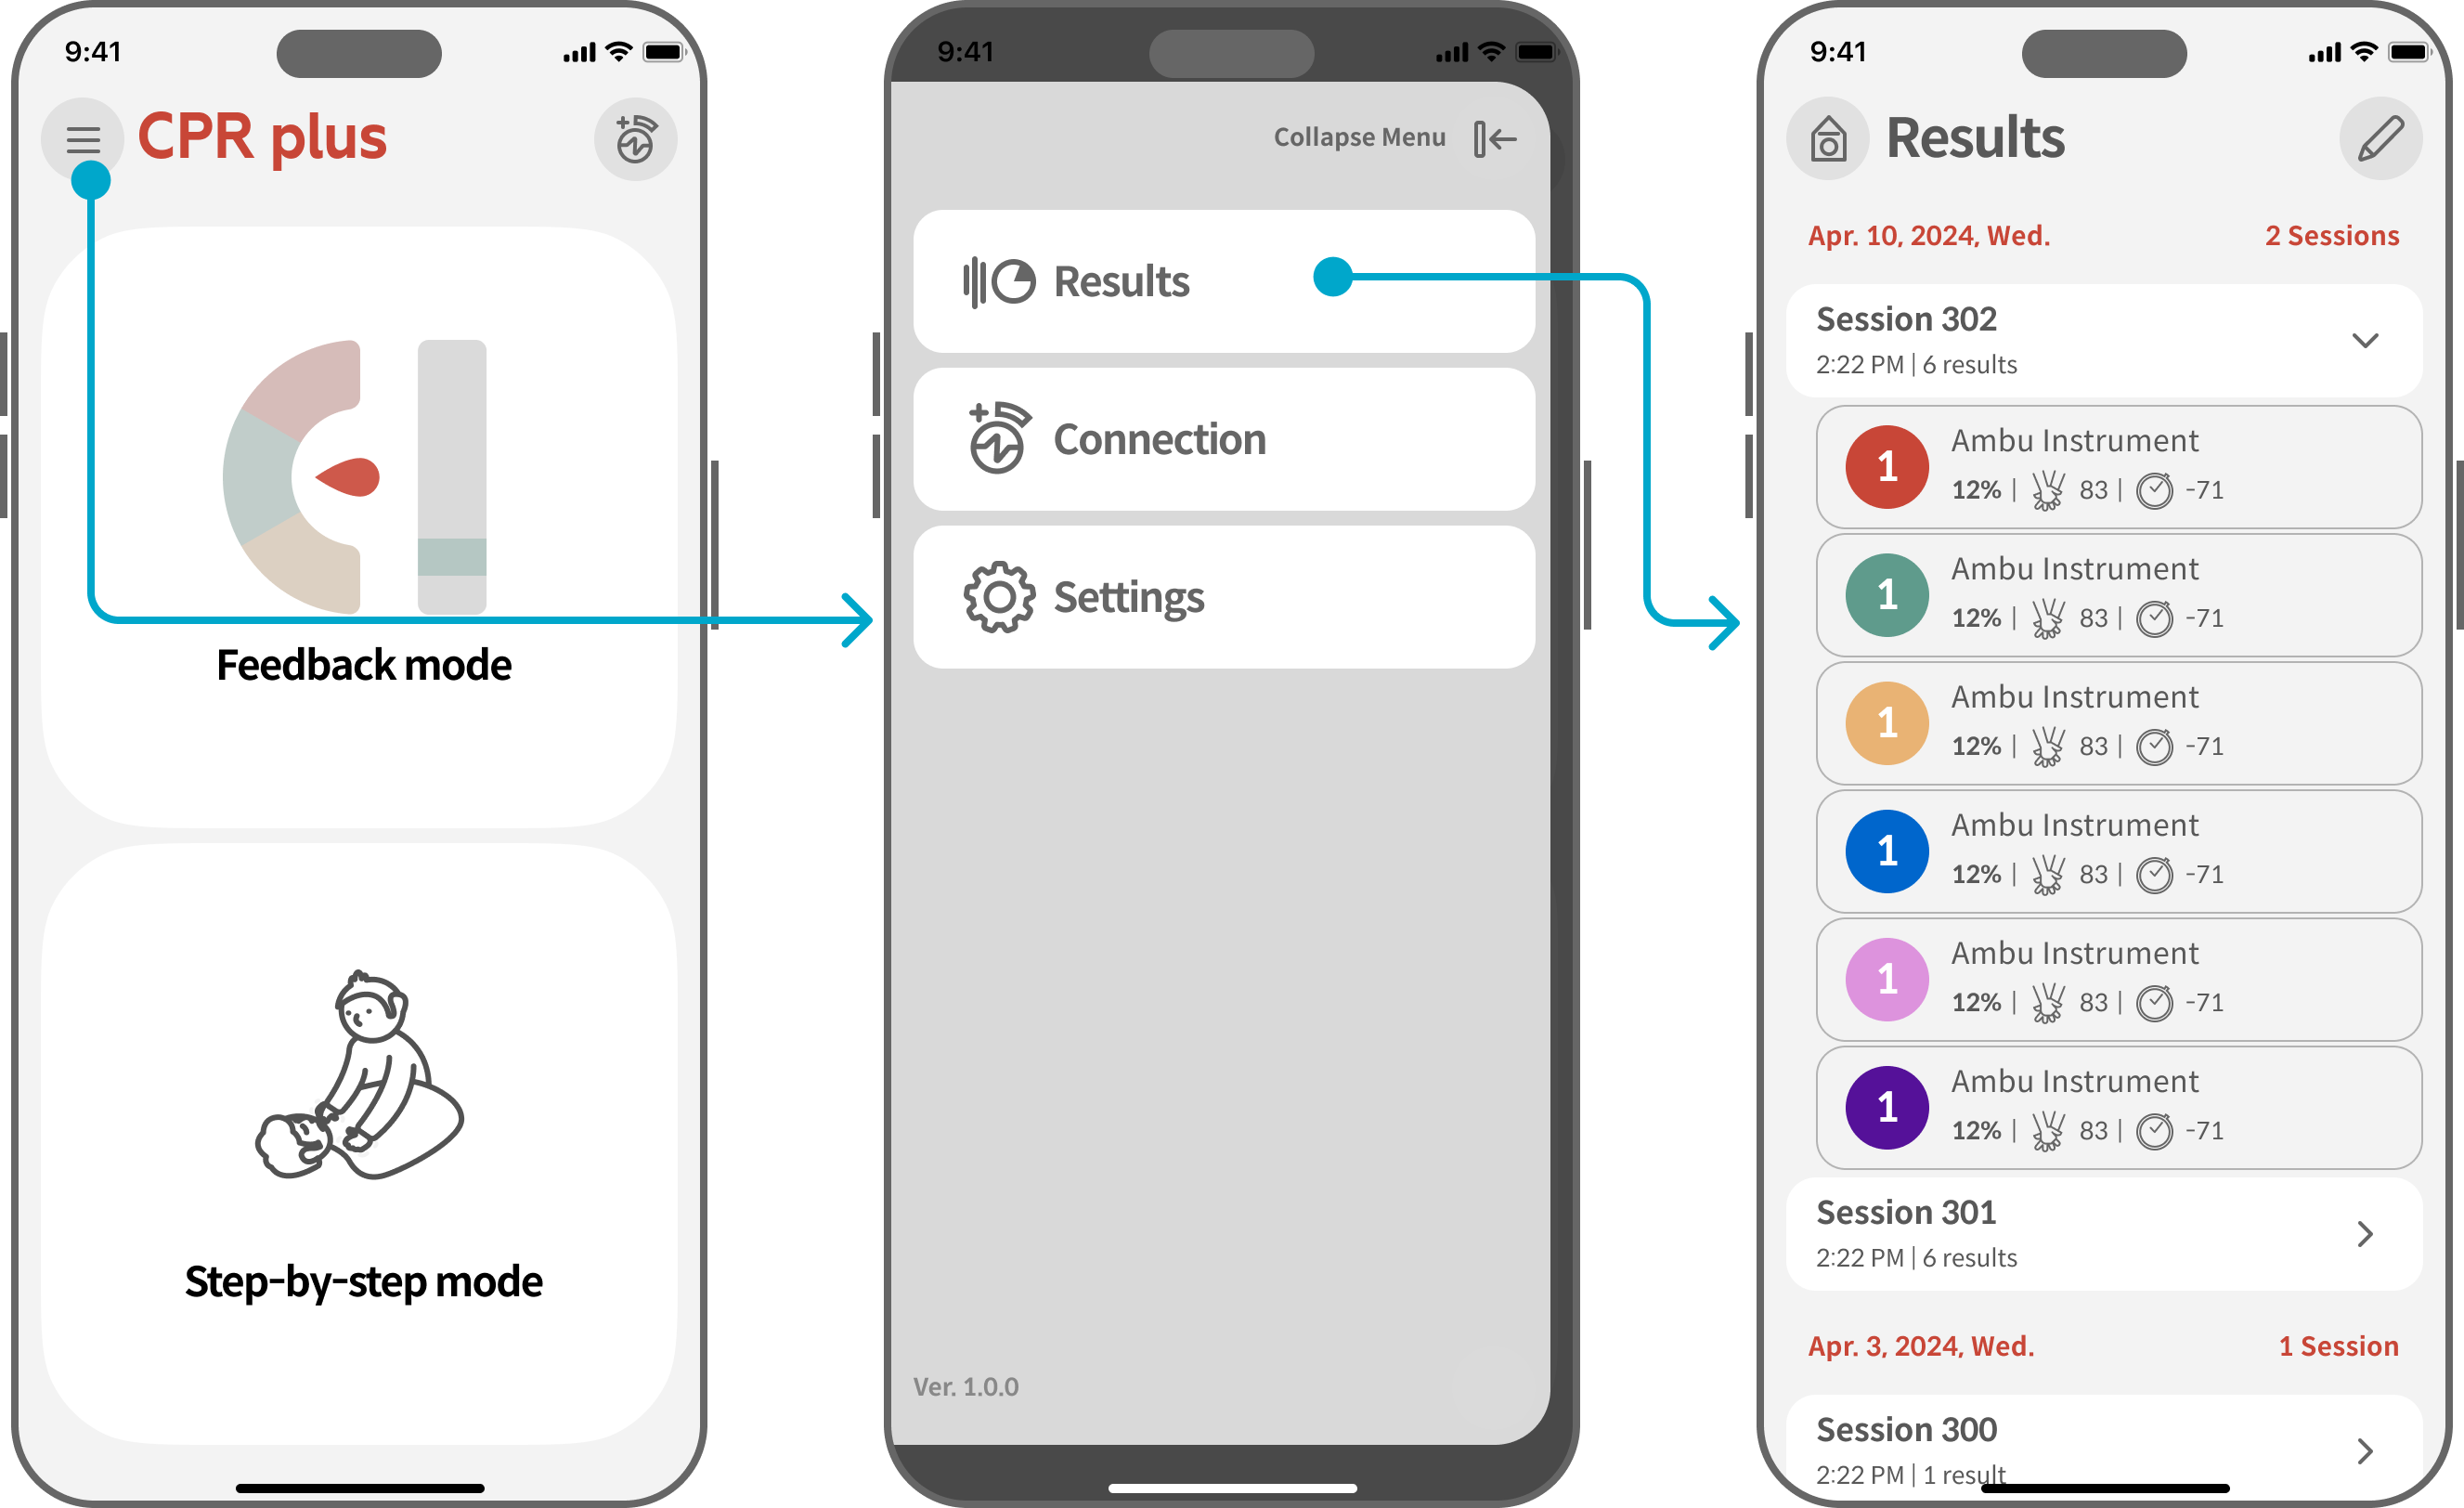
Completed CPR results can be reviewed from the "Results" menu.
① Tap menu icon (☰) from main screen.
② Select "Results."
③ Choose session for detailed view.
4. Settings
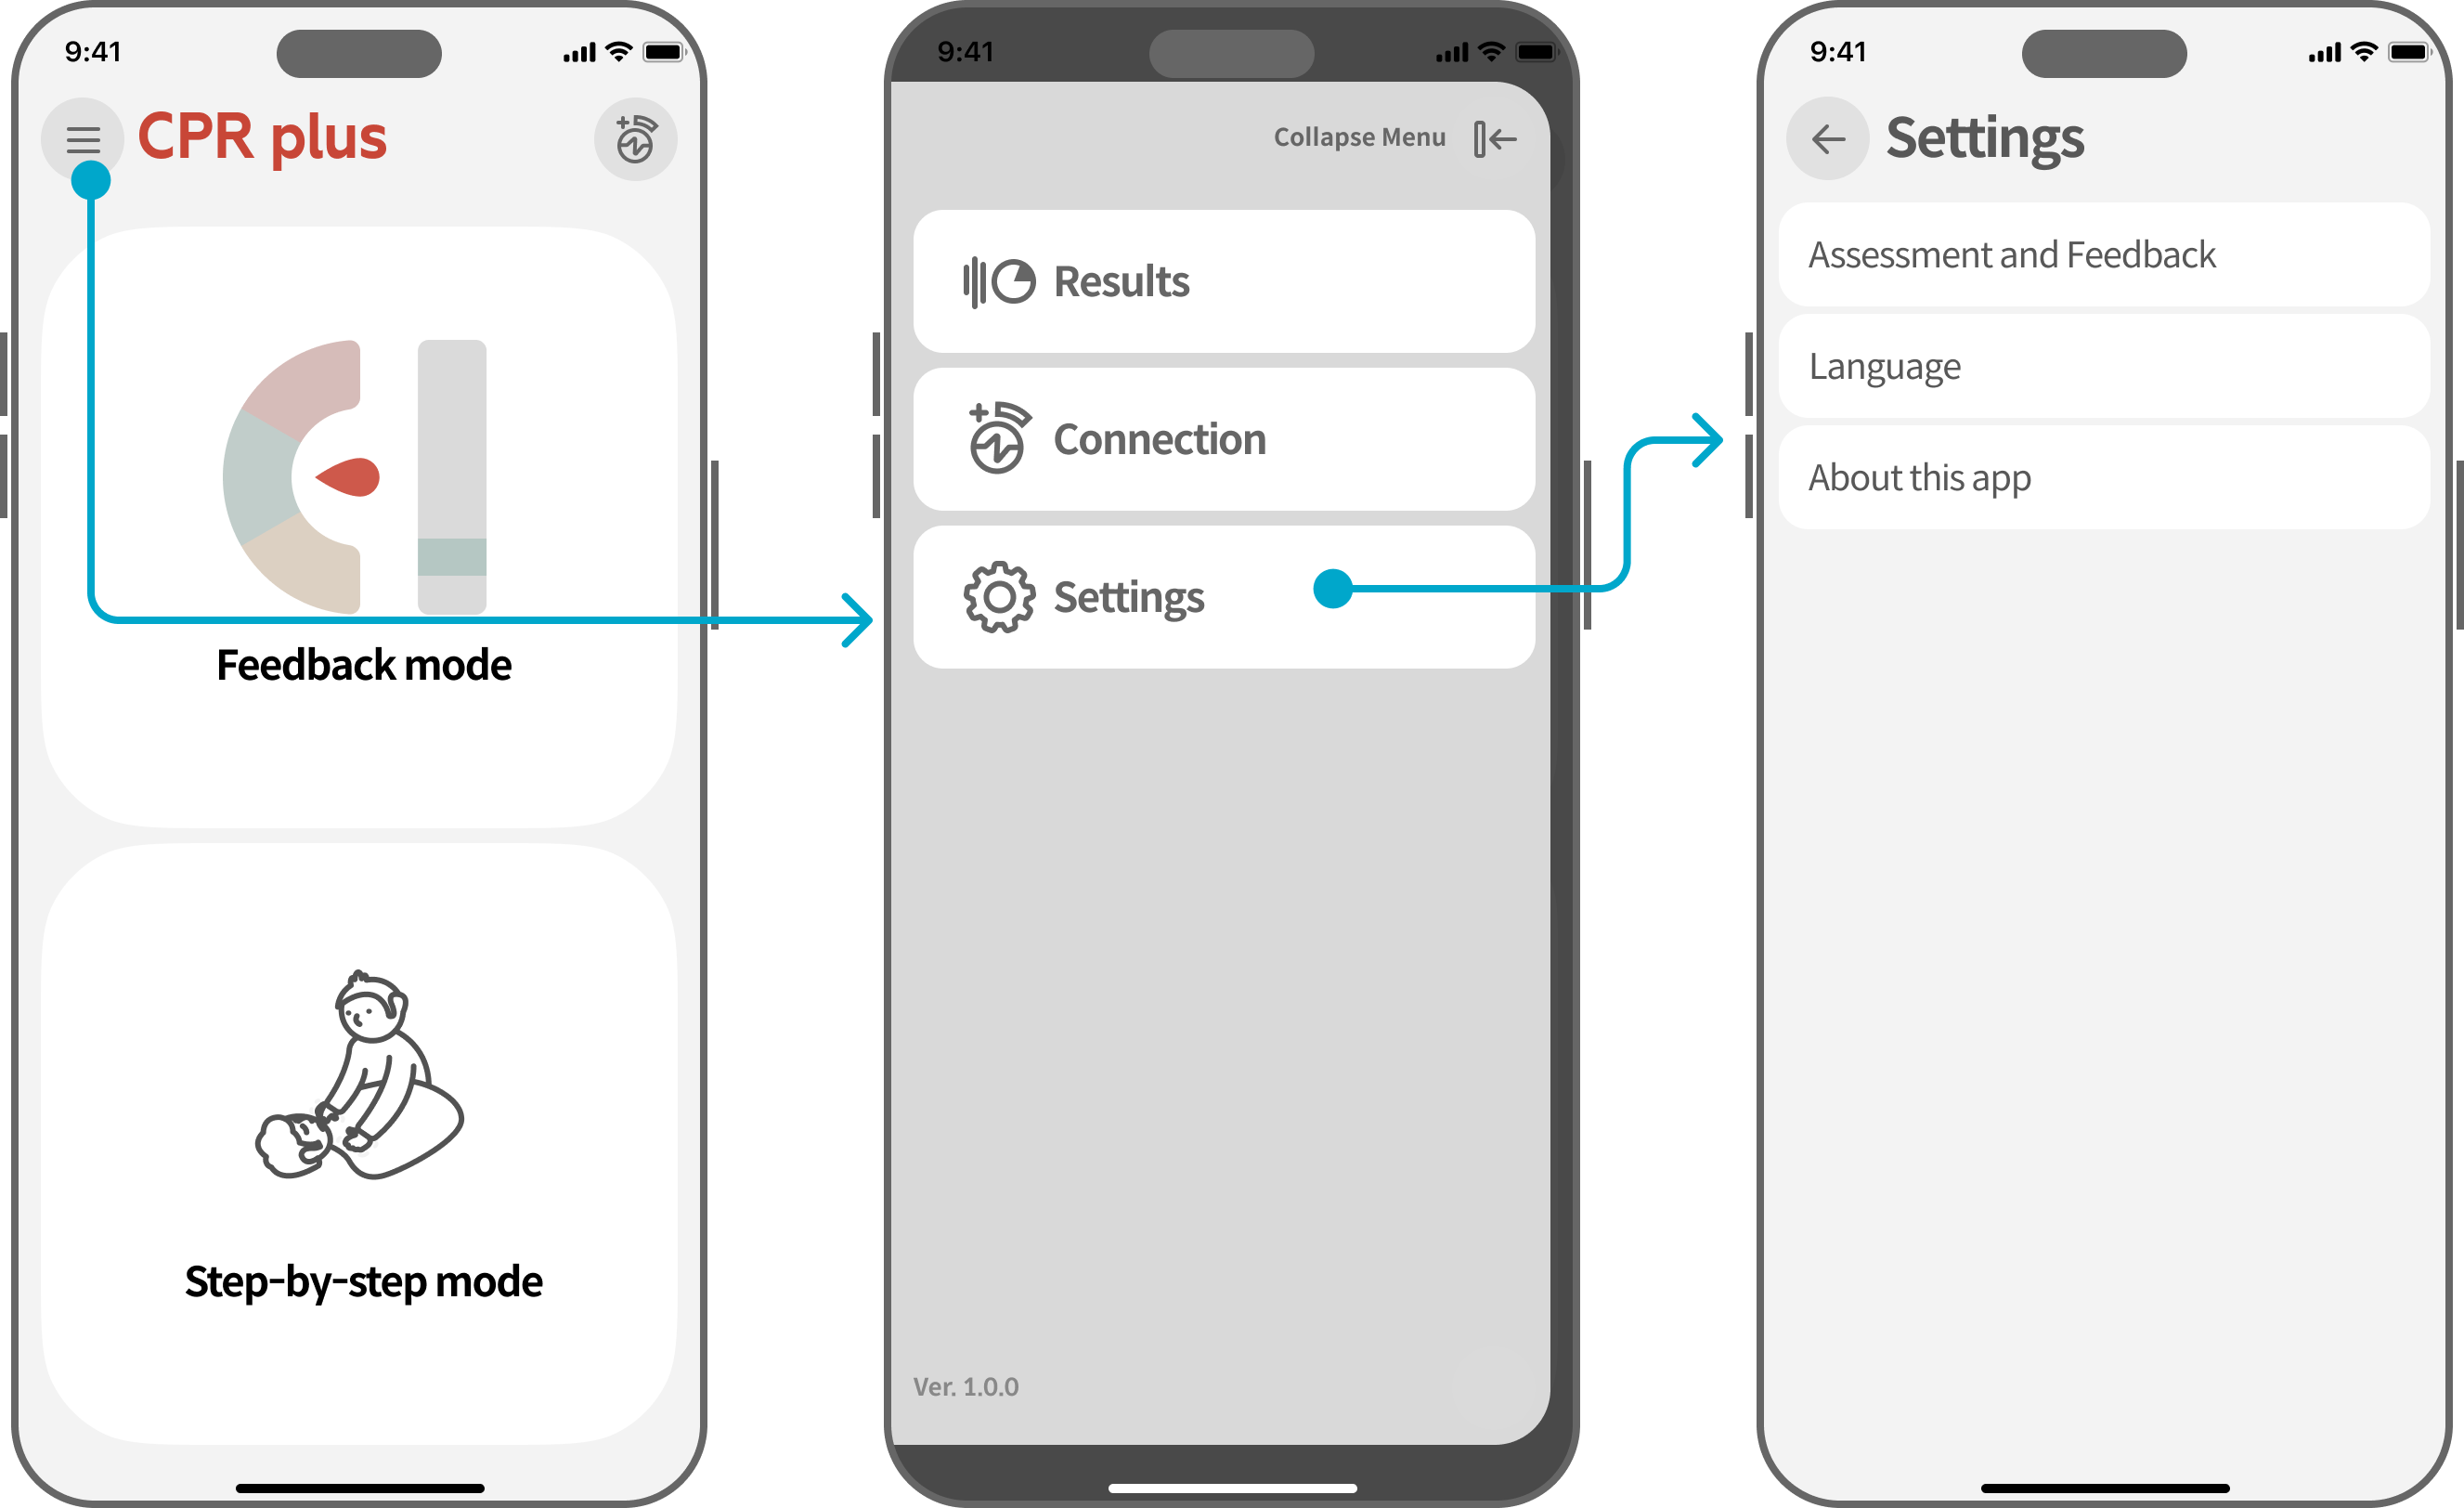
① Tap menu icon (☰) from main screen.
② Select "Settings."
③ Adjust scoring and feedback criteria under "Evaluation and Feedback."
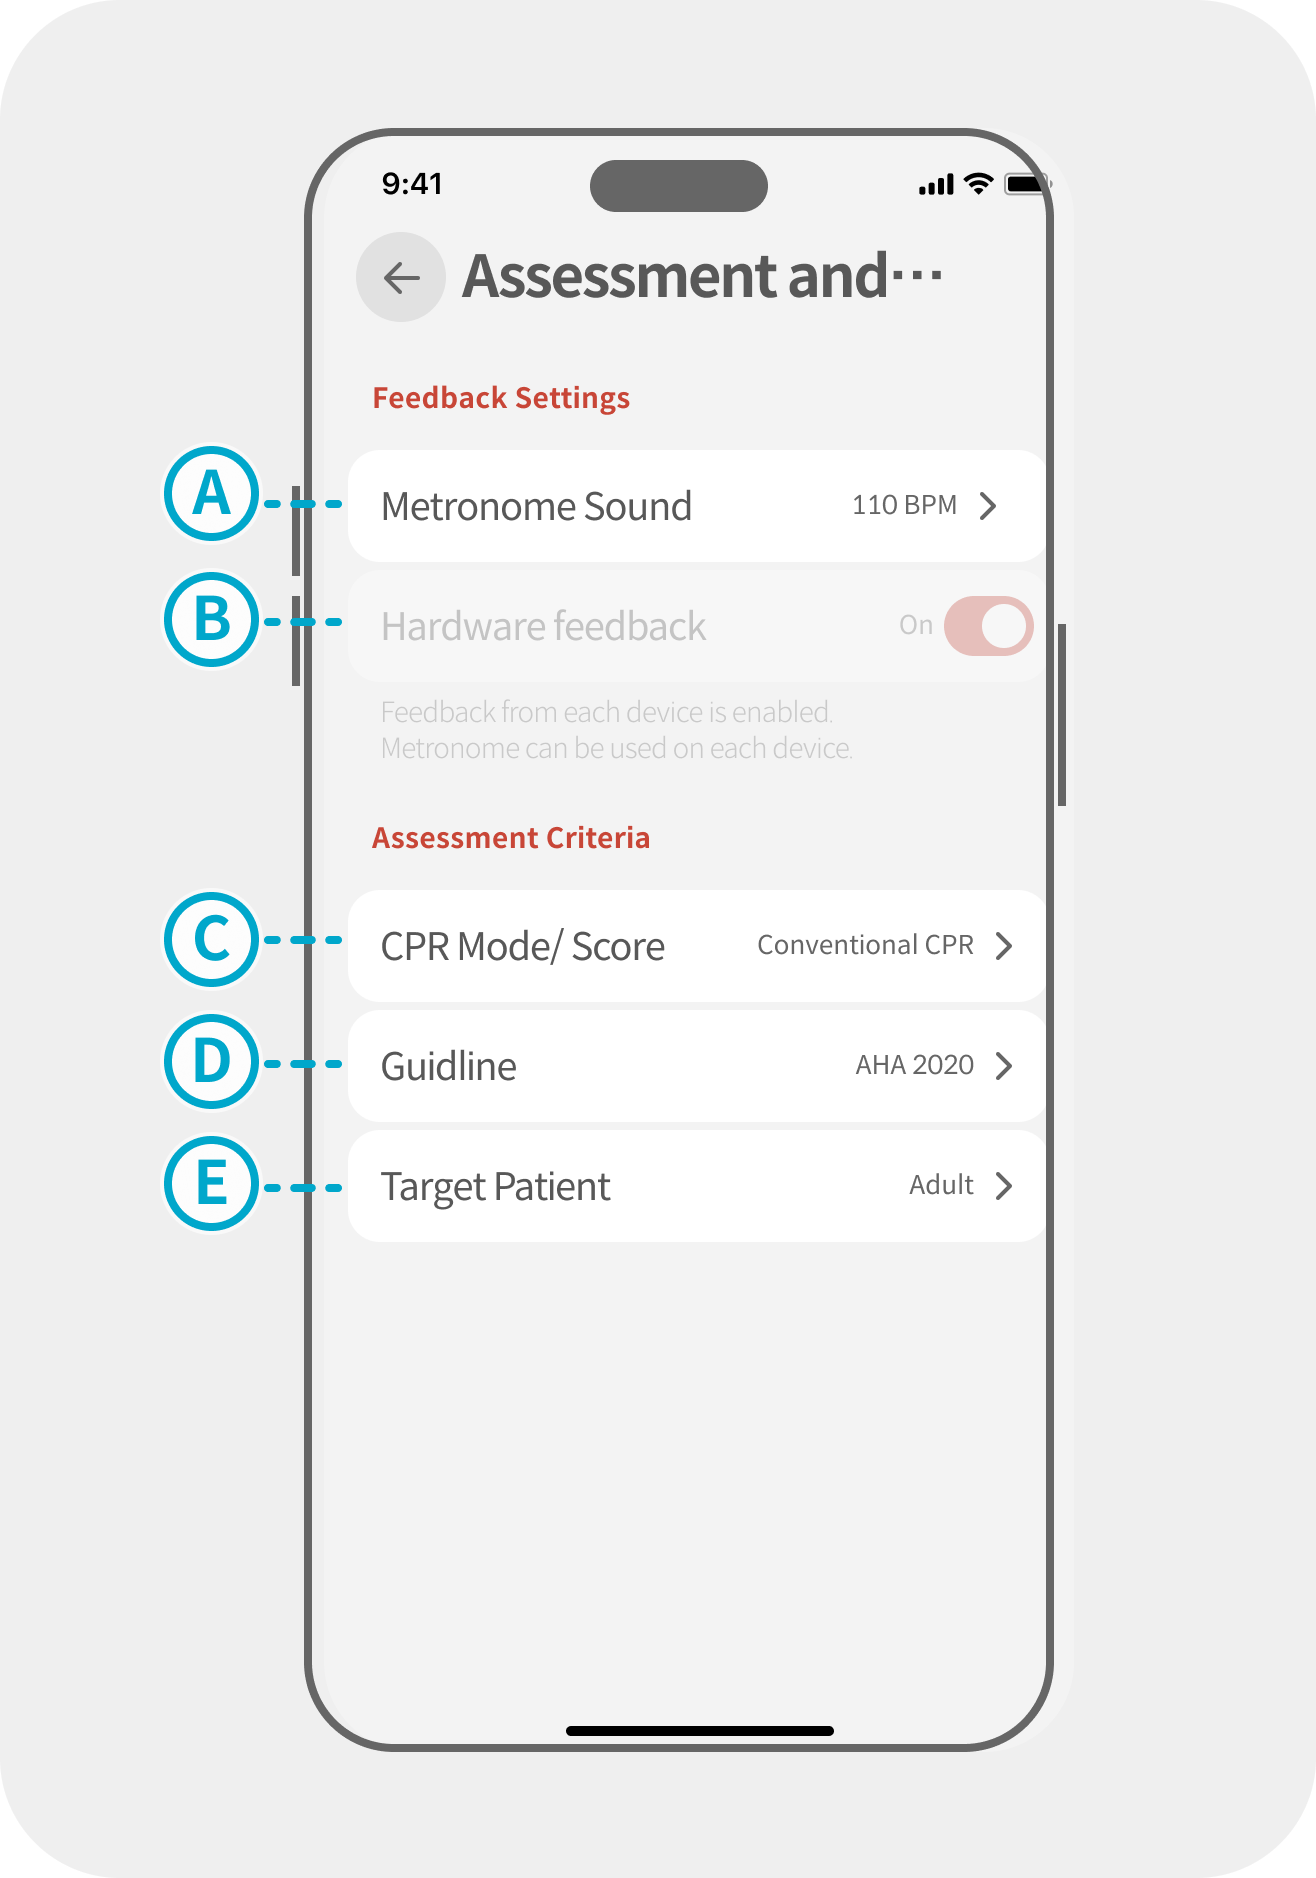
Evaluation Setting Items
Metronome
Select compression speed guide (100, 110, 120 BPM)
Hardware Feedback
Option to disable hardware feedback from cprCUBE during use. (Under development)
CPR Mode/Score
Determine whether to set the CPR standard as Hands-only CPR or conventional CPR. You can also adjust scoring weights and evaluation factors.
Guideline
Set the CPR guidelines to be applied. These guidelines will also be indicated in the results.
Target Patient
Select patient type (adult/child) for compatible manikins.
5. Maintenance and Troubleshooting
5.1. Checking Battery Level
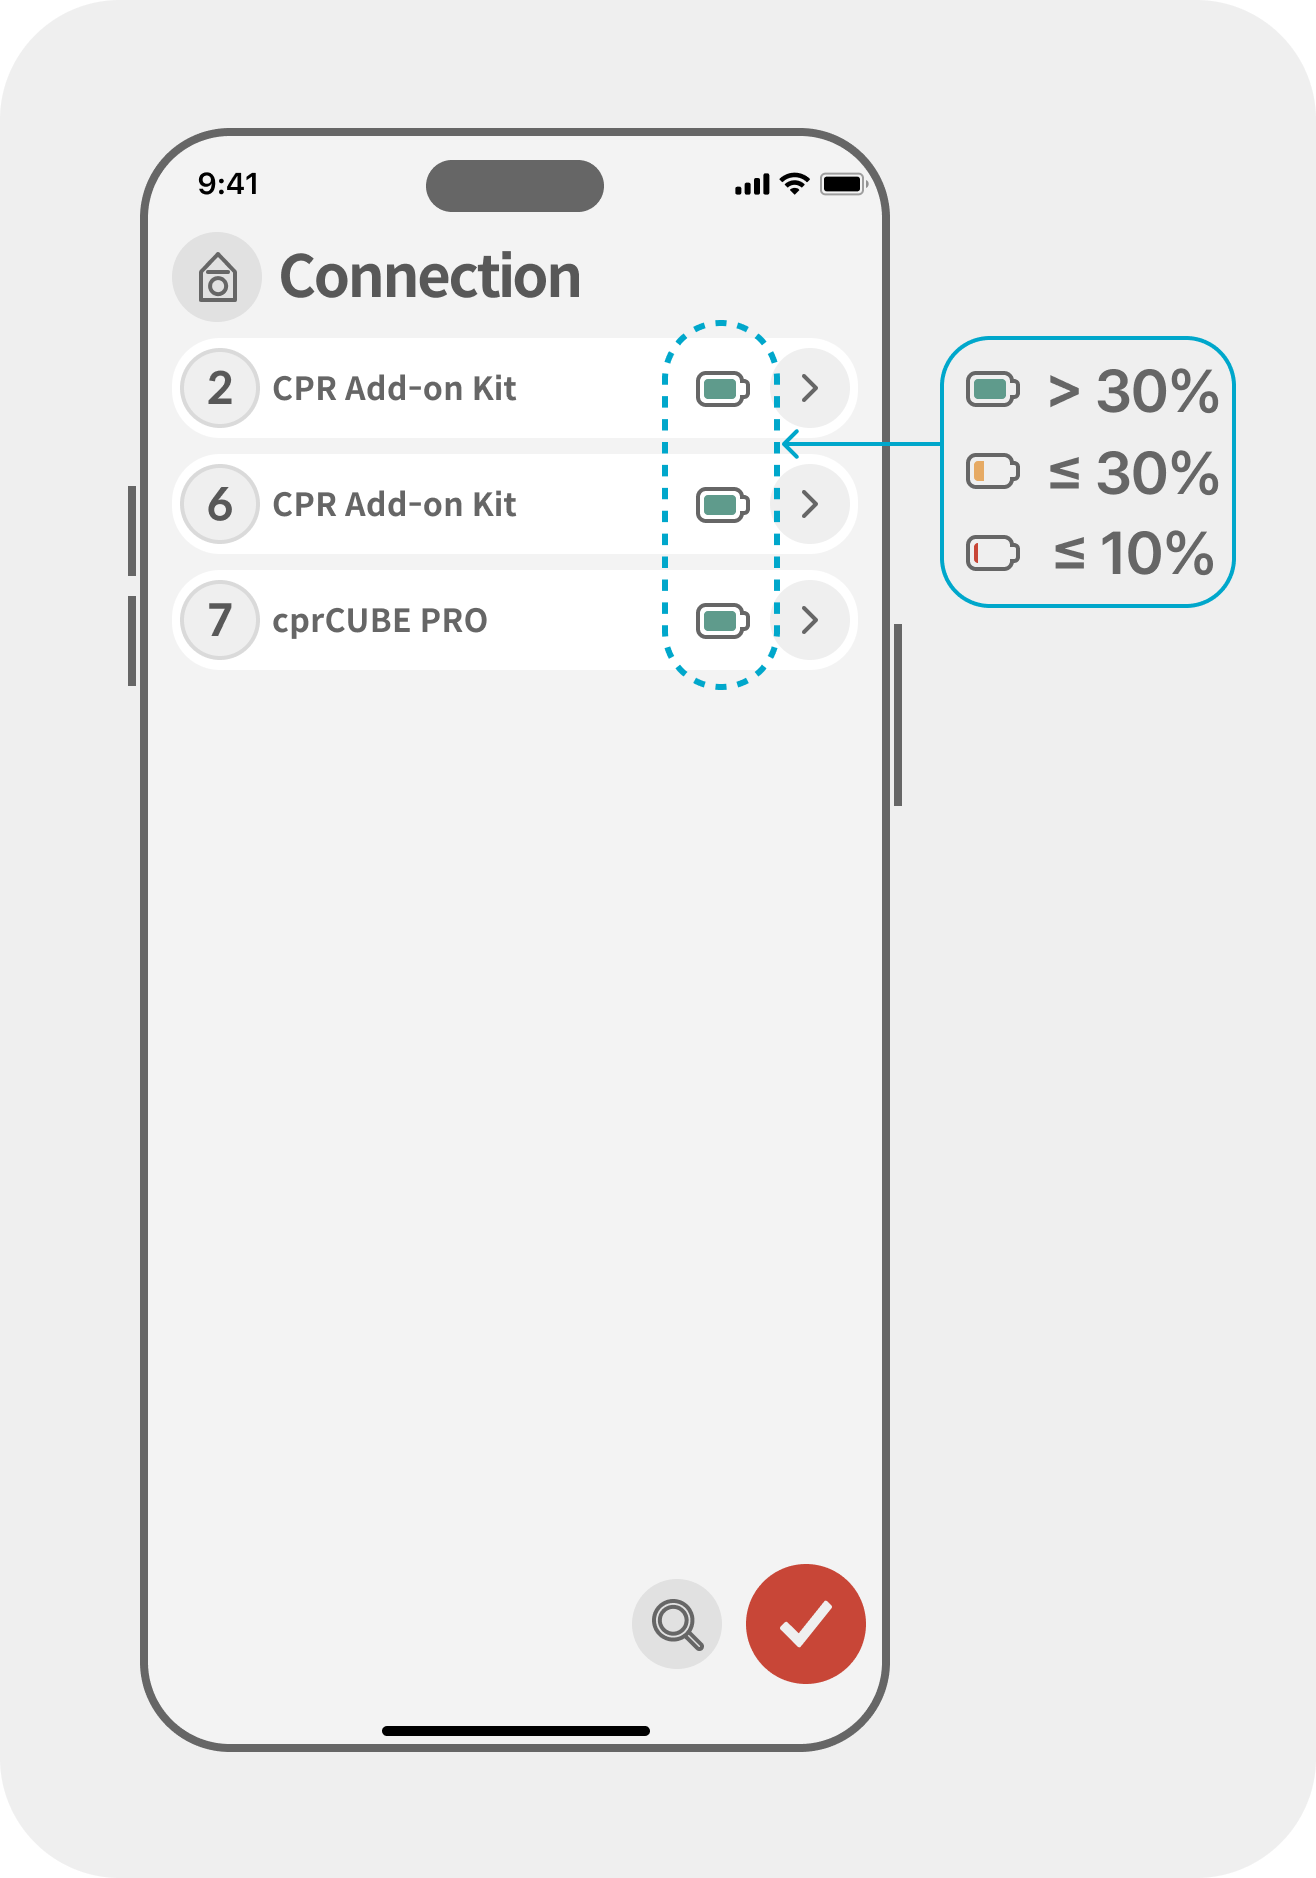
You can check the battery level of the connected kit in the application's "Connection" menu.
- Green: Battery level is above 30%; sufficient charge remains.
- Yellow: Battery level is 30% or below; replacement will be needed soon.
- Red: Battery level is 10% or below; replace the battery immediately.
5.2. Frequently Asked Questions
| Symptom | Cause | Solution |
|---|---|---|
| The kit to be connected is not found in the app. | - The kit is not powered on. |
- The kit is connected to another app. | - Press the manikin for 2 seconds to power it on. A beep indicates the manikin is powered on.
- Disconnect the kit from the other connected device. | | The connection is lost while using the kit. | - Your device may not be supported.
- Battery is low. | - Try another mobile device.
- Replace the battery. |
6. Inquiries
Please send your inquiries to contact@imlabworld.com, and we will provide detailed guidance regarding your request.
Copy and complete the form below in your email:
| - Organization:
- Contact Person:
- Position:
- Contact Number:
- Description of Issue: | | --------------------------------------------------------------------------------------- |