Overview
This document provides guidance on the initial setup process for the CPR Station.
For detailed product usage instructions, please refer to the CPR station User Guide (English ver).
To proceed with the setup according to this guide, you must first assemble the kiosk hardware. Follow these steps:
-
Prepare a compatible kiosk hardware.
📲 Kiosk or Tablet Requirements
Operating System Android 10 or later (Some low-end models may not be compatible.) RAM 2GB or higher Storage At least 16GB Interface • Touchscreen supporting multi-touch • Virtual keyboard Resolution Recommended 1920×1080 or 16:9 aspect ratio Sound Built-in or external speakers Others • The kiosk/tablet should be exclusively used for the CPR Station. • Ensure the device is securely fixed to prevent unintended movements due to user interaction. -
Prepare a compatible manikin and install the Add-on Kit (AoK).
- If AoK installation is completed, please refer to2.1.1. Initial Manikin Setup
- If AoK installation is required, proceed to the section 1. Installing the Add-on Kit
1. Installing the Add-on Kit
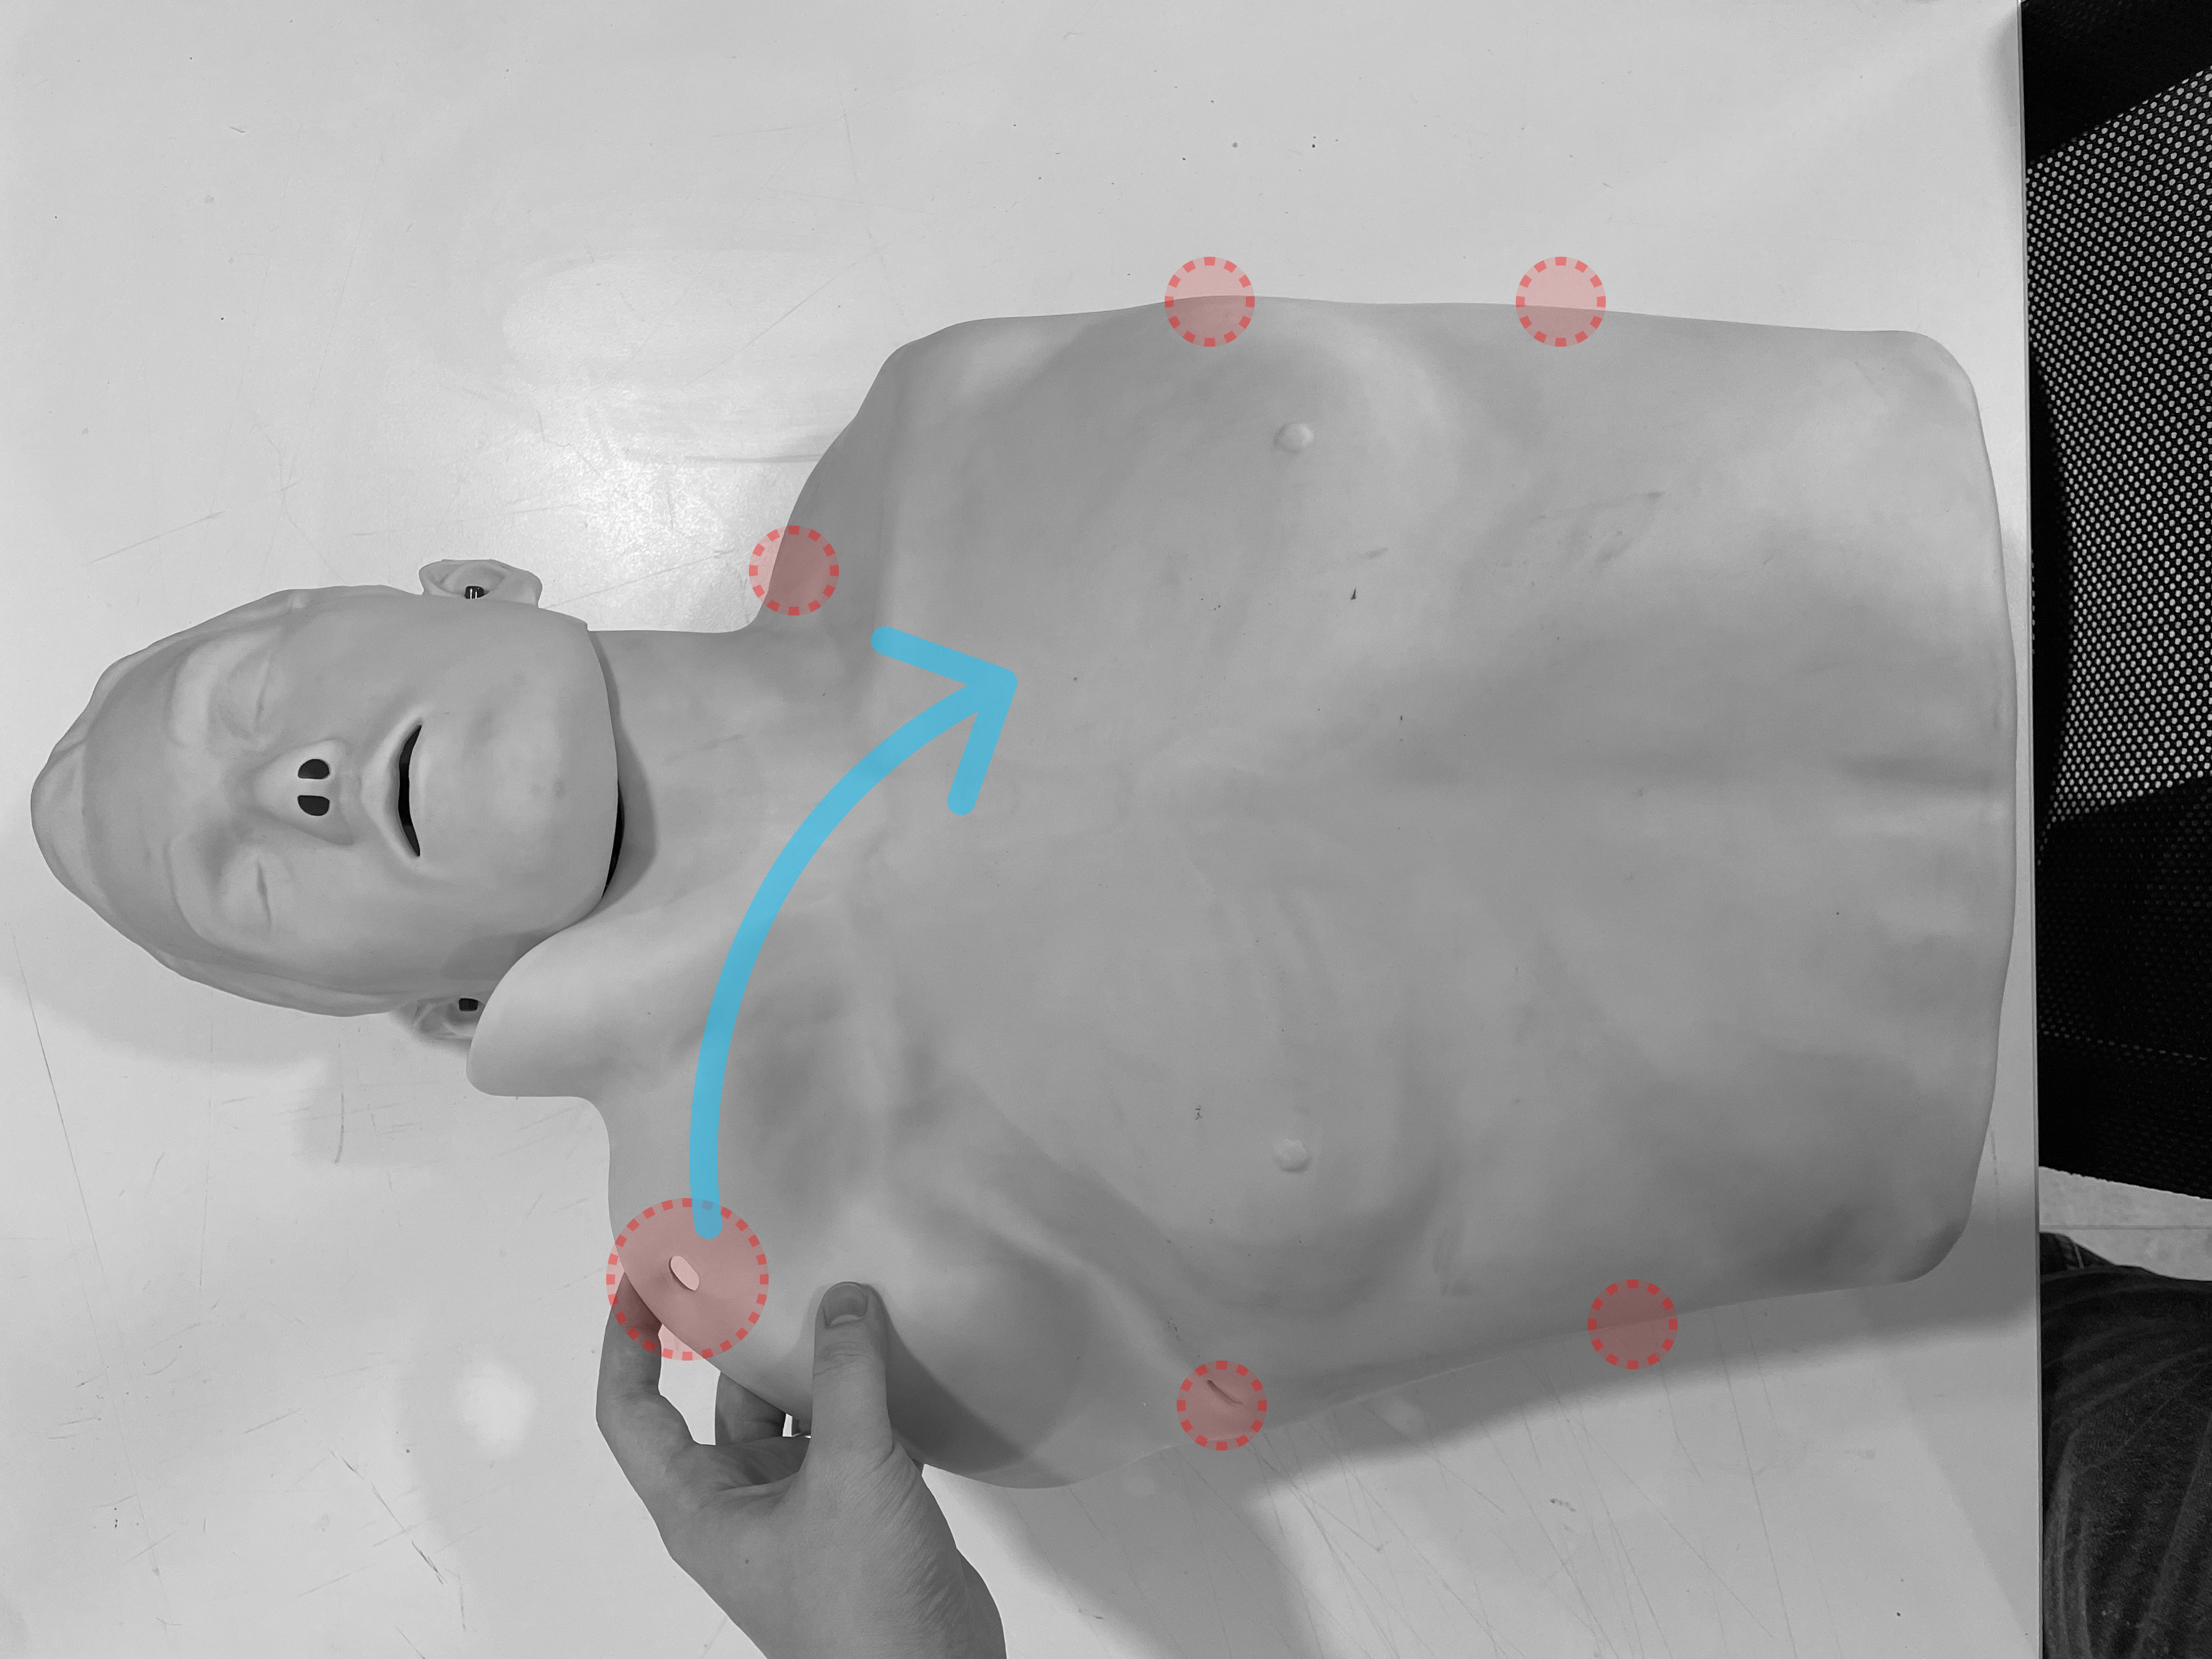
1-1. Add-on Kit Installation on Manikin
Note This video covers the installation of the wireless model. For wired power connection and cable management, please refer to the next section.
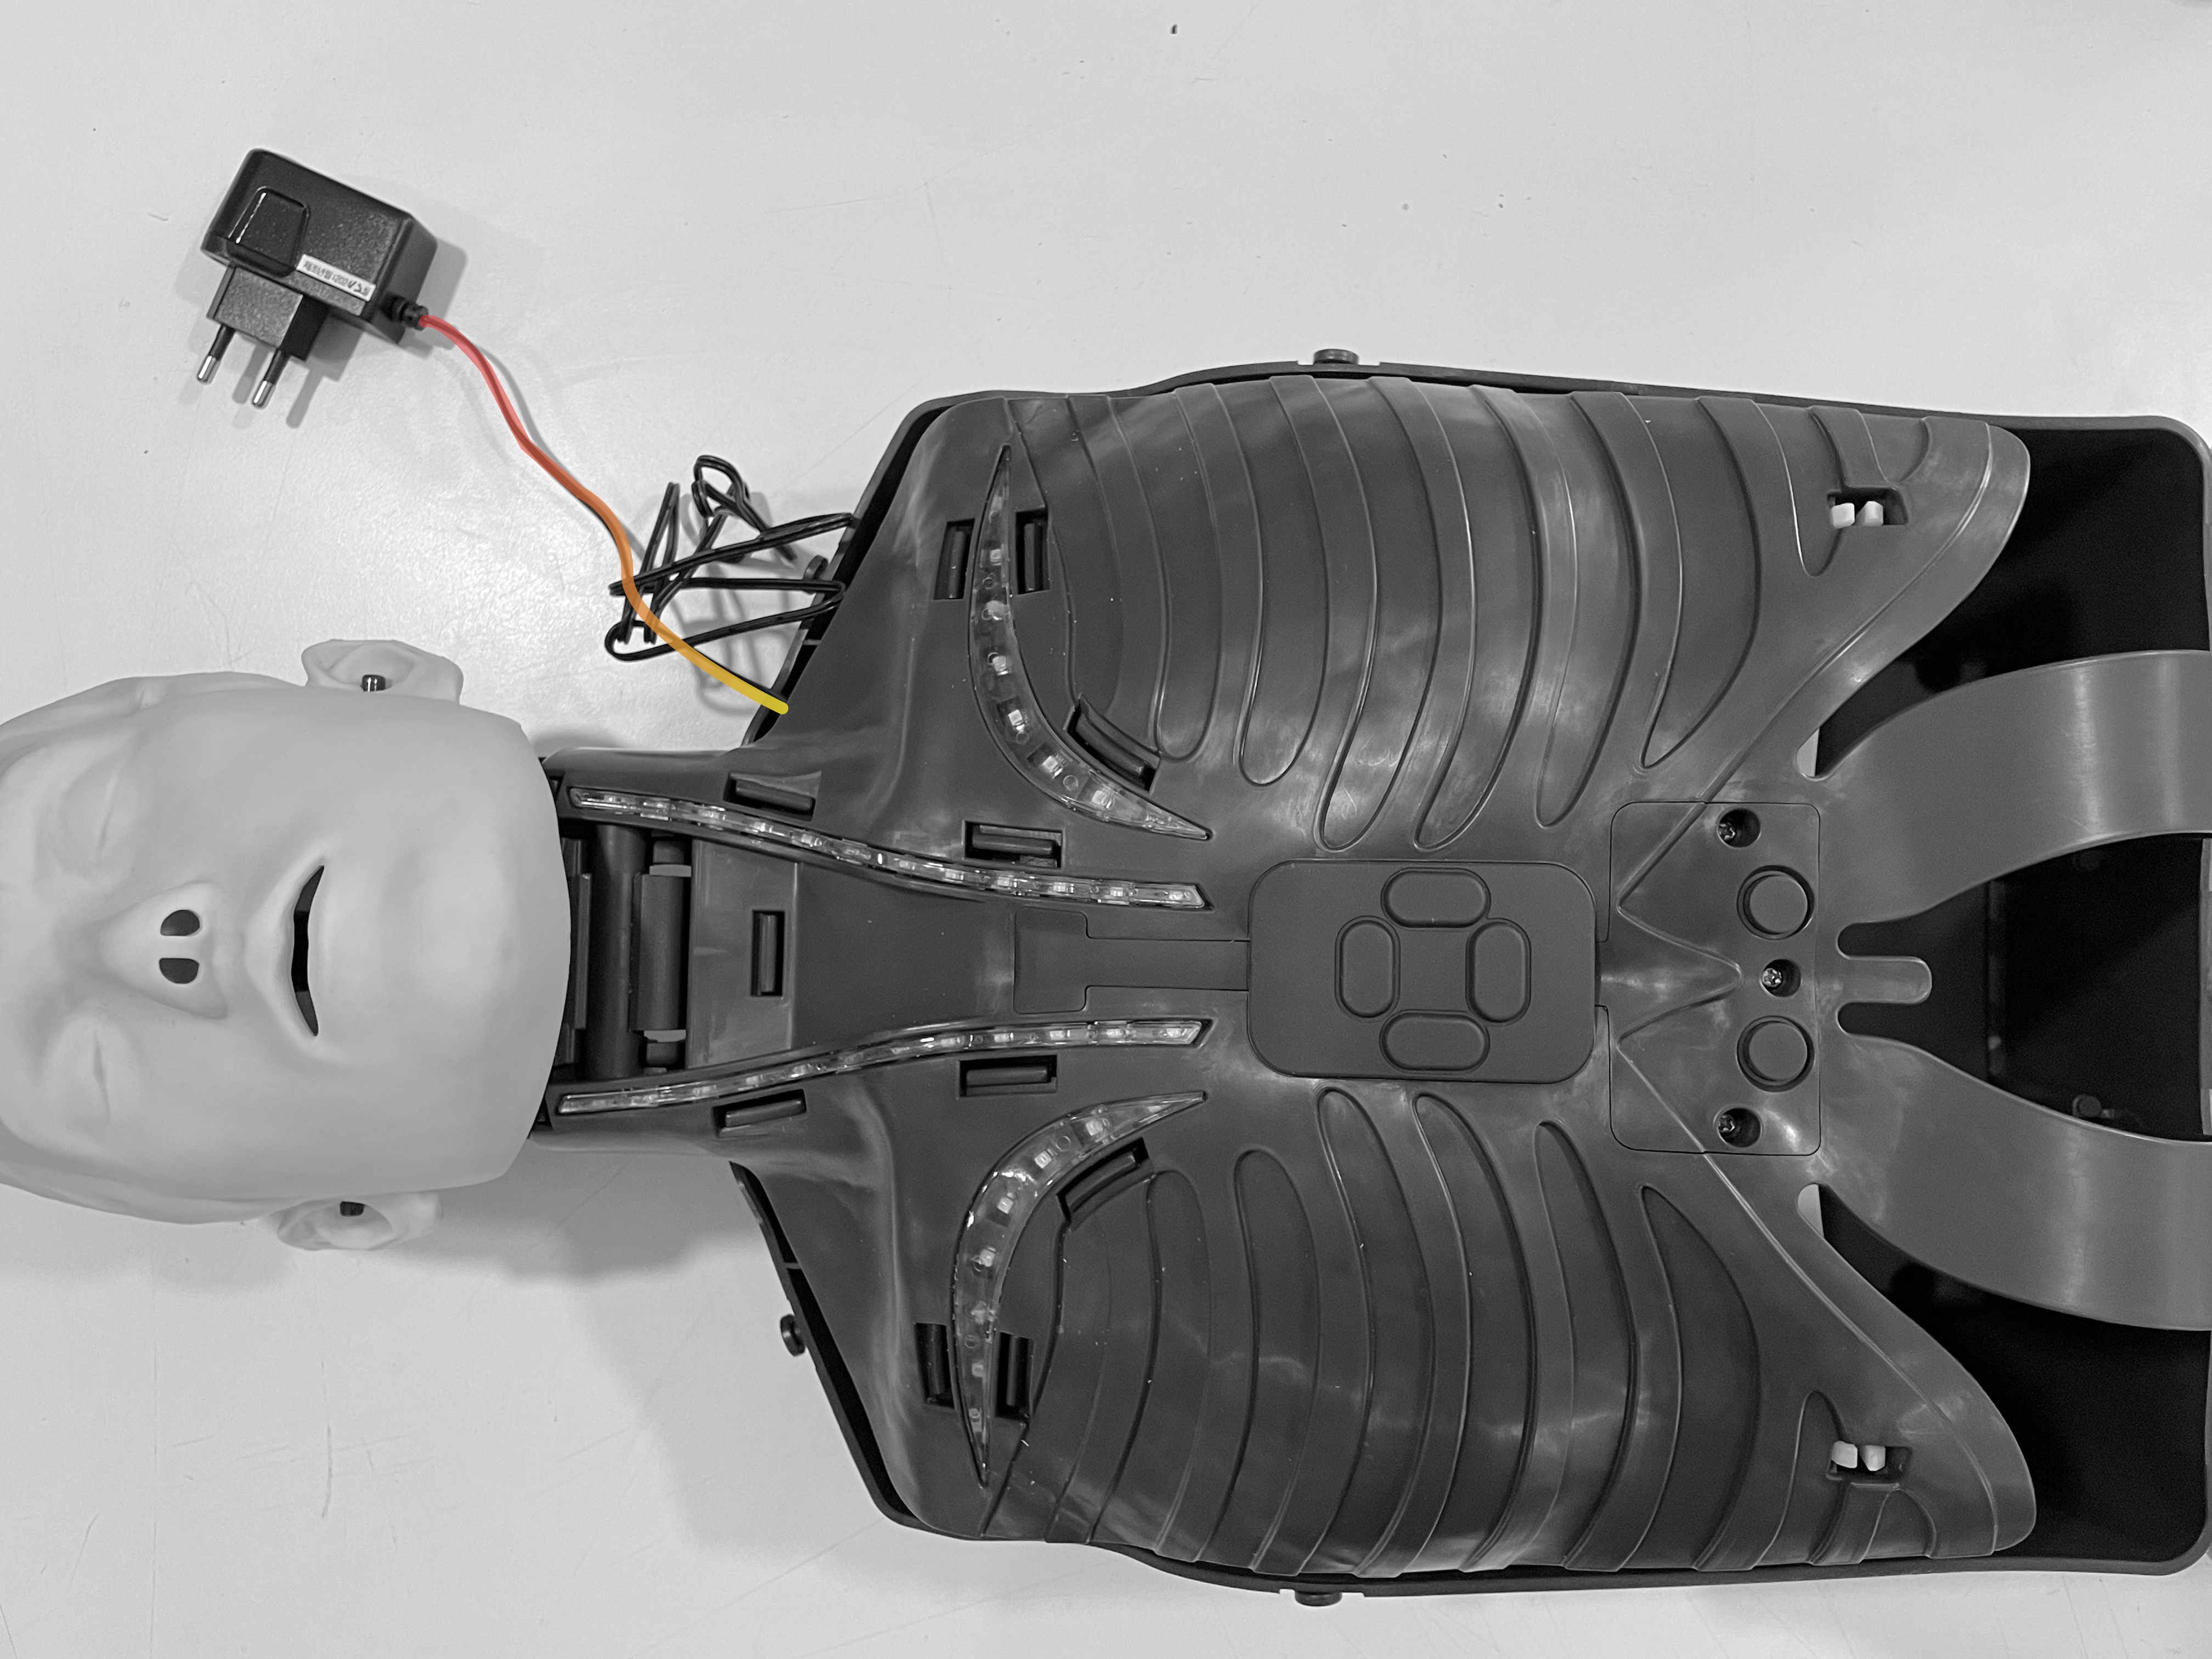
1-2. Wired Power Connection & Cable Management
① Open the manikin skin.
② Loop the power cable.
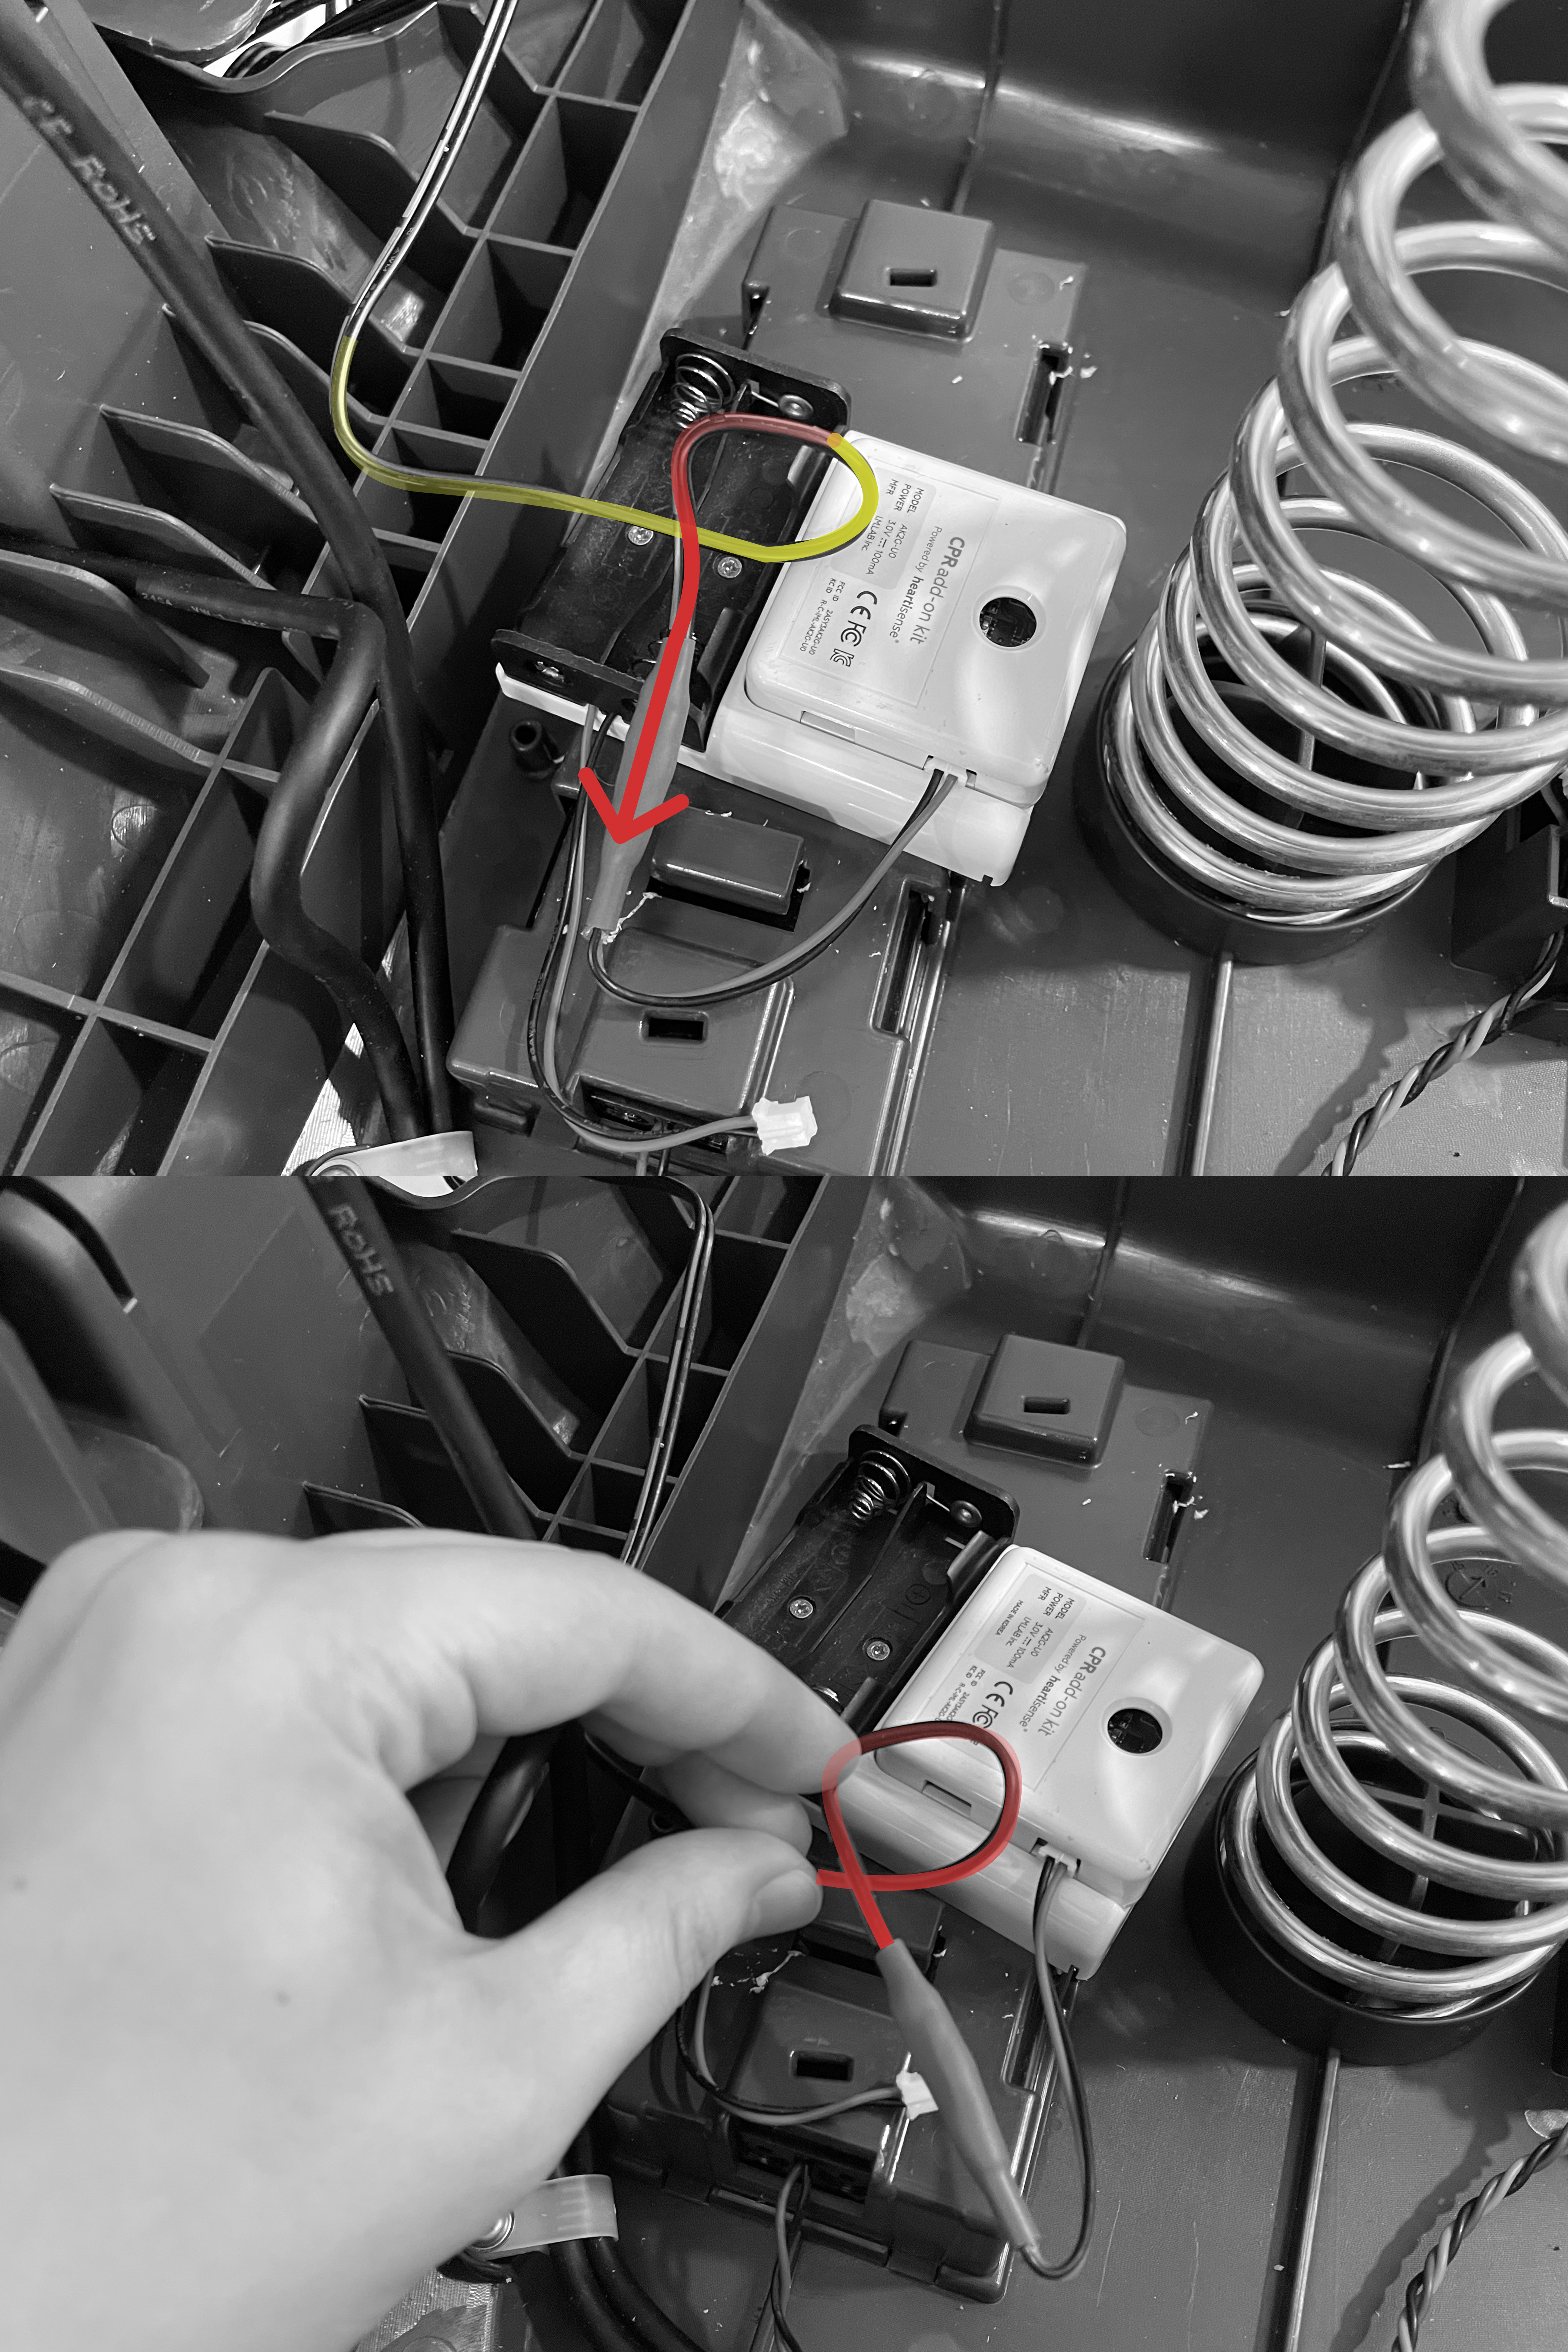
③ Wrap the loop around the pillar once and insert it into the gap.
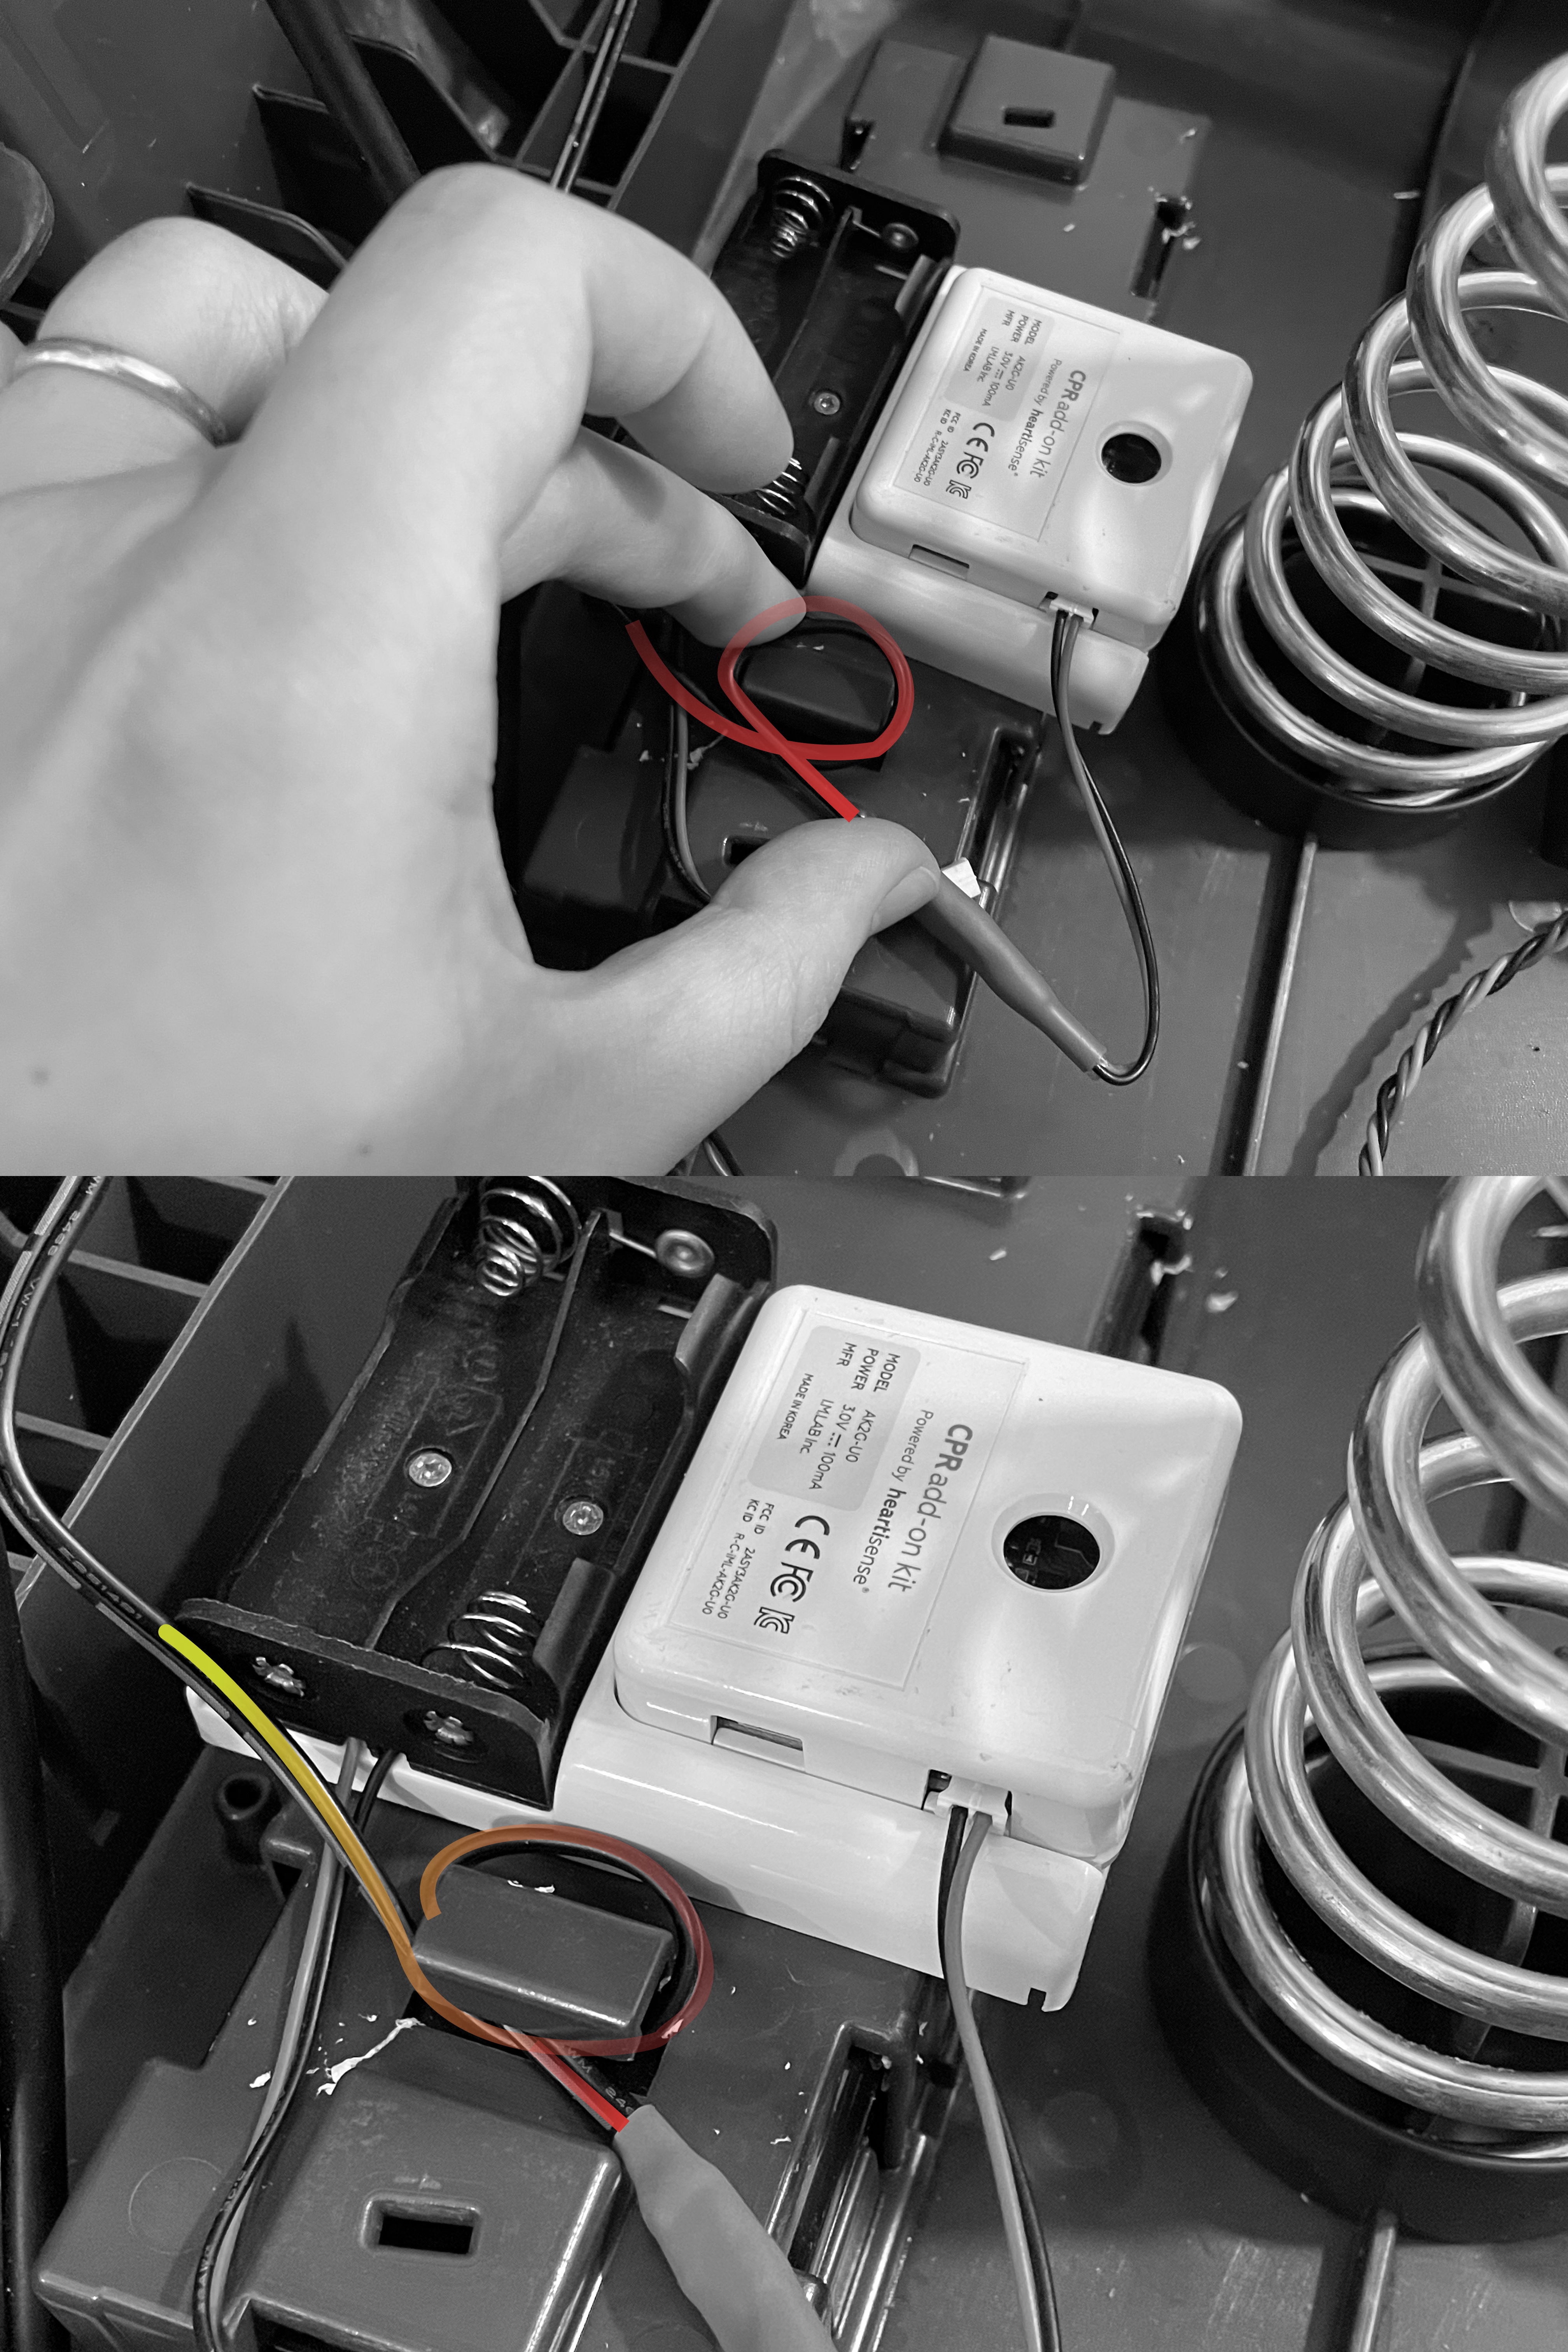
④ Secure the cable firmly so the loop stays in place between the pillars.
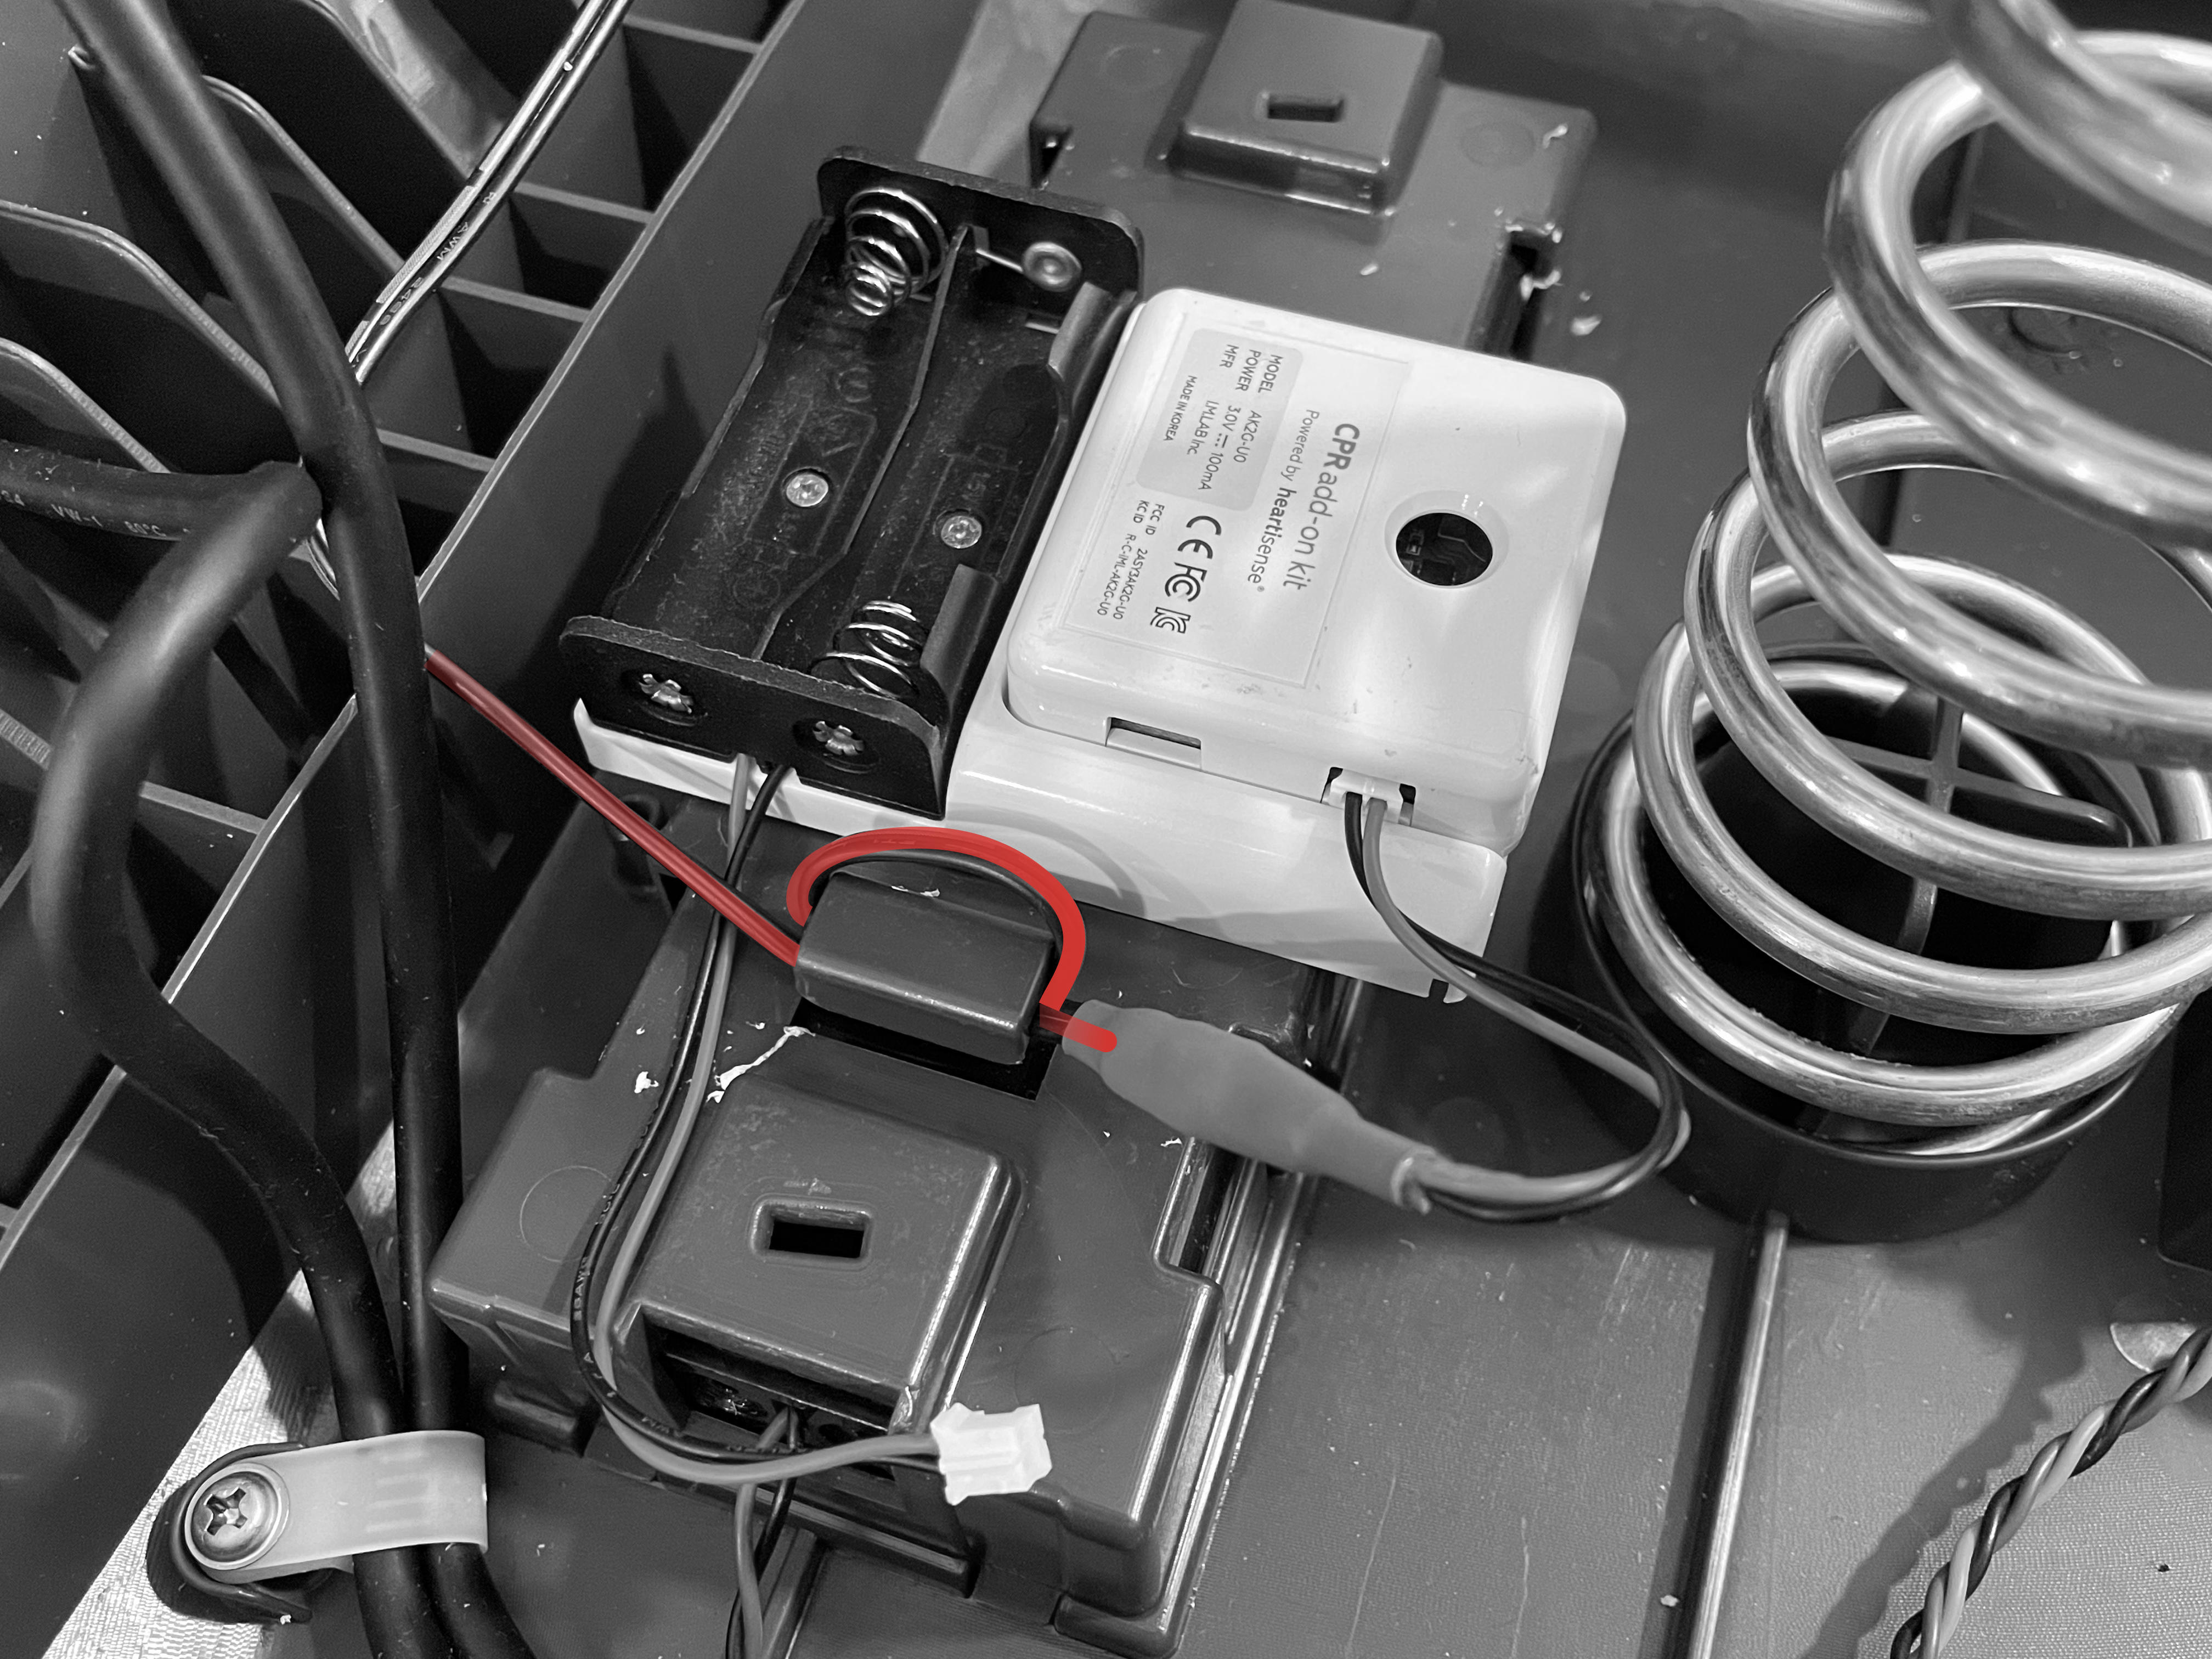
⑤ Pull the adapter cable out through the right side of the manikin.
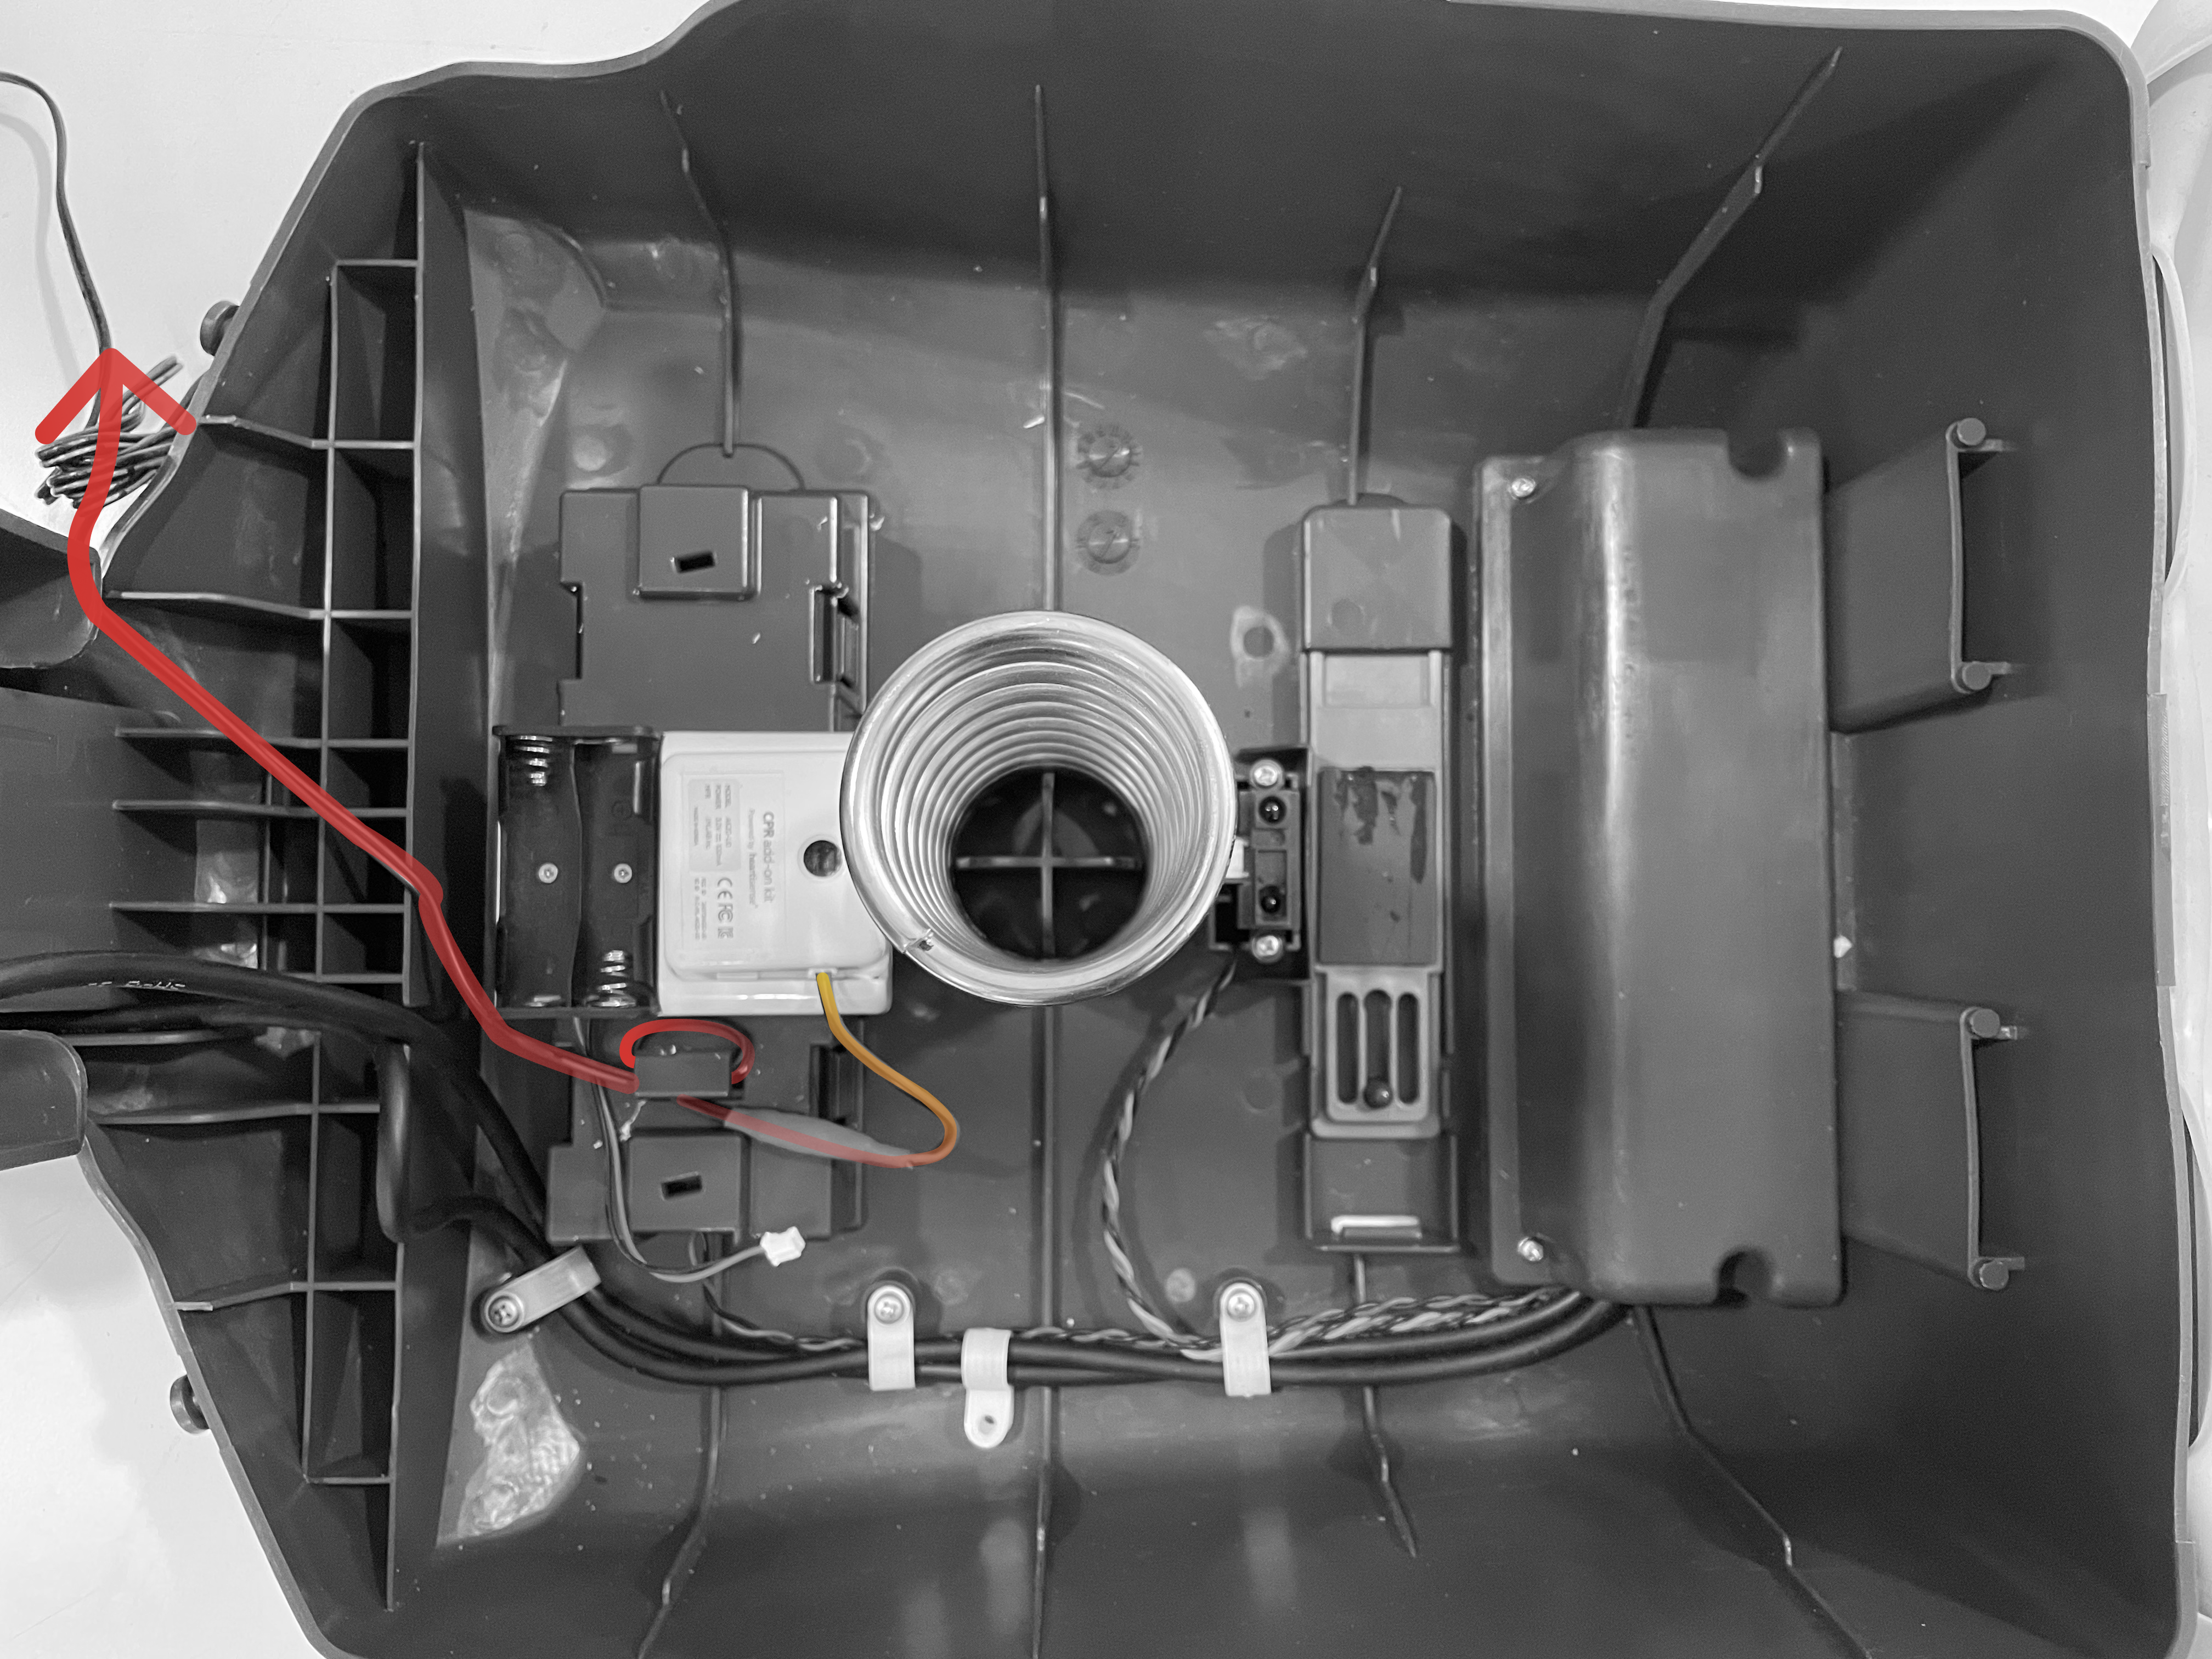
⑥ Close the manikin cover and reinstall the skin.
2. Installing Rust Desk
This software is needed for remote support
2-1. Transferring the Installation File to the Kiosk
Unzip the file before transferring it to a kiosk or tablet.
- Save the Android installation package (.apk) provided by I.M.LAB on the kiosk or tablet.
- Refer to the hardware requirements above.
- Some email services may restrict sending APK files. Use USB storage or other media instead.
- A wireless internet connection is required during installation.
2-2. Installing Rust Desk
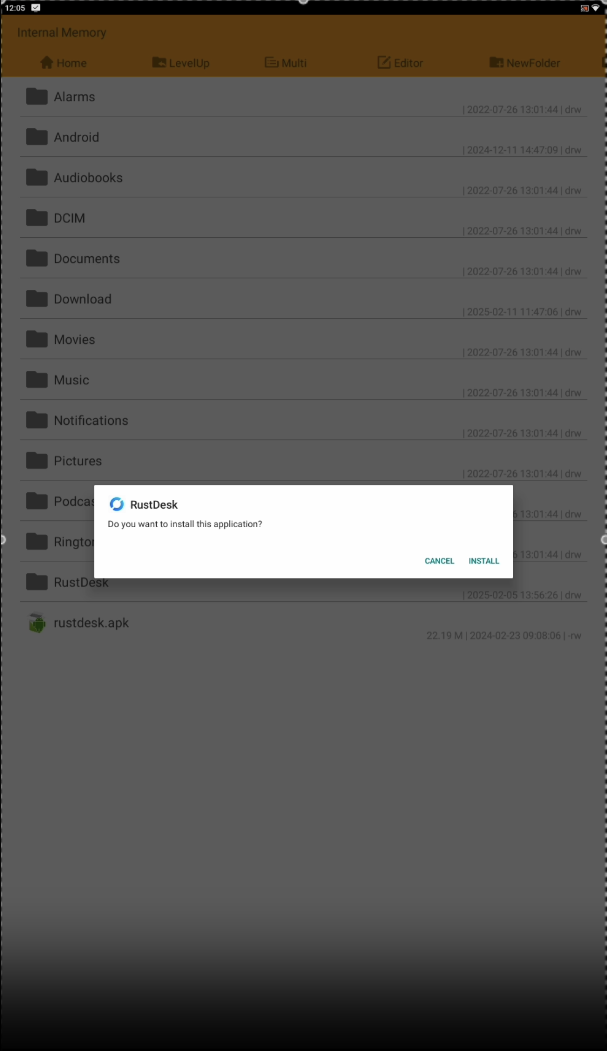
① Open the File Explorer on the device.
② Locate and run the provided rustdesk.apk file.
③ After installation, launch the app.
2-3. Setting Up RustDesk
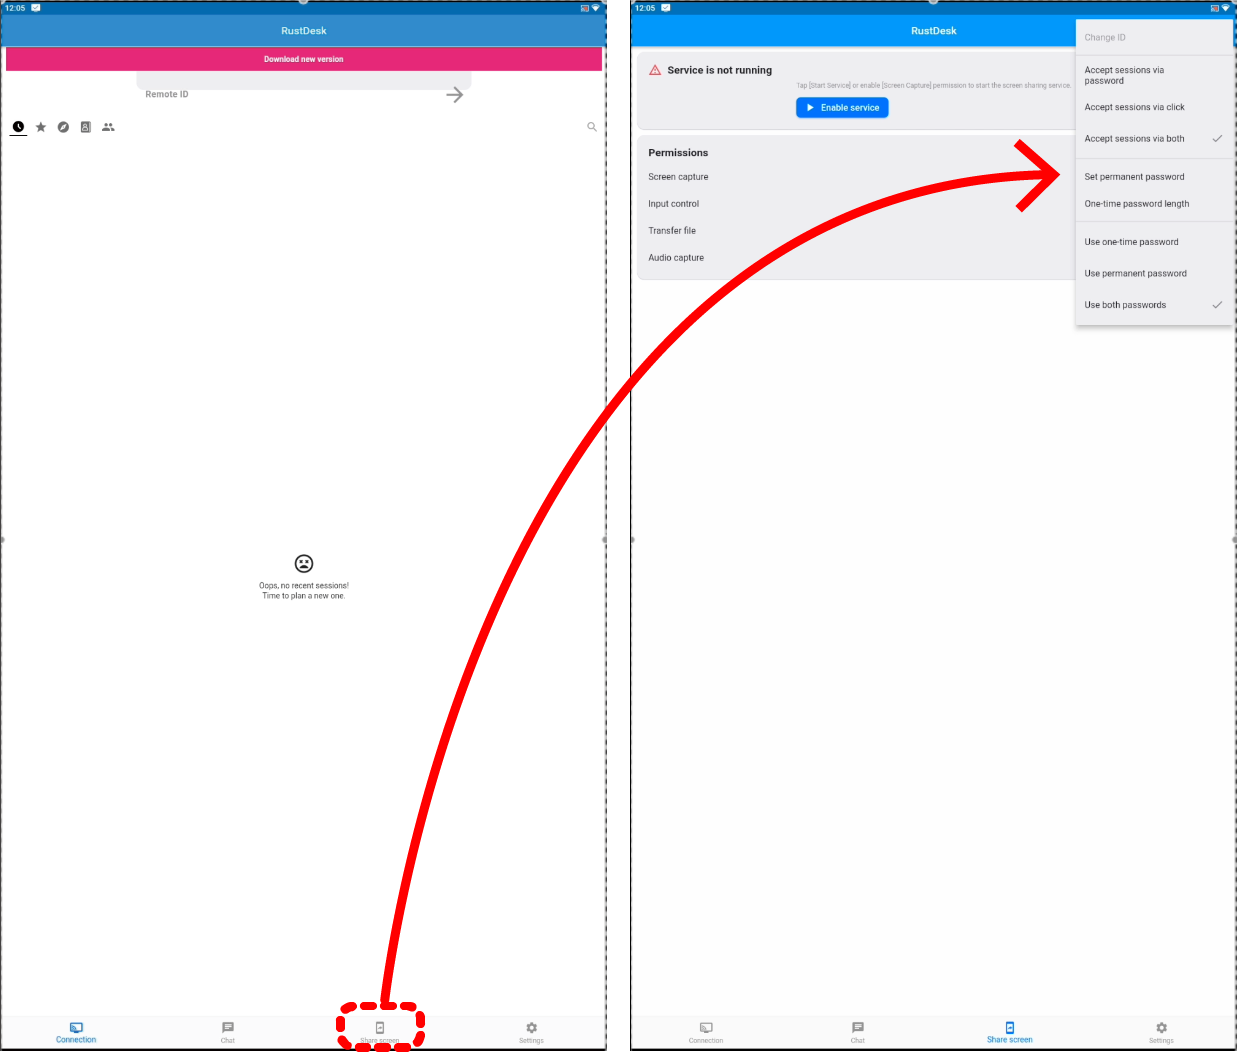
⚠️ Do not update RustDesk when prompted with a "Download New Version" button.
① Open the application and go to the third tab called "Share screen."
② Tap the menu (⋮) icon in the top right corner and select "Set Permanent Password."
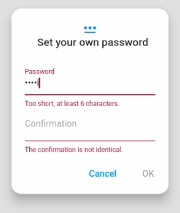
③ Set the password as station1(all lowercase letters + number 1). (This password is used solely by I.M.LAB for service support.)
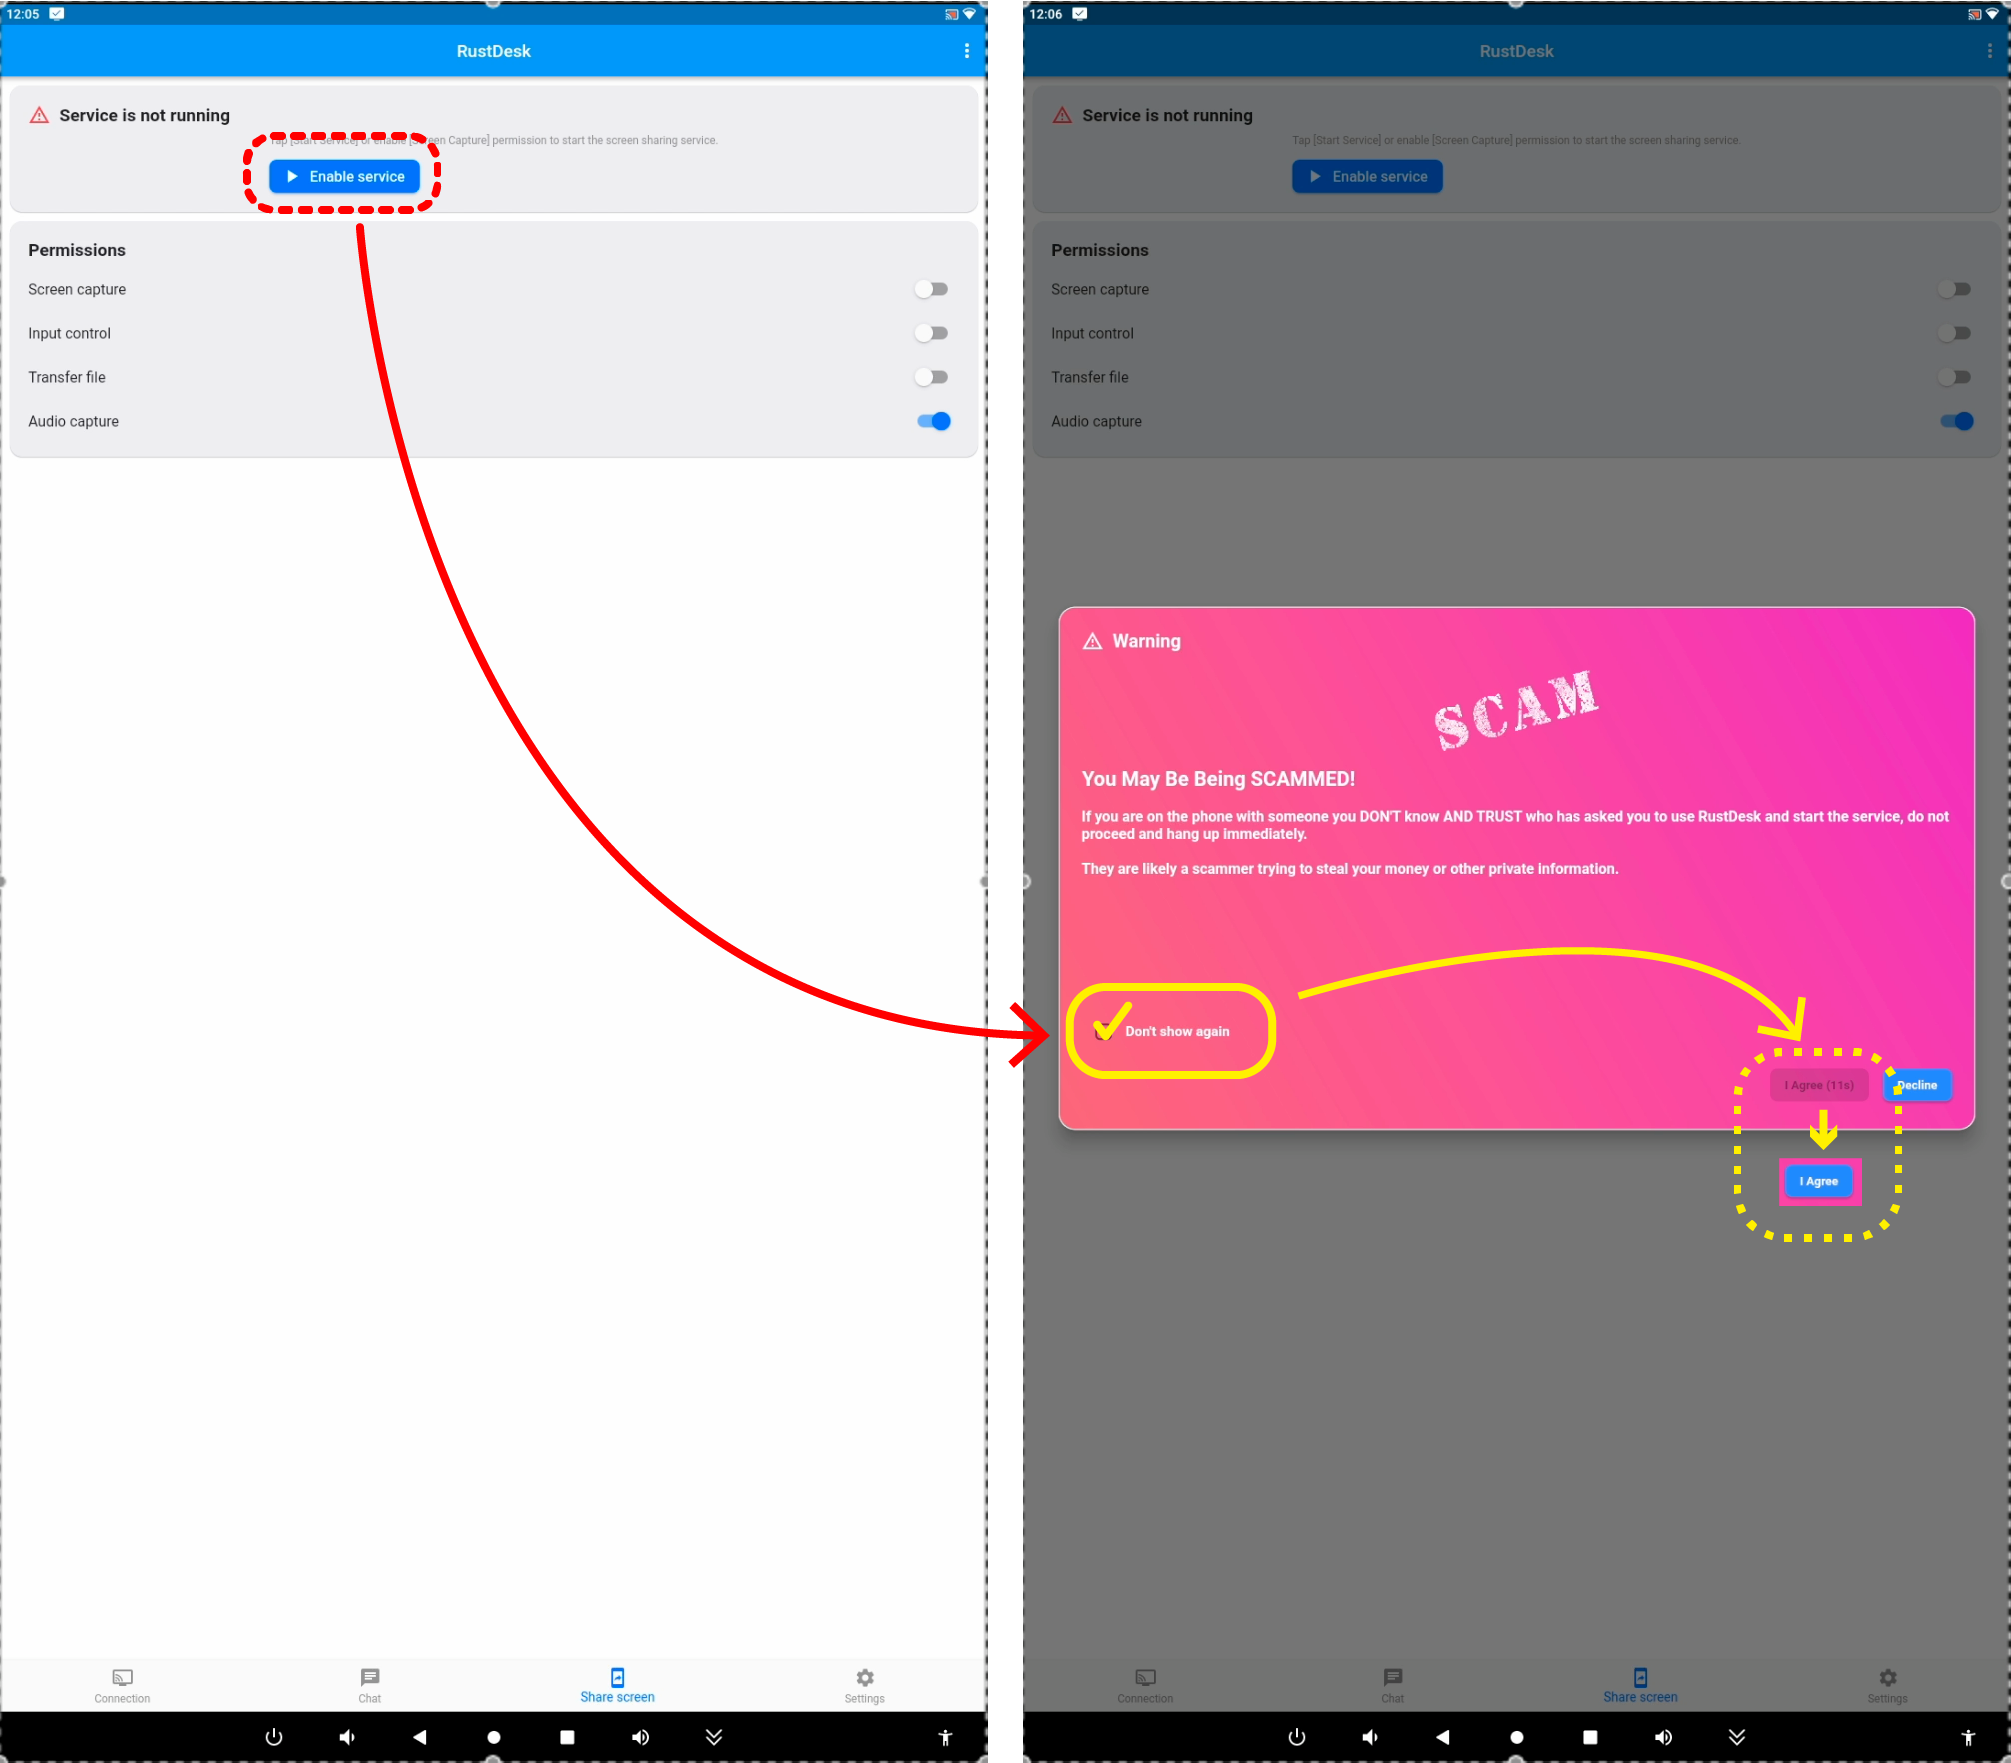
④ Select "Enable Service". A warning message will appear.
- Enable **"Don’t show again."**
- Press **"I Agree"** (the button activates after a short delay
🔒 I.M.LAB does not store customers' personal or financial data. Do not store personal or payment information on the kiosk.
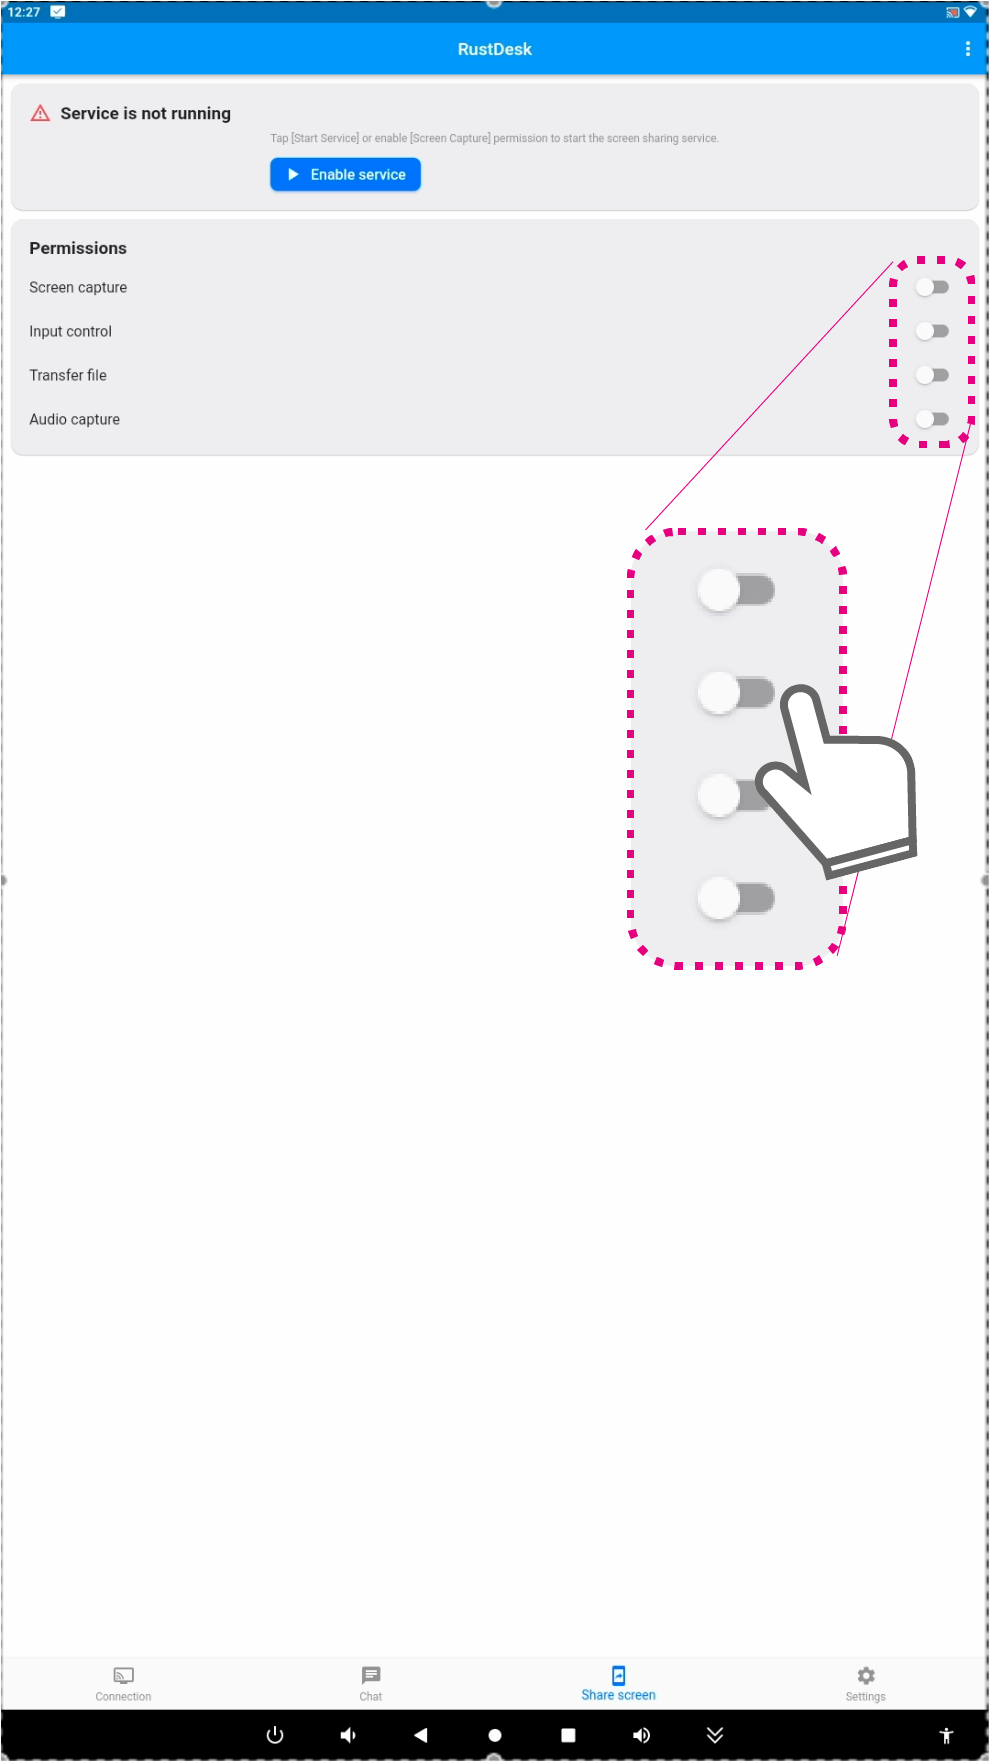
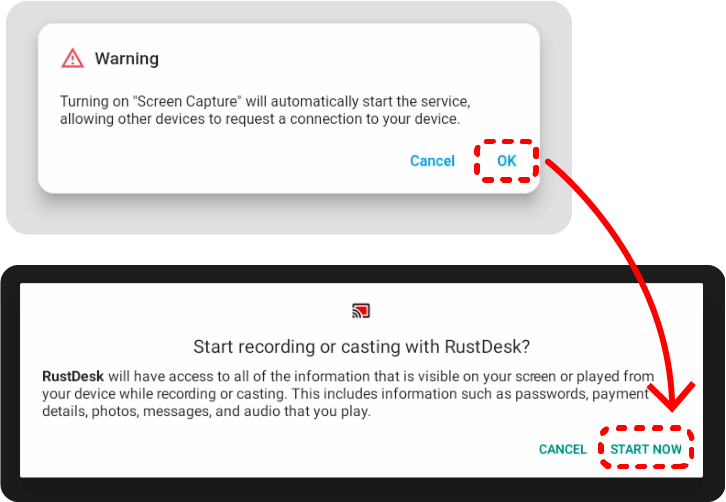
⑤ Activate all four toggle buttons:
-
Screen capture
-
Input control
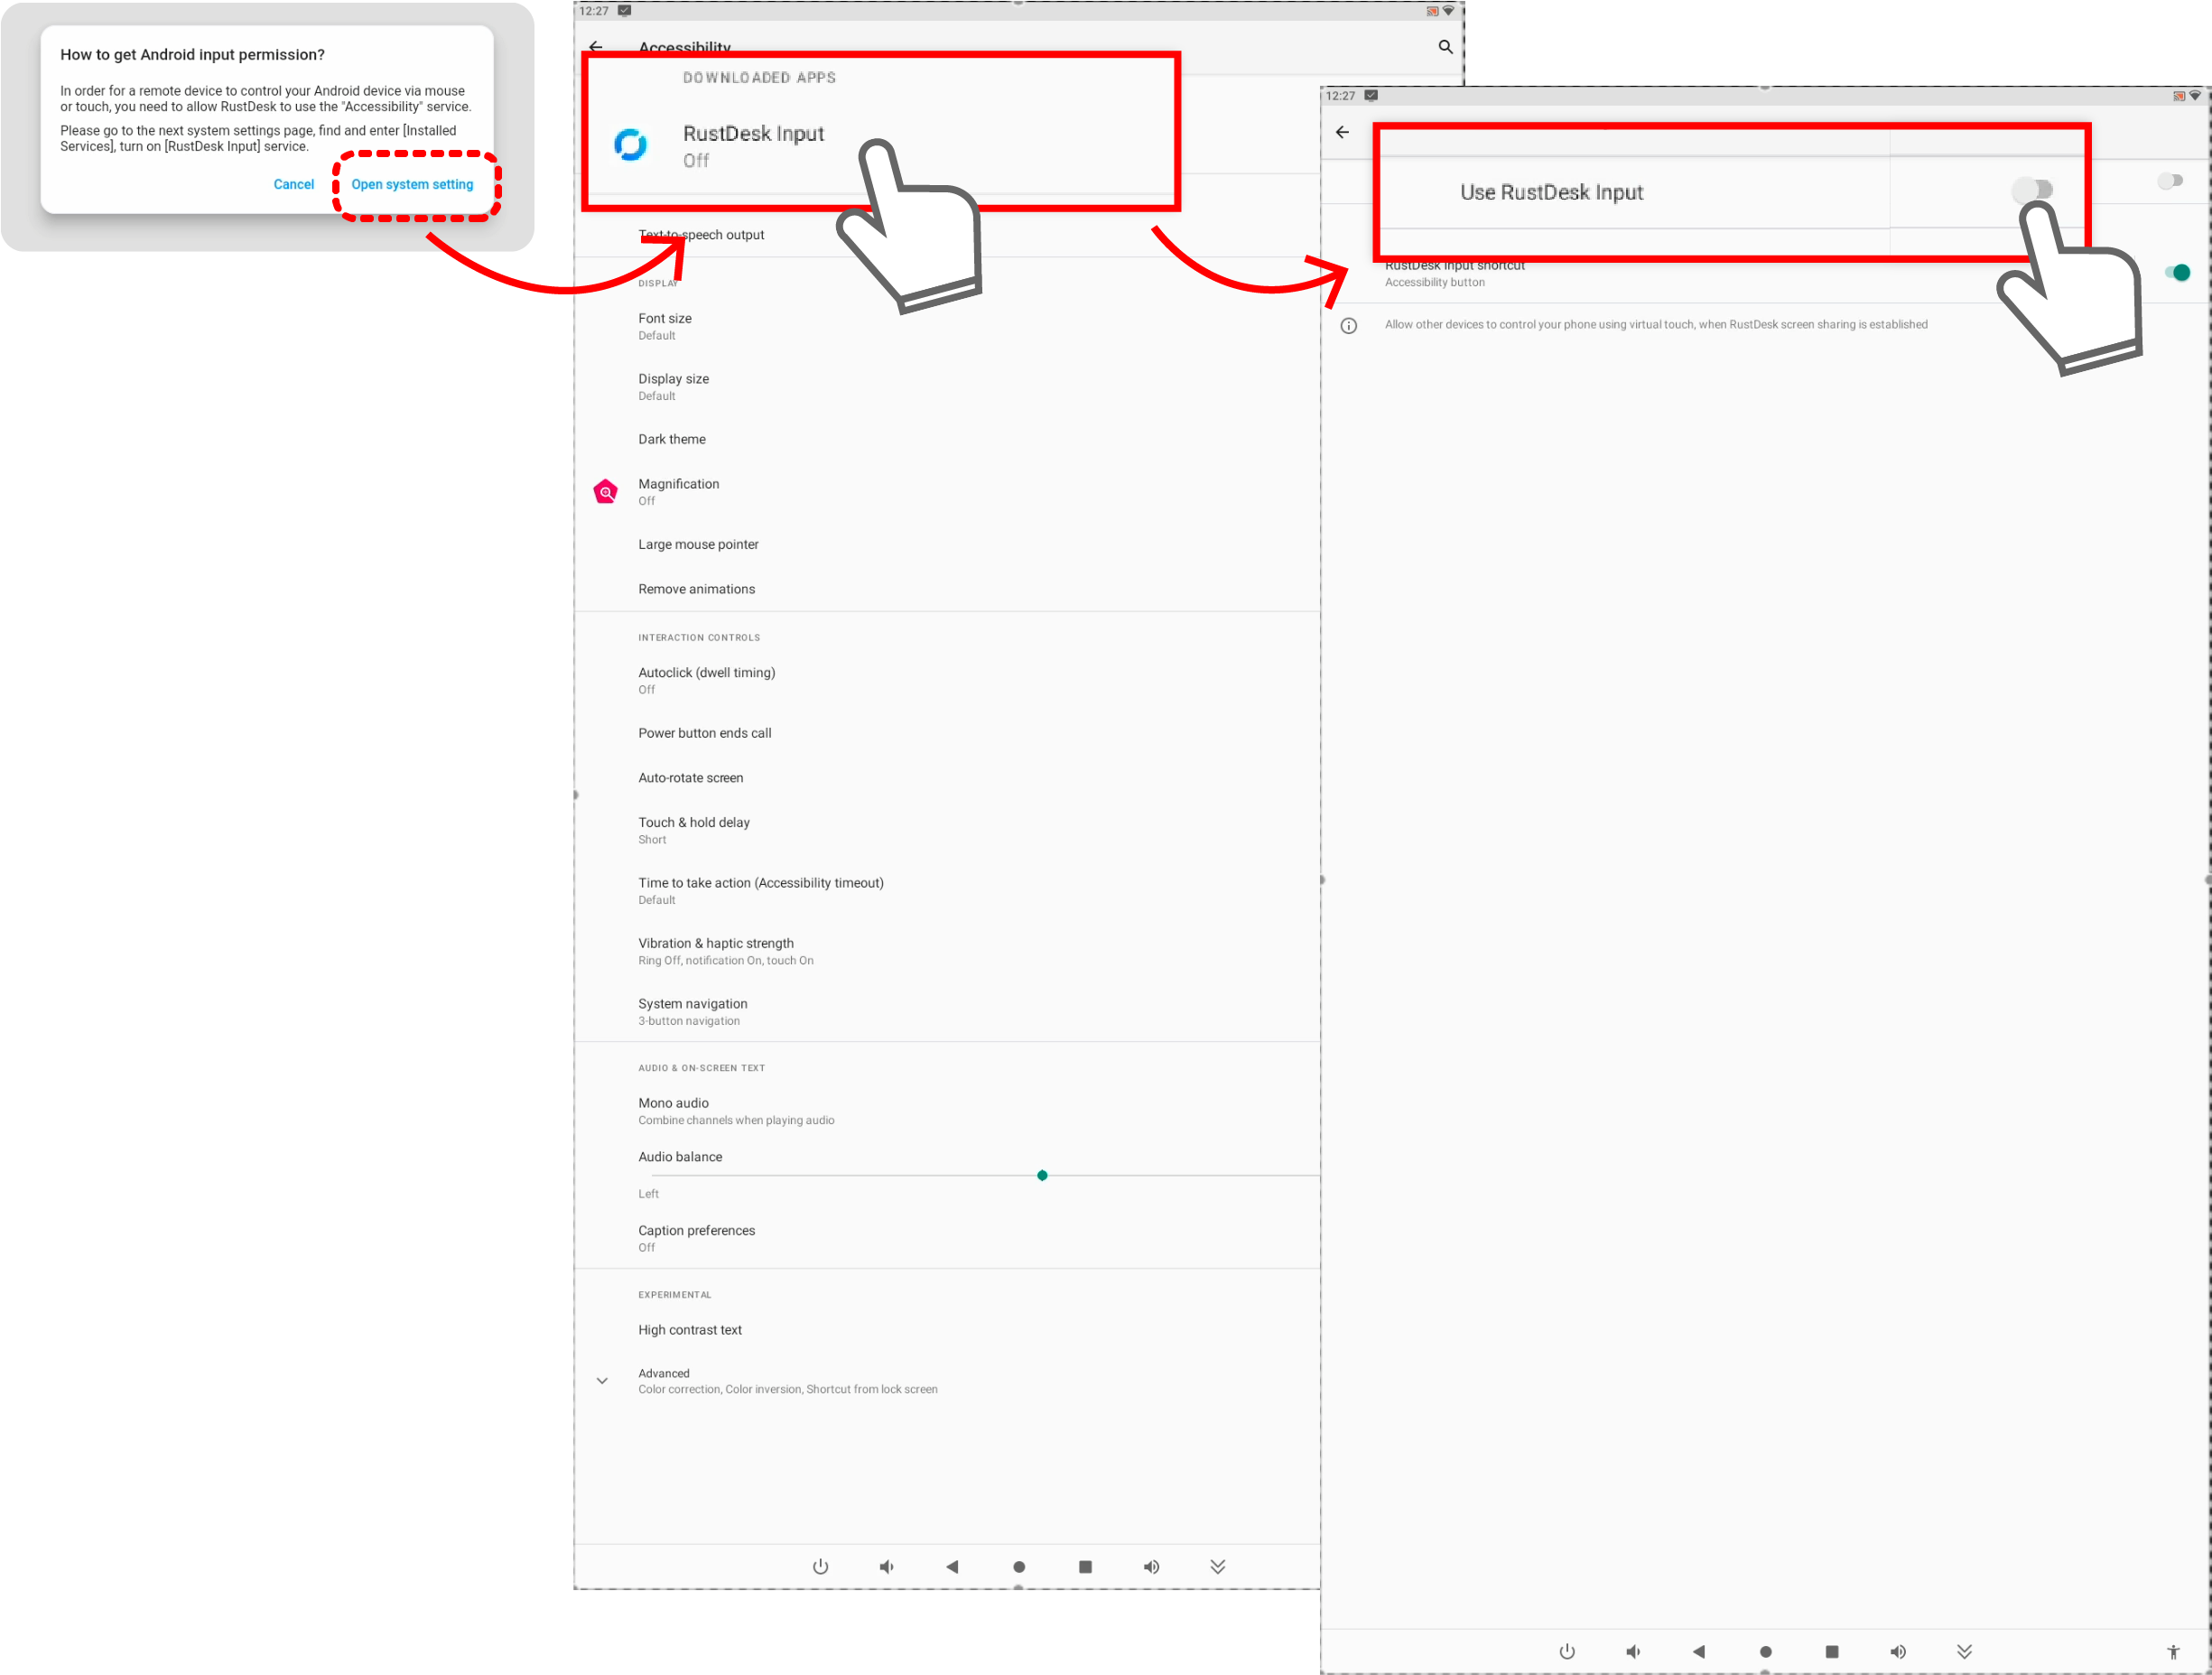
-
Transfer file
-
Audio capture
3. Downloading and Installing CPR Station
CPR station PRO Setup 0.0.4.apk.zip
Unzip the file before transferring it to a kiosk or tablet.
3-1. Installation Process

① Open the File Explorer on the device.
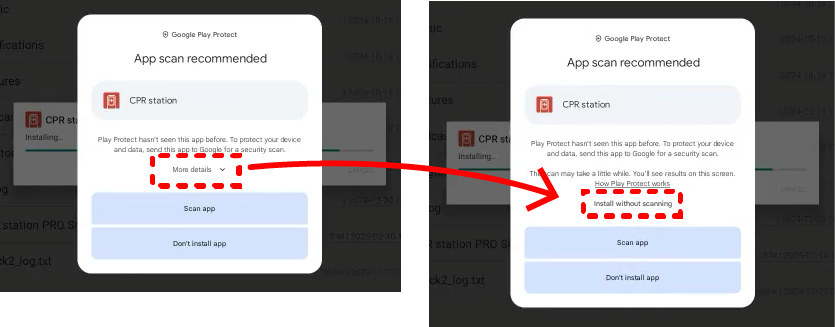
② Locate and run the CPR Station PRO Setup 0.0.4.apk file.
③ If an Android security scan message appears, tap More Details → Install without scanning.
3-2. License Authentication & File Download
⚠️ The device must be online.
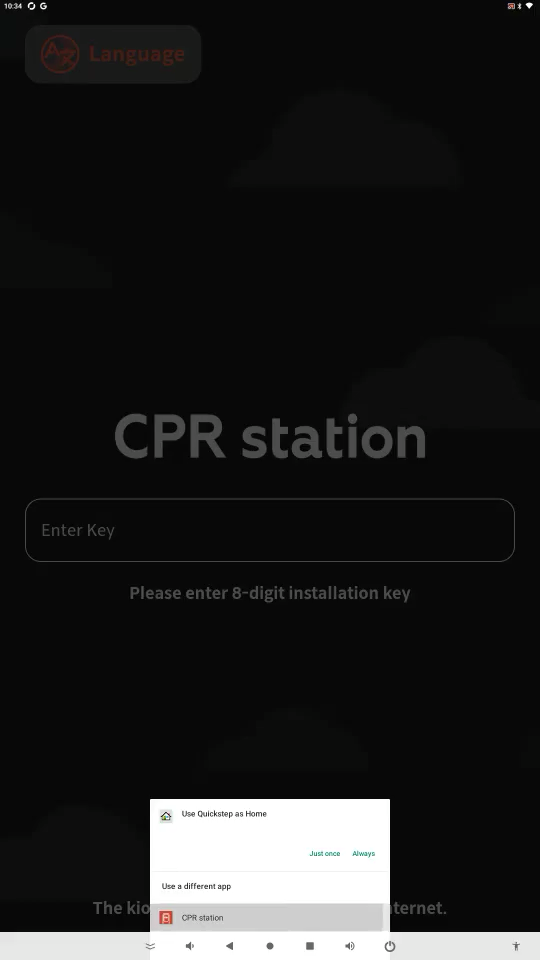
① Set CPR Station as the default home application.
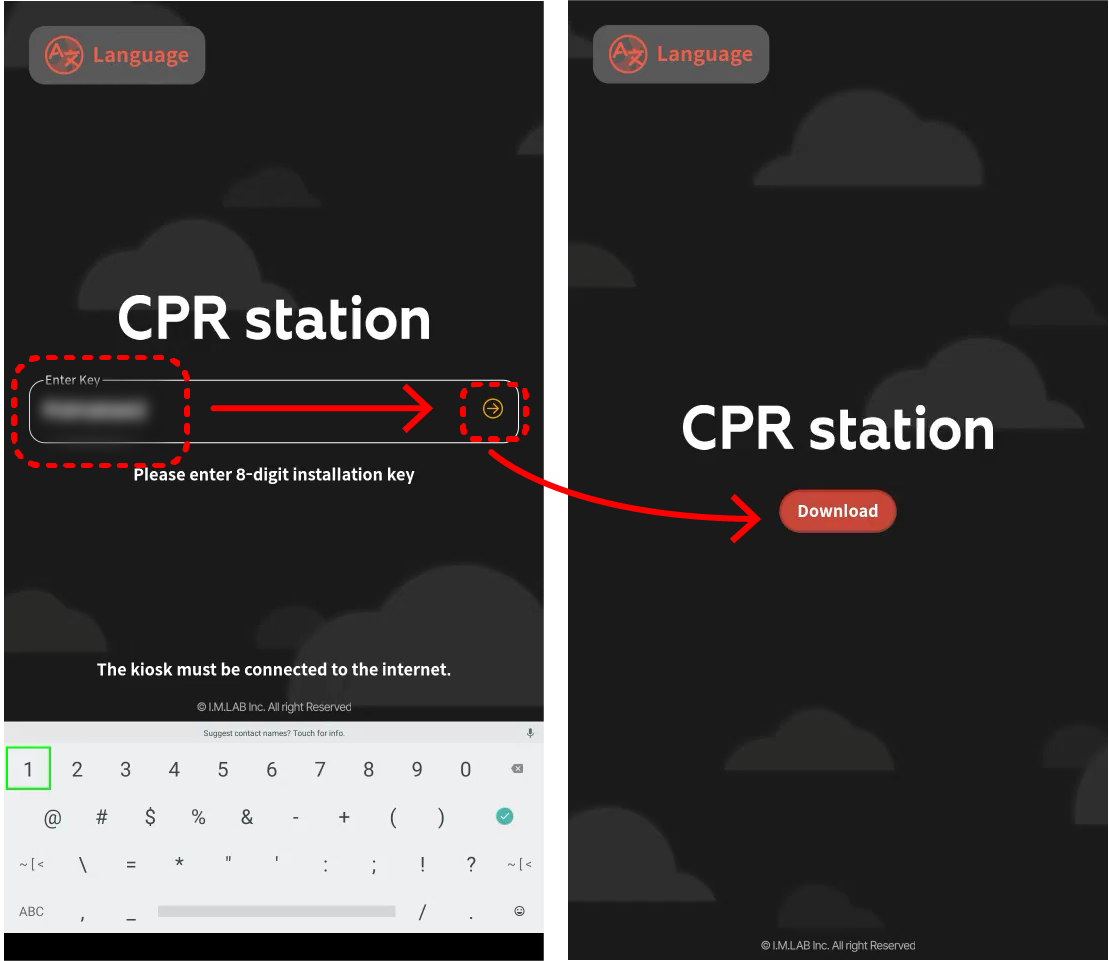
② Enter the provided 8-digit license key. The Download button will appear.
③ Once the download is complete, the app will reinstall and restart.
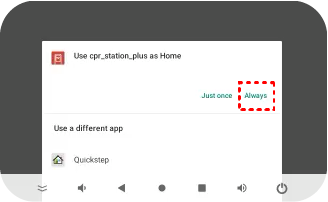
④ When prompted, set CPR Station as the default home application permanently by selecting "Always."
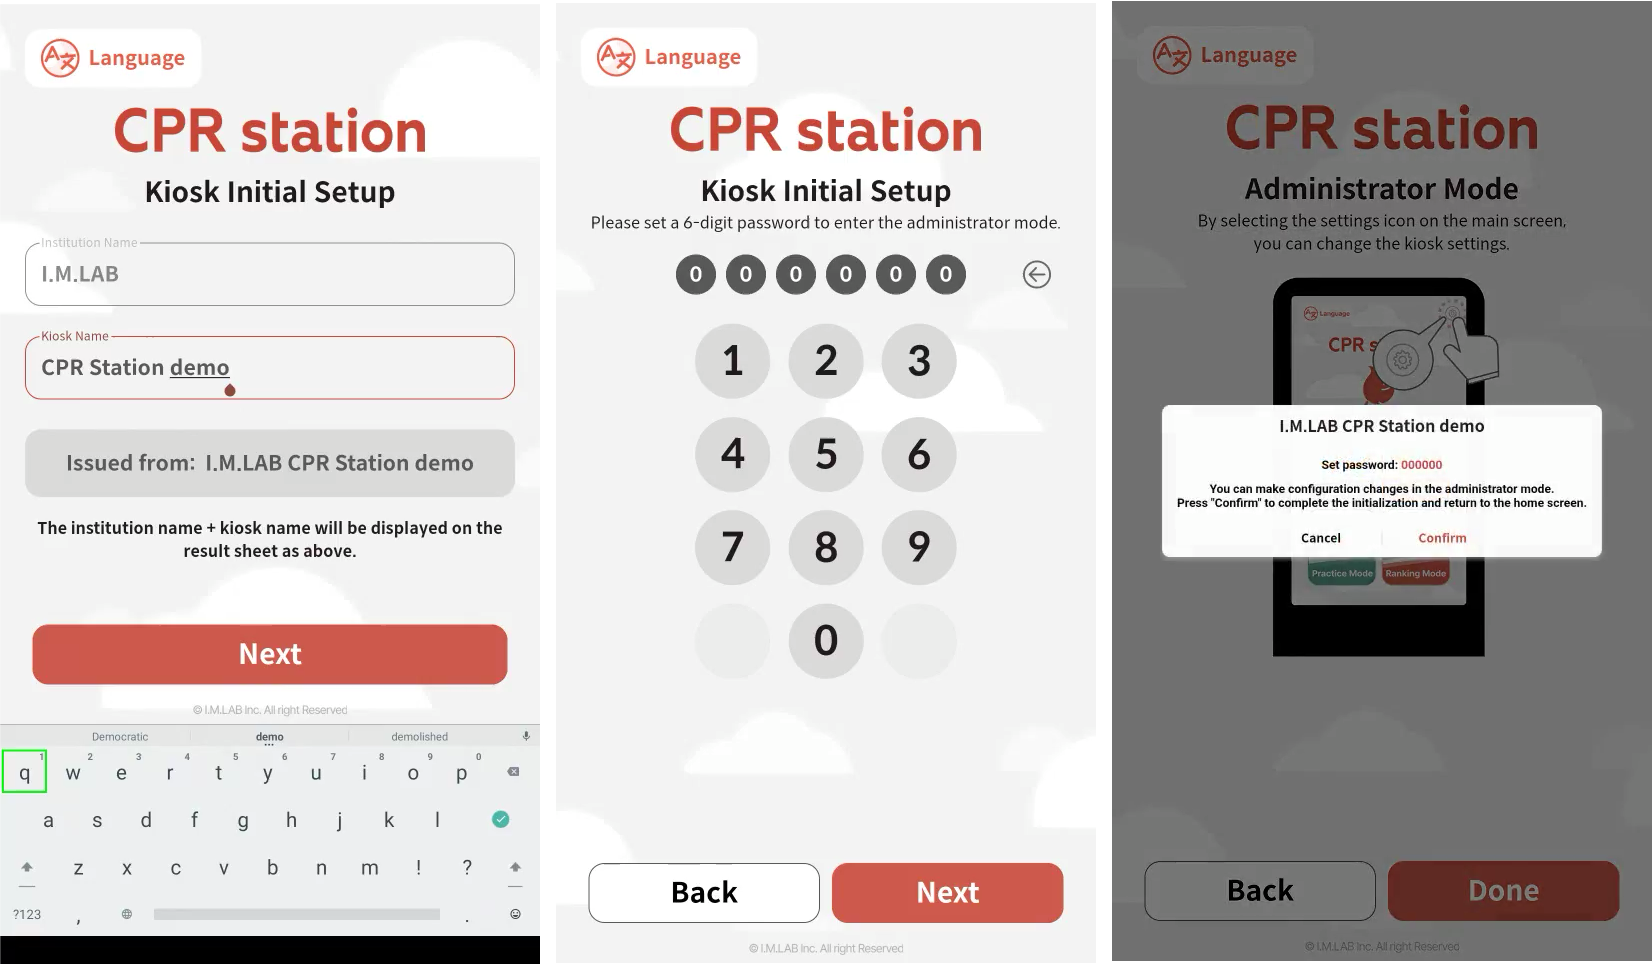
3-3. Initial Settings
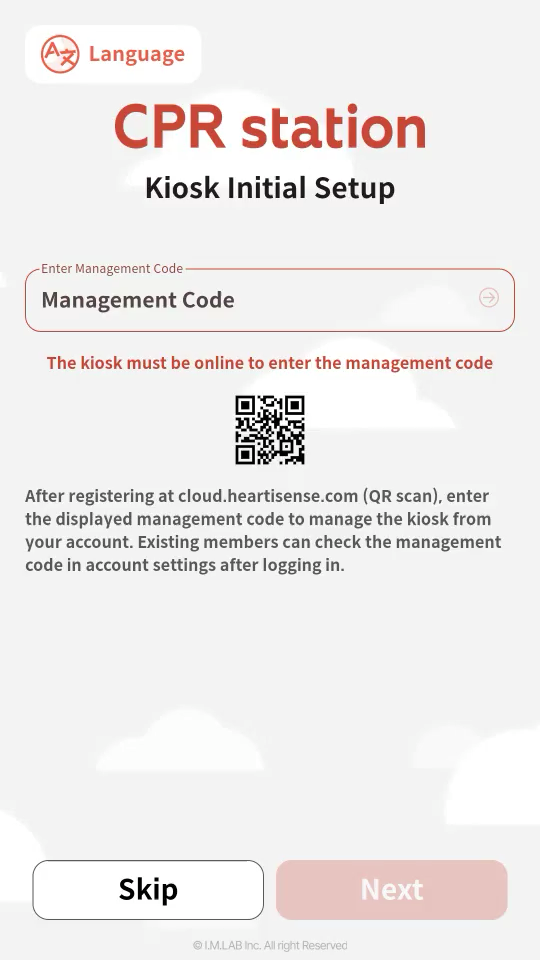
① The station’s initial configuration screen will now appear. If you are not using the cloud, tap Skip.
⚠️ For online cloud and remote management services, contact contact@imlabworld.com.
(This is separate from the activation code.)
② Follow the on-screen guidance to complete the setup.
3-4. Connecting the Manikin
⚠️ Ensure that AoK installation and manikin setup are complete before proceeding.
2.1.1. Initial Manikin Setup
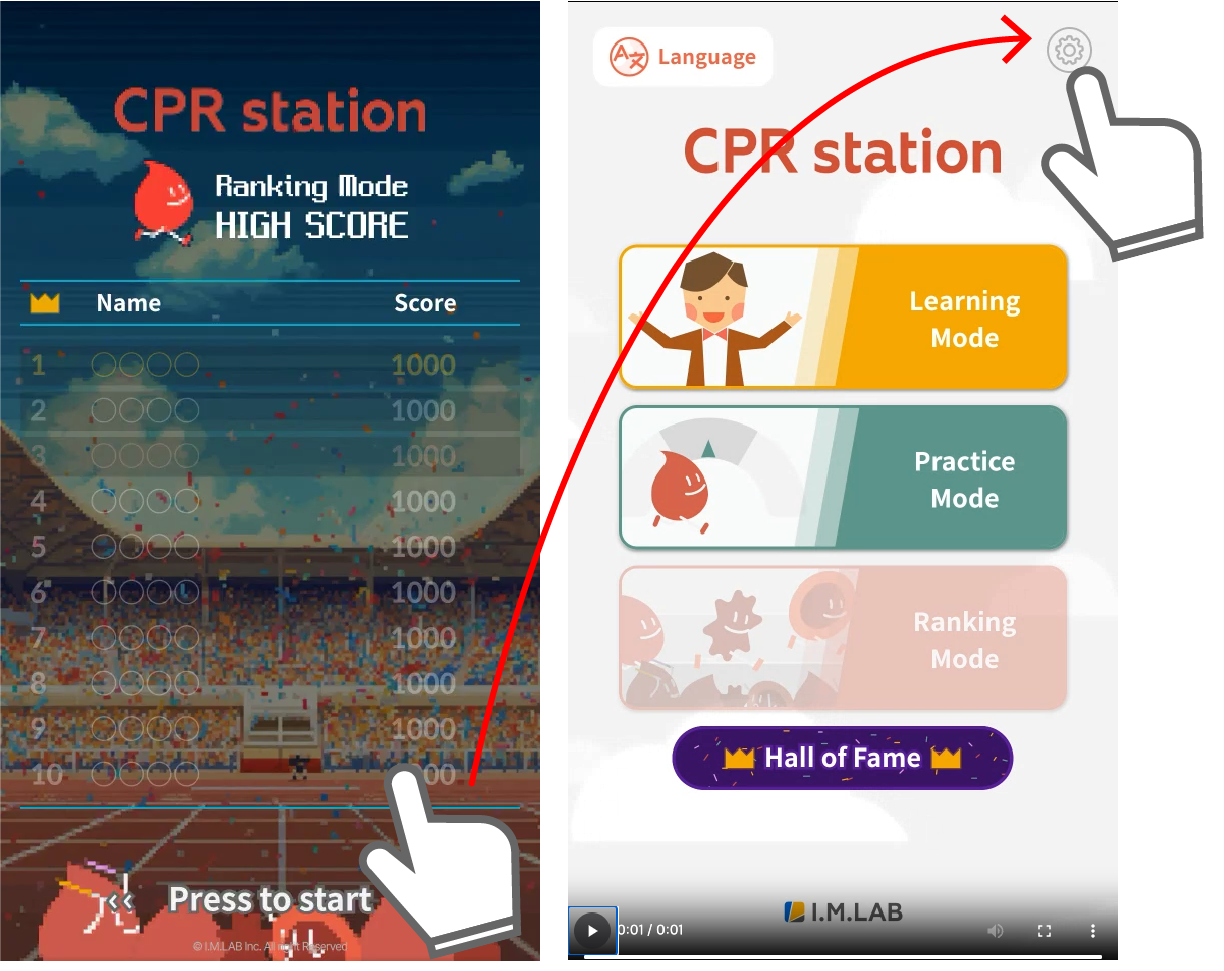
① On the standby screen (Hall of Fame), tap anywhere.
☝ Theory-based educational content can be used without a manikin.
② Tap the gear icon in the top-right corner.
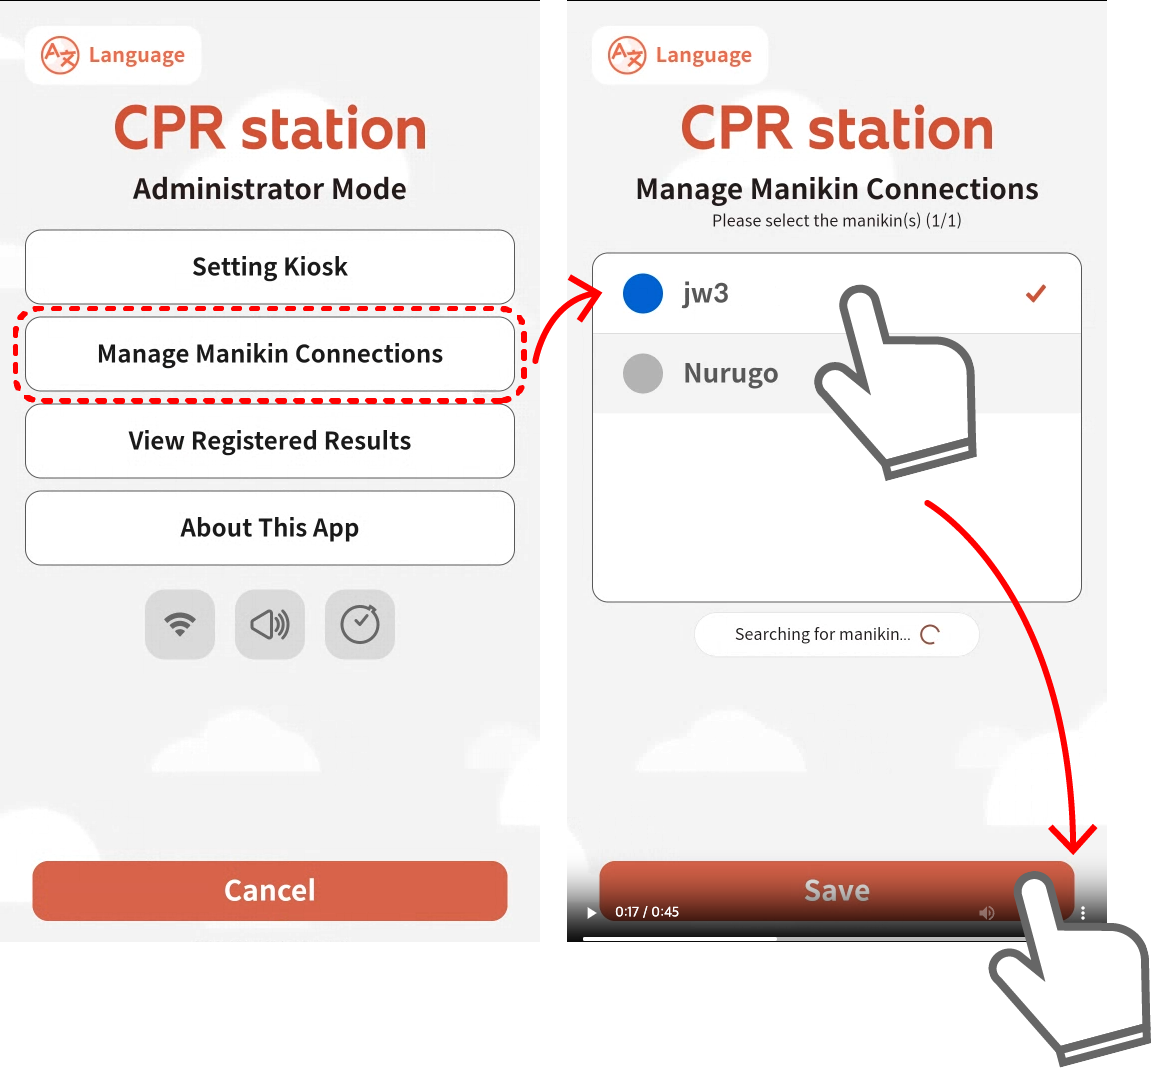
③ In Administrator Mode, select "Manikin Connection Settings."
④ Choose the manikin to connect, then tap "Save."(The kiosk will automatically connect to this manikin in the future.)